WORKOUTS

Pro Pointers on Proper Positioning for Prone Iso Plank (How to Hold a Longer Plank)

Welcome to another edition of Workout Wednesday. I think my finger got stuck on the P key when I came up with this blog post title. Say that five times fast.

PRO POINTERS ON PROPER POSITIONING FOR PRONE ISO PLANK

In other words, tips from yours truly on proper form for planks, what not to do, and how to hold a plank longer. 'Prone Iso' means to face down with your stomach towards the ground. Iso is short for isometric which means to hold the muscles under tension instead of doing repetitions. 

The plank is a fantastic exercise for core strength and muscle endurance which is essential for runners, but it is important that you perform the exercise correctly in order to get maximum benefit from your hard work. 

my favorite skull leggings and pizza Yoga mat. 

my favorite skull leggings and pizza Yoga mat. 

PROPER PLANK POSITIONING

Position your elbows on the floor with your shoulders directly over your elbows. Your body should be in a straight line parallel to the floor. Engage your core (this means brace your stomach like someone is about to punch you). Hold it tight. Squeeze your glutes (butt muscles) and hold. Be careful not to sink your hips or raise your butt in the air. Do not clasp your hands in front of you. Keep your neck neutral. Now set a timer and see how long you can hold it. 

I can tell you what to do, but sometimes it is more effective to tell you what NOT to do. 

Tips on proper plank form (what NOT to do)

Tips on proper plank form (what NOT to do)

TIPS TO HOLD A LONGER PLANK

Planks are hard. If you've never done them before or have taken considerable time away from planks, it is can take some time to build up your core strength and endurance. Be patient and consistent

1. Get in a plank position and do a quick check to make sure you are not making any form mistakes.
2. Brace your abs like someone is going to punch you in the tummy. Hold it tight.
3. Squeeze and hold your butt muscles while in plank position. This helps release tight hip flexors also.
4. Set the timer on your phone but immediately turn your phone over so you can't see the screen and how much time has passed. So much of this is mental. Staring at the timer can make 10 seconds feel like 10 minutes! 
5. While bracing and holding, take a deep belly breath in through your nose and mouth and breath out. Count breaths in and out. See how many breaths in/out you can do while staying in plank position. Counting breaths instead of seconds also helps distract your brain.
6. Keep track of your time, but each time you plank try to meet or beat the number of breaths in/out that you can do while maintaining the plank position. 
7. If your lower back starts to hurt then stop for the day and try again tomorrow or the next day.

Good luck! Give it a try and let me know how long you can hold it! Keep working at planks until you can hold for one or two minutes max. There is little benefit to holding longer than two minutes. It's ok to start slow and build up over time. If you work at it consistently you may surprise yourself at how fast you progress.

Like this post? It helps me when you share!
 

Lea signature.jpg

THE STOPLIGHT RUNNING WORKOUT

Welcome to the latest edition of Workout Wednesday when each week I share a new running or strength for runners workout! Want to receive workouts like these right in your email every week?  

This week I want to remind you that running is supposed to be fun. Yes, fun! Most of us aren't elite athletes that run for the prize money when we win marathons. We run because either on the surface or somewhere deep down inside we really enjoy it.

Remember when we were kids and we would race our friends to the end of the street or chase our screaming little brothers around the block? (My brother could bench press me these days.) Somehow in our adulthood, we forgot how to have fun. Sometimes we even try to make the fun activities too serious. We can't take a walk in nature without tracking our steps on Fitbit, go for a run without analyzing our paces and heart rate or even run a race without putting crazy pressure on ourselves to perform well. I am as guilty as any. 

Sometimes running is just supposed to be fun. That's why I love this stoplight workout. We can mix up the paces and have fun with it without putting too much pressure on ourselves. It reminds me of those childhood games we used to play in the old neighborhood under the street lights, when our parents had to yell for us to come home in the days long before cell phones.

Now, I wish I could be there with you while you do this workout so I could yell out "GREEN LIGHT!", "YELLOW LIGHT!", "RED LIGHT!", "GO!" but you'll just have to use a trusty timer and your imagination, like back in the old days. (I just had a birthday and I am really starting to sound like an old lady with all this good 'ol days talk.)

This post contains affiliate links, which means if you click on a link in this post and make a purchase, I make a small percentage of the sale with no additional cost to you. No one is getting rich here, it just helps with the running (pun intended) of this blog. Thanks, as always, for your support.

THE STOPLIGHT RUNNING WORKOUT

This workout can be done on a treadmill or on the street or track with an interval timer or simple stop watch. I use this interval timer from Gymboss with my runners and at my bootcamps.

Download a printable PDF of the Stop Light Running Workout

Download a printable PDF of the Stop Light Running Workout

RUN BY EFFORT: THE RPE CHART

This workout is based on the RPE chart, which is ideal for a workout you find on the internet. RPE stands for Rate of Perceived Exertion and is based on your own effort, not assigned paces. Why? Because it can be dangerous and irresponsible to follow arbitrary paces on the internet. If you try to follow a pace that is beyond your fitness level you could injure yourself. If you follow a pace that is too easy, you won't get the maximum benefit of the workout. If you work according to your own fitness levels and progress only when you're ready, you will improve your running skills while reducing chance of injury. (Coach rant over.)

You can learn more about the RPE chart here

Your RPE can be determined by the talk test.

RPE:1 No effort. You are probably sitting.
RPE:2-3 Light effort. Breathing is extremely easy. You may be walking at this effort.
RPE: 4-6 Moderate effort. You are working a little harder, maybe a jog or an easy run, but you can carry on a full conversation at this pace without gasping for air between words or sentences.
RPE: 7-8 Hard effort. You can speak a sentence or two at a time before having to taking a gasp of breath.
RPE: 9 Extremely hard effort. You can get out a word or two but breathing is labored and talking is challenging.
RPE: 10 Maximum effort. You are completely out of breath and unable to talk. You would only be able to hold this pace for a very short time.

RED LIGHT | YELLOW LIGHT | GREEN LIGHT EFFORT

RED LIGHT | HARD EFFORT | RPE 7-9
YELLOW LIGHT | MODERATE EFFORT | RPE 4-6
GREEN LIGHT | EASY EFFORT | RPE 3

THE SUNDAY DRIVER

After a proper running warm up, like the one shown in this blog post, get ready for your workout with four minutes of a brisk walk or light jog. This should be an extremely easy effort. 

REV UP YOUR ENGINE

Let's start getting our body ready for faster paces. Run for 30 seconds at a hard effort and then recover for 90 seconds at a moderate or easy effort until your breath is recovered. Repeat a total of four times

THE SPEED DEMON

Now we are getting into the fun. Start off with one minute of easy effort, followed by three minutes at a moderate steady pace. You should be working but not so hard that you can't maintain it for three minutes. Recover for two minutes at an easy pace before picking it back up at a hard pace for two minutes. The most important point here is that you find a pace that you can maintain for two minutes. If you go out too hard, you'll never make it two minutes. Your pace should be steady, yet hard for the two minute interval. You have one minute to recover before one last hard interval of one minute. This is your last one, give it all you got for the last minute. 

COOL OFF

Walk or jog for three minutes to bring your heart rate down to normal before finishing up workout. It is generally a good idea for most runners to finish up with some stretching.


Like this post? It makes me happy when you share.

Lea signature.jpg

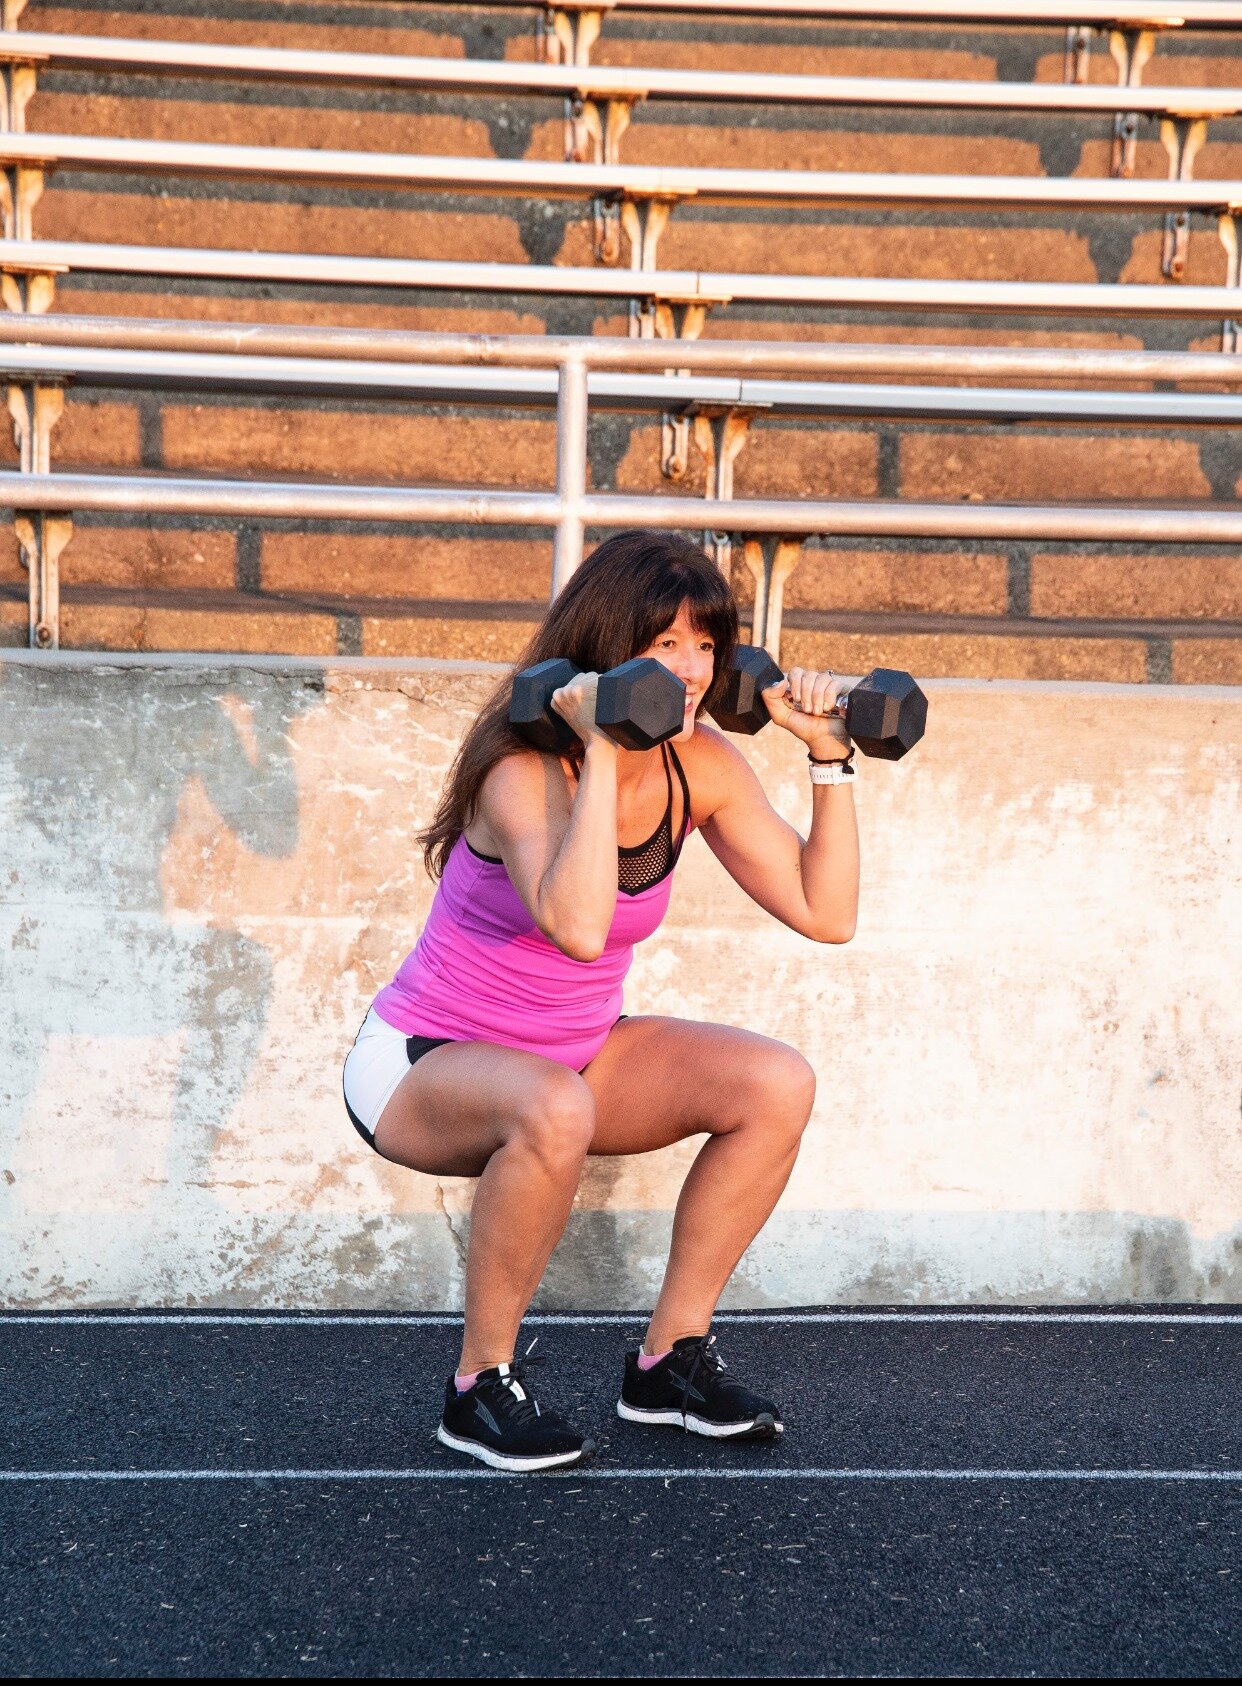
Dumbbell Compound Exercises for When You Don't Have Time to Work Out

Welcome to the latest edition of Workout Wednesday when each week I share a new strength training or running workout. These dumbbell compound exercises are great for those busy days when you don't have time to work out. 

I've been writing this blog for over two years now (time flies when you're having fun) and I realized that I have not yet shared a workout using dumbbells. Since I use dumbells in my own workouts, I thought it was about time I put together a quick and effective dumbbell workout you can do at home or in the gym.

This is the perfect workout for when you don't have time to workout because it incorporates compound exercises, working multiple muscles in each move. It is faster, more efficient and burns more energy (calories) than isolation movements. When you combine movements you can quickly move through your workout and get on with your day.

Working out with weights helps us build and maintain lean muscle. This is a good thing, especially if you are trying to lose weight. You want to make sure you are losing fat and preserving your muscle mass so that when you lose weight, you don't also lose muscle.

You don't have to spend all day at the gym. Incorporate strength training workouts two to three times a week to maintain and build muscle. Runners who strength train are stronger, faster and less prone to injury. Strength training is time well-invested for runners.

DUMBBELL COMPOUND EXERCISES FOR WHEN YOU DON'T HAVE TIME TO WORKOUT

I recommend moving through each exercise for the number of reps assigned, then moving to the next exercise without rest in a circuit fashion. One you complete all four moves, rest for about a minute and repeat the whole circuit one or two more times. 

dumbbell compound exercises for when you don't have time to work out. 

dumbbell compound exercises for when you don't have time to work out. 

TRAINER TIPS

Perform each move slowly while paying attention to proper form. This is not a race against the clock. Choose a dumbbell weight that challenges you to complete the assigned number of reps. If it is very easy to complete the reps trying going up in weight. However, the weights should not be so heavy that you can't complete the assigned number of reps. It may take some experimenting to find the right weight for you. 

As you get stronger your body will adapt to the exercises which will make them feel easier (YAY) but that also means they won't be as effective (BOO!). You have to constantly challenge your body as you get stronger. After several weeks you can do this by adding additional reps; instead of 8 reps, perform 12. You can also increase the number of sets by running through the circuit four times instead of three. You can increase weights as you get stronger and/or decrease rest times. All of these things will challenge your body in a new ways so it can grow even stronger. 

Give it a try and let me know how it goes. Have any questions? I'd love to help!

Like this post? It helps me when you share with your friends and followers

Lea signature.jpg


4 STRENGTH EXERCISES 4 WORKOUTS FOR RUNNERS

Welcome to the latest edition of workout Wednesday! If you've been hanging around here at the strength and running blog, you know that I am a huge proponent of strength training for runners. As a long-time runner myself I understand that runners sometimes have a bit of resistance (pun-intended) to strength training. It's not that they don't know that it's important or understand that it helps make them faster, stronger and less prone to injury, it's just that they don't enjoy the time in the gym like they do on streets, trails or track. I get it. They don't want to spend a bunch of time in a gym taking away from the their time on the road. After all, there are only so many hours in the day and it's hard enough to find the time to get out and run, how are they supposed to find additional time to strength train? 

I have good news for you. You don't need to spend hours in the gym pumping iron. You can spend 12-25 minutes three to four days a week, either immediately before an easy run, at a different time of the day or on an off day from running. 

The exercises in these circuits are compound exercises which means we are working multiple joints and muscles at once for the most effective and efficient workout. This full body workout can be structured a few different ways using some basic strength exercises that are great for runners. 

This post contains affiliate links which means that if you click on a link in this post and make a purchase I make a small percentage of the sale with no additional cost to you. No one is getting rich here, it just helps with the running (pun-intended) of this blog. Thanks, as always, for your support.

EQUIPMENT USED IN THIS WORKOUT

Medicine ball
Resistance bands
Interval timer

download a free printable PDF of this four exercises for runners workout

download a free printable PDF of this four exercises for runners workout

THE STRENGTH EXERCISES FOR RUNNERS

SINGLE LEG DEADLIFT 

Standing on one leg, keep your knee soft (slightly bent) and perform a deadlift by bending at your hip while keeping your back straight and neck neutral. Extend your free leg behind you in line with your body. Lower until your back is parallel to the floor. With your back straight return to the upright position.

SQUAT WITH SHOULDER PRESS

With your feet hip width apart push your hips back, brace your core and lower until your thighs are parallel to the floor (like you are sitting back in a chair) or as low as your flexibility allows. While holding a medicine ball, touch your elbows to your knees in the low position. Push up to standing while pressing the medicine ball above your head into a shoulder press.

CURTSY SQUAT WITH CHEST PRESS 

Holding a medicine ball or weight to your chest, stand with your feet hip apart. Cross your right leg behind the body and to the left. Bend left knee 90 degrees, or as low your flexibility will allow, toes pointing forward. In the low position straighten your arms to press the ball out from your chest. Bring the weight back to your check and return to starting position. Alternate sides.

BACK LUNGE WITH RESISTANCE BAND ROW 

With your feet hip width apart and your toes pointing straight ahead, take a large step backward with your right leg, so your right knee almost touches the floor and your left leg lunges at a 90 degree angle. While static in the low position, use a resistance band to row your right arm back keeping your shoulders down and elbow close to your side. Push back up to starting position. Always row on the same side as the leg that steps back.

lea genders fitness med ball.JPG

4 WAYS TO STRUCTURE YOUR WORKOUT

13 MINUTES: TABATA-STYLE

Using a Tabata timer app or an interval timer, perform the below exercises as indicated:

TABATA ONE:
SINGLE LEG DEADLIFT RIGHT SIDE- 20 SECONDS
REST 10 SECONDS
SINGLE LEG DEADLIFT LEFT SIDE - 20 SECONDS
REST 10 SECONDS
REPEAT FOR FOUR MINUTES
REST 30 SECONDS BEFORE MOVING ON TO NEXT CIRCUIT

TABATA TWO:
SQUAT WITH SHOULDER PRESS - 20 SECONDS
REST 10 SECONDS
ALTERNATING CURTSY SQUAT WITH CHEST PRESS - 20 SECONDS
REST 10 SECONDS
REPEAT FOR FOUR MINUTES
REST 30 SECONDS BEFORE MOVING ON TO THE NEXT CIRCUIT

TABATA THREE:
BACK LUNGE WITH ROW RIGHT SIDE - 20 SECONDS
REST 10 SECONDS
BACK LUNGE WITH ROW LEFT SIDE - 20 SECONDS
REST 10 SECONDS
REPEAT FOR FOUR MINUTES

12 MINUTES: 30 SECONDS EACH EXERCISE

Set the timer for 30 seconds x 6 and complete the circuit below.

SINGLE LEG DEADLIFT RIGHT SIDE - 30 SECONDS
SINGLE LEG DEADLIFT LEFT SIDE - 30 SECONDS
SQUAT WITH SHOULDER PRESS - 30 SECONDS
ALTERNATING CURTSY SQUAT WITH CHEST PRESS - 30 SECONDS
BACK LUNGE WITH ROW RIGHT SIDE - 30 SECONDS
BACK LUNGE WITH ROW LEFT SIDE - 30 SECONDS
REST ONE MINUTE
PERFORM THREE TIMES

20 MINUTES: AS MANY ROUNDS AS POSSIBLE

Set the timer for 20 minutes and perform the below circuit as many times as you can in the time frame. Move through the exercises quickly but with controlled movement. No sloppy reps!

SINGLE LEG DEADLIFT RIGHT SIDE - 8 REPS
SINGLE LEG DEADLIFT LEFT SIDE - 8 REPS
SQUAT WITH SHOULDER PRESS - 12 REPS
CURTSY SQUAT RIGHT SIDE WITH CHEST PRESS - 8 REPS
CURTSY SQUAT LEFT SIDE WITH CHEST PRESS - 8 REPS
BACK LUNGE WITH ROW RIGHT SIDE - 8 REPS
BACK LUNGE WITH ROW LEFT SIDE - 8 REPS
 

THE REP PYRAMID

The first time through the circuit perform each exercise for 6 reps.
Rest for one minute
Repeat the circuit but this time perform 8 reps for each exercise
Rest for one minute
The third time through perform 12 reps for each exercise
Rest for one minute
8 reps for each exercise
Rest for one minute
6 reps for each exercise
 

SINGLE LEG DEADLIFT RIGHT SIDE
SINGLE LEG DEADLIFT LEFT SIDE
SQUAT WITH SHOULDER PRESS
CURTSY SQUAT RIGHT SIDE WITH CHEST PRESS
CURTSY SQUAT LEFT SIDE WITH CHEST PRESS
BACK LUNGE WITH ROW RIGHT SIDE
BACK LUNGE WITH ROW LEFT SIDE

Do you find the time for strength training? 

Like this post? It helps me when you share with your friends and followers.

Lea signature.jpg