WORKOUTS

Unilateral Leg Training for Runners

Welcome to another edition of workout Wednesday! Today we are talking about unilateral leg training for runners. What is unilateral training? It is training one side of the body independently from the other. Think about it for a moment. When you run you repeatedly transfer your body weight from one leg to the other for the duration of the run. Since you run on one leg at a time, it only makes sense to strength train one leg at a time. 

While traditional bilateral (two leg) exercises like the squat are great for runners, you can take it to the next step in strength and balance by training each leg independently to increase runner-specific strength and help ward off injuries. I recommend incorporating both bilateral and unilateral training into your program.

WHY UNILATERAL TRAINING?

When you train both legs at the same time you may be reinforcing strength imbalances. If one side of your body is stronger than the other, that side is going to compensate for the weaker side. Training each limb independently will build up the strength on your weaker side and eventually even out the strength of both sides. If you don't train unilaterally, the dominant side of your body will stay strong, while the weaker side will stay weak. These imbalances can lead to injuries. 

I also love unilateral training because it requires more stability and forces you to balance and build core strength. Balance and core strength are essential for runners. 

Try these unilateral exercises in your next leg workout. Perform these moves without weights at first until you master technique and form. As your balance and stability improves, add weight to the exercises for an additional challenge.
 

Lunge 
Lunge

Lunge

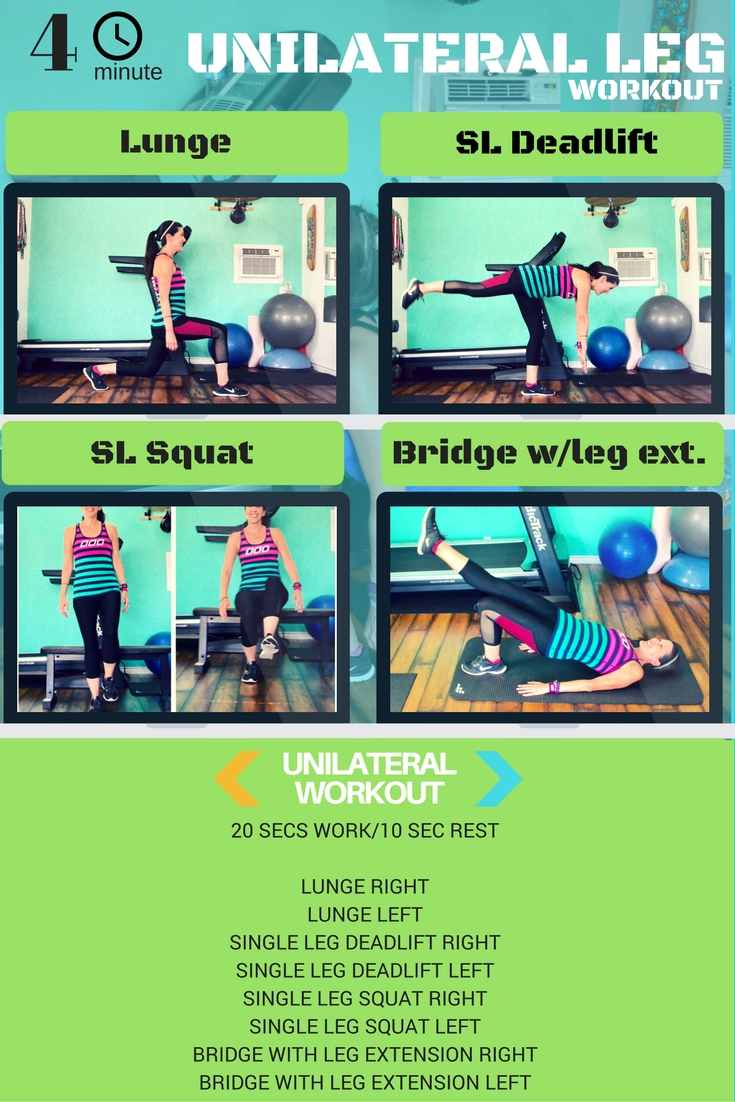
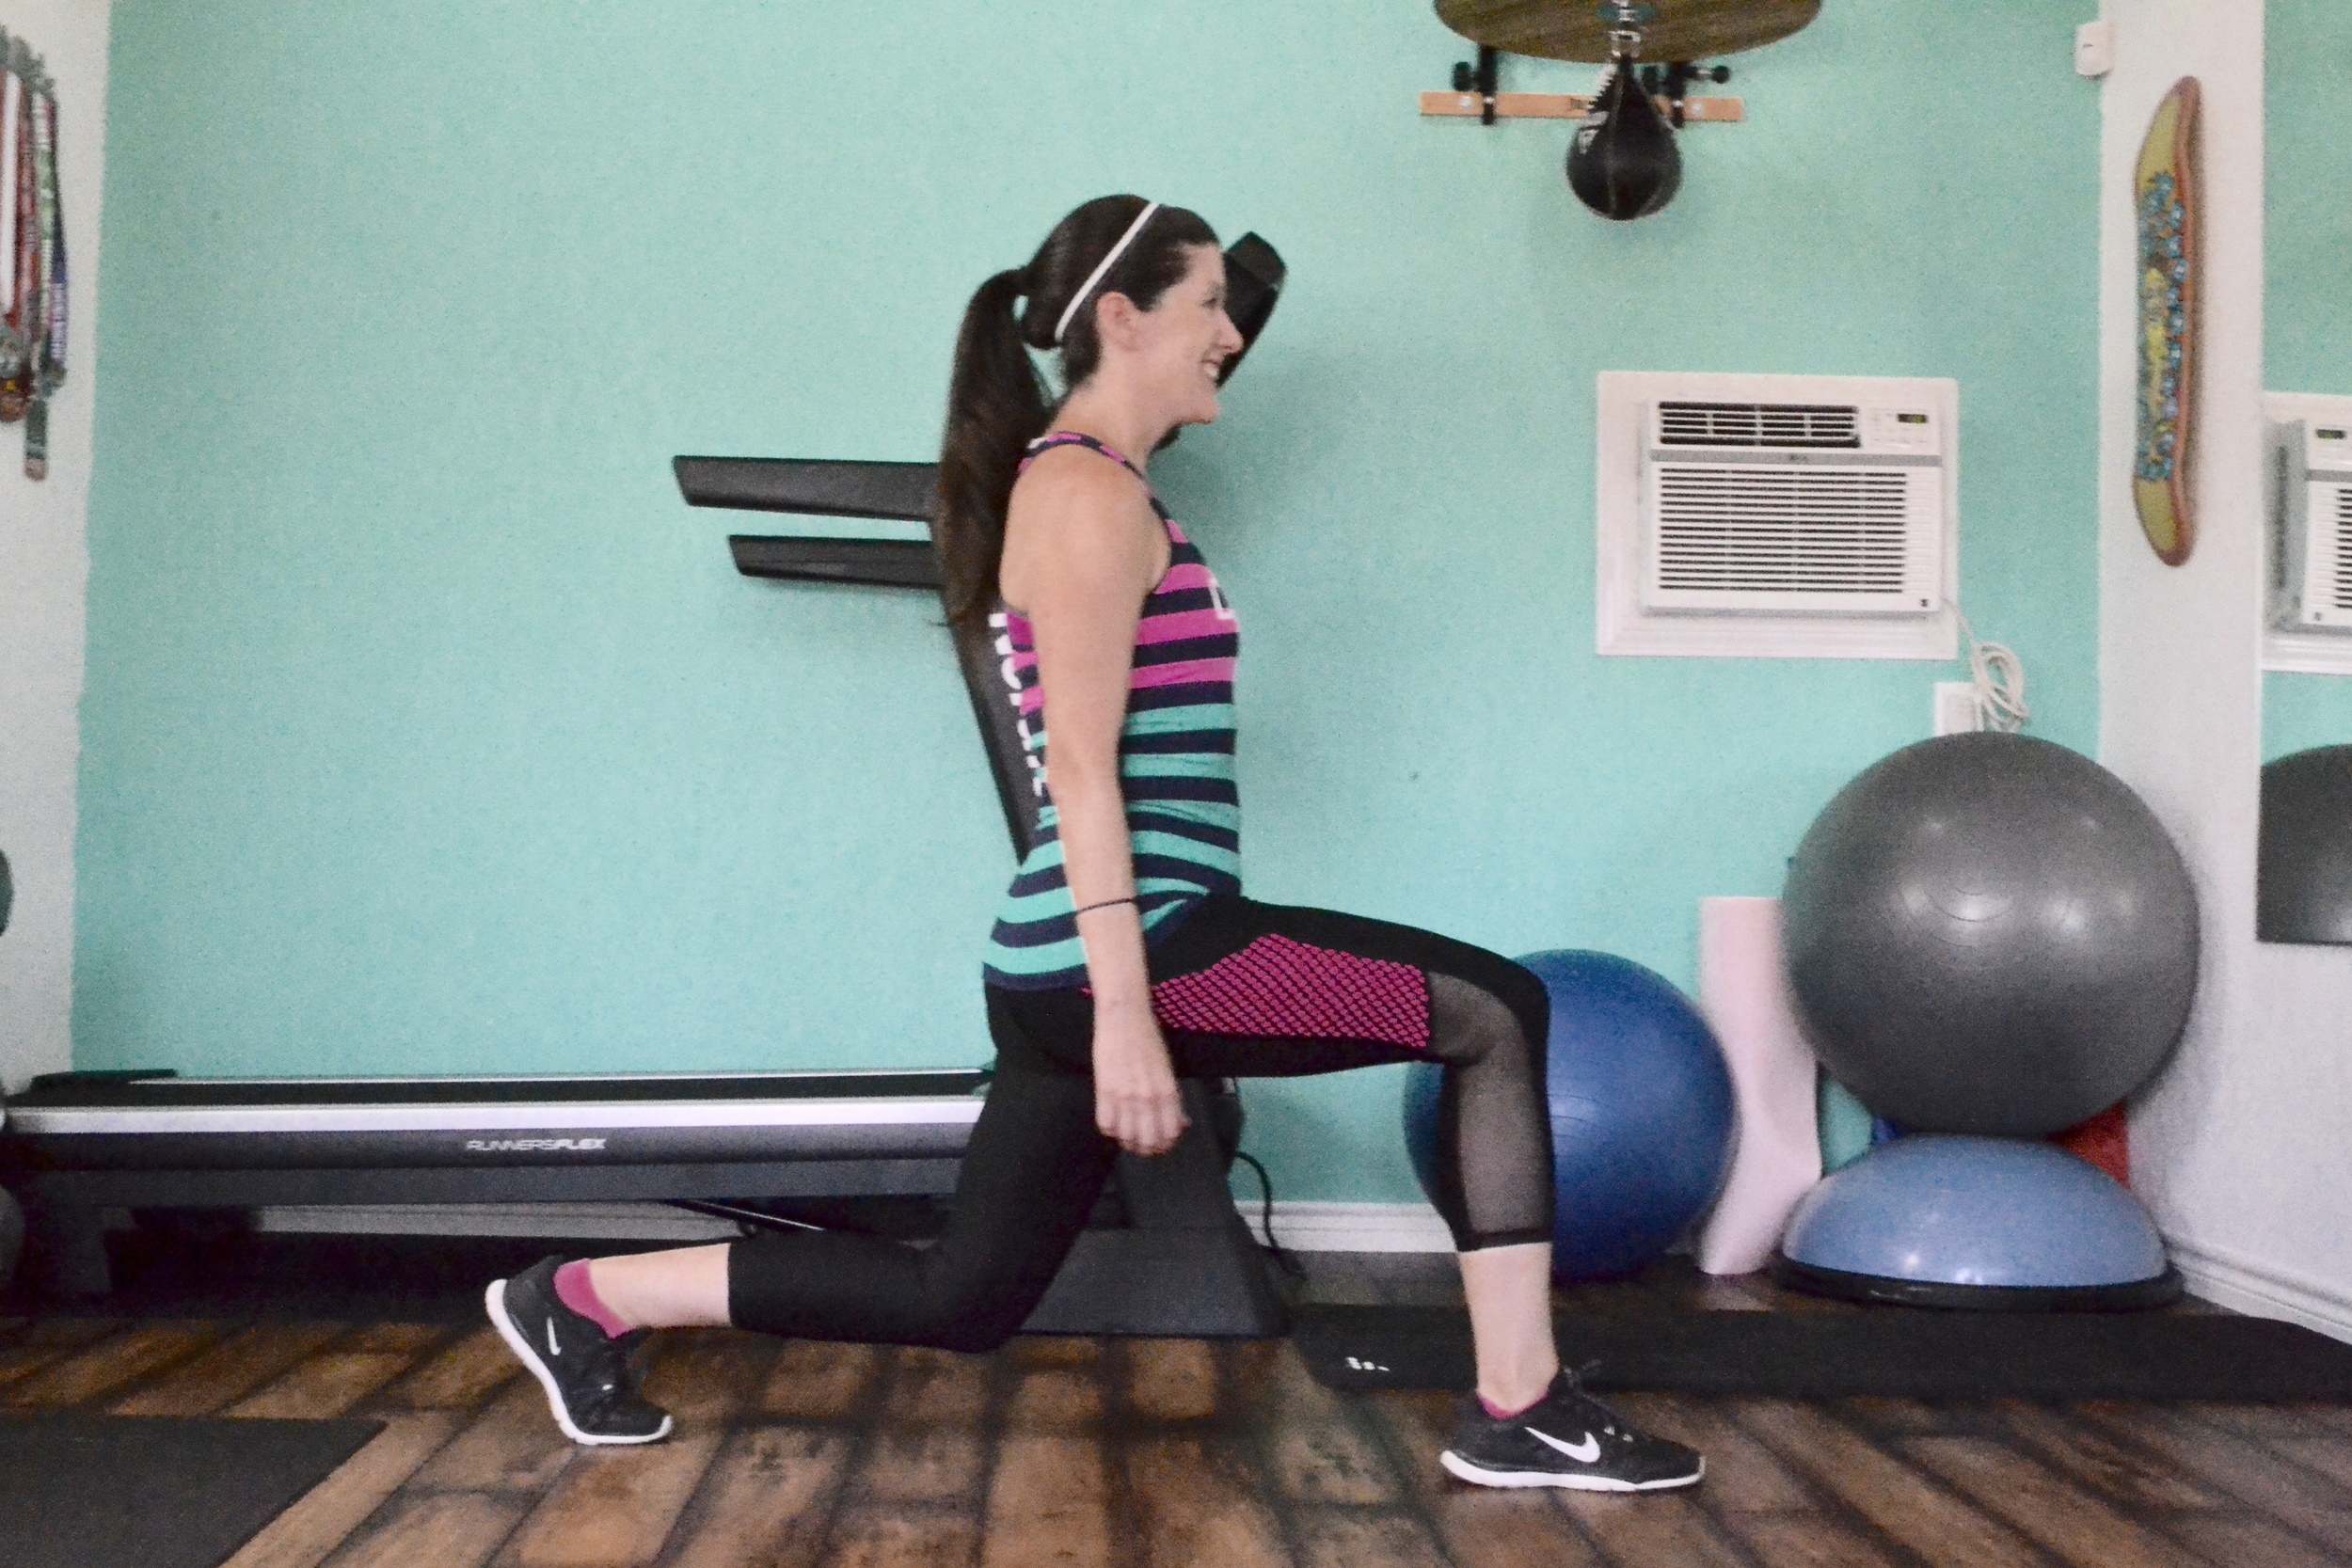
With your feet hip width apart and your toes pointed straight ahead, engage your core and keep your back straight. Take one large step with your right leg to lunge forward until your front knee is lined up over your ankle and your back knee is nearly touching the floor. Do not allow your knee to move forward over your toes. Resist the urge to lean forward or rest your arms on your thighs. Once you are in the lunge position push back up to starting position. Repeat for 20 seconds.

Single Leg Deadlift

single leg deadlift

single leg deadlift

Standing on one leg, keep your knee slightly bent and perform a deadlift by bending at your hip while keeping your back straight and neck neutral. Extend your free leg behind you in line with your body. Lower until your back is parallel to the floor. With your back straight return to the upright position. Repeat for 20 seconds.

Single Leg Squat

While the single leg squat is an advanced move, there are a couple of variations that almost anyone can perform. I like using a bench for the low position. Balance on one leg and lower yourself until you are sitting on the bench. Your knee may want to cave inward, which is sign of a muscle imbalance. Work to keep your standing knee inline with your outside toe as you lower to the bench. Keeping the 2nd leg off the ground stand back up to the starting position.

single leg squat

single leg squat

Another variation is the single leg wall squat. Lower yourself into a wall squat position, with your back flat against the wall and your thighs parallel to the ground. Lift one leg off the floor and straighten it in front you. Repeat for 20 seconds.

Bridge with leg extension

Lie on your back with your knees bent and lift your hips off the floor while engaging your glutes and abs. Straighten one leg. Keep your leg in a straight line with your body and your knees together. Hold for 20 seconds.

bridge with leg extension

bridge with leg extension

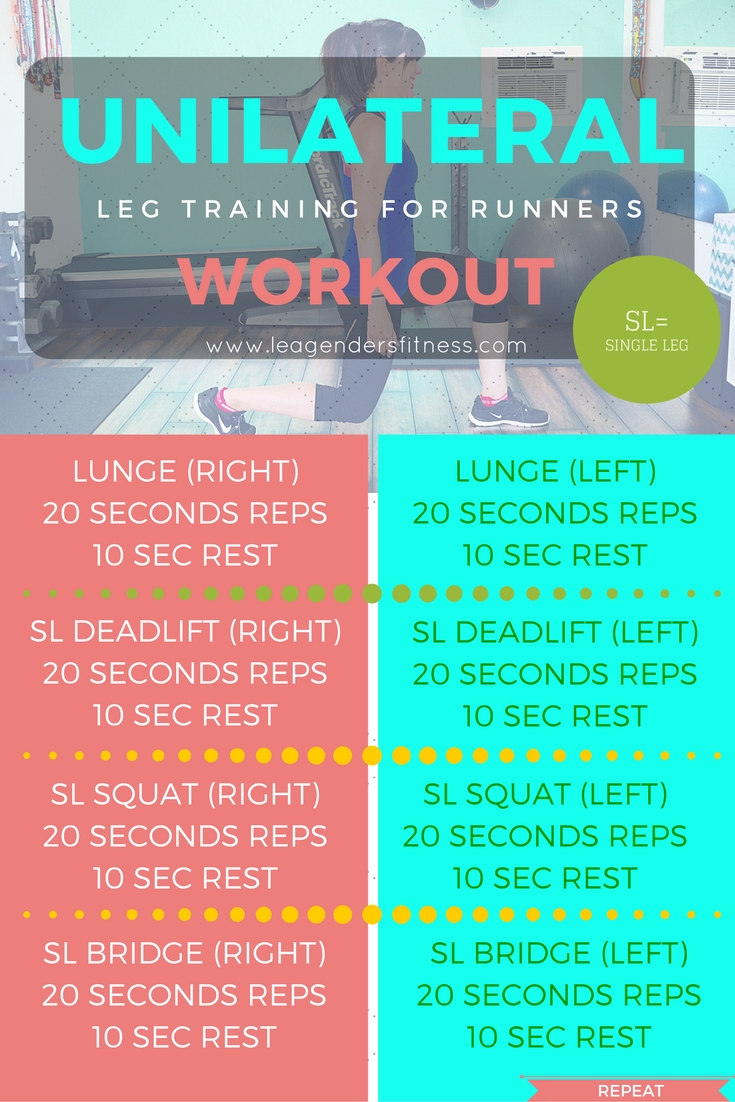
Perform each of the exercises in a Tabata-style format: 20 seconds work/10 seconds rest for four minutes. Rest one minute then repeat the circuit two more times. This is a quick and effective unilateral workout that you can tack on to the end of your run.
Like this post? It helps me when you share!


Coach Lea

I am a NASM personal trainer and RRCA adult distance running coach that specializes in strength training for runners. I offer in-person training in the Shredshed, as well as online training. If you are interested in a more in-depth running or strength training plan, please contact me. Have questions? I'd love to help. 

While I am a certified personal trainer, I am not your personal trainer. Since I don't know your exercise abilities, injury background or medical history, please see your doctor before beginning any new exercise program.


Types of Running Workouts To Increase Speed

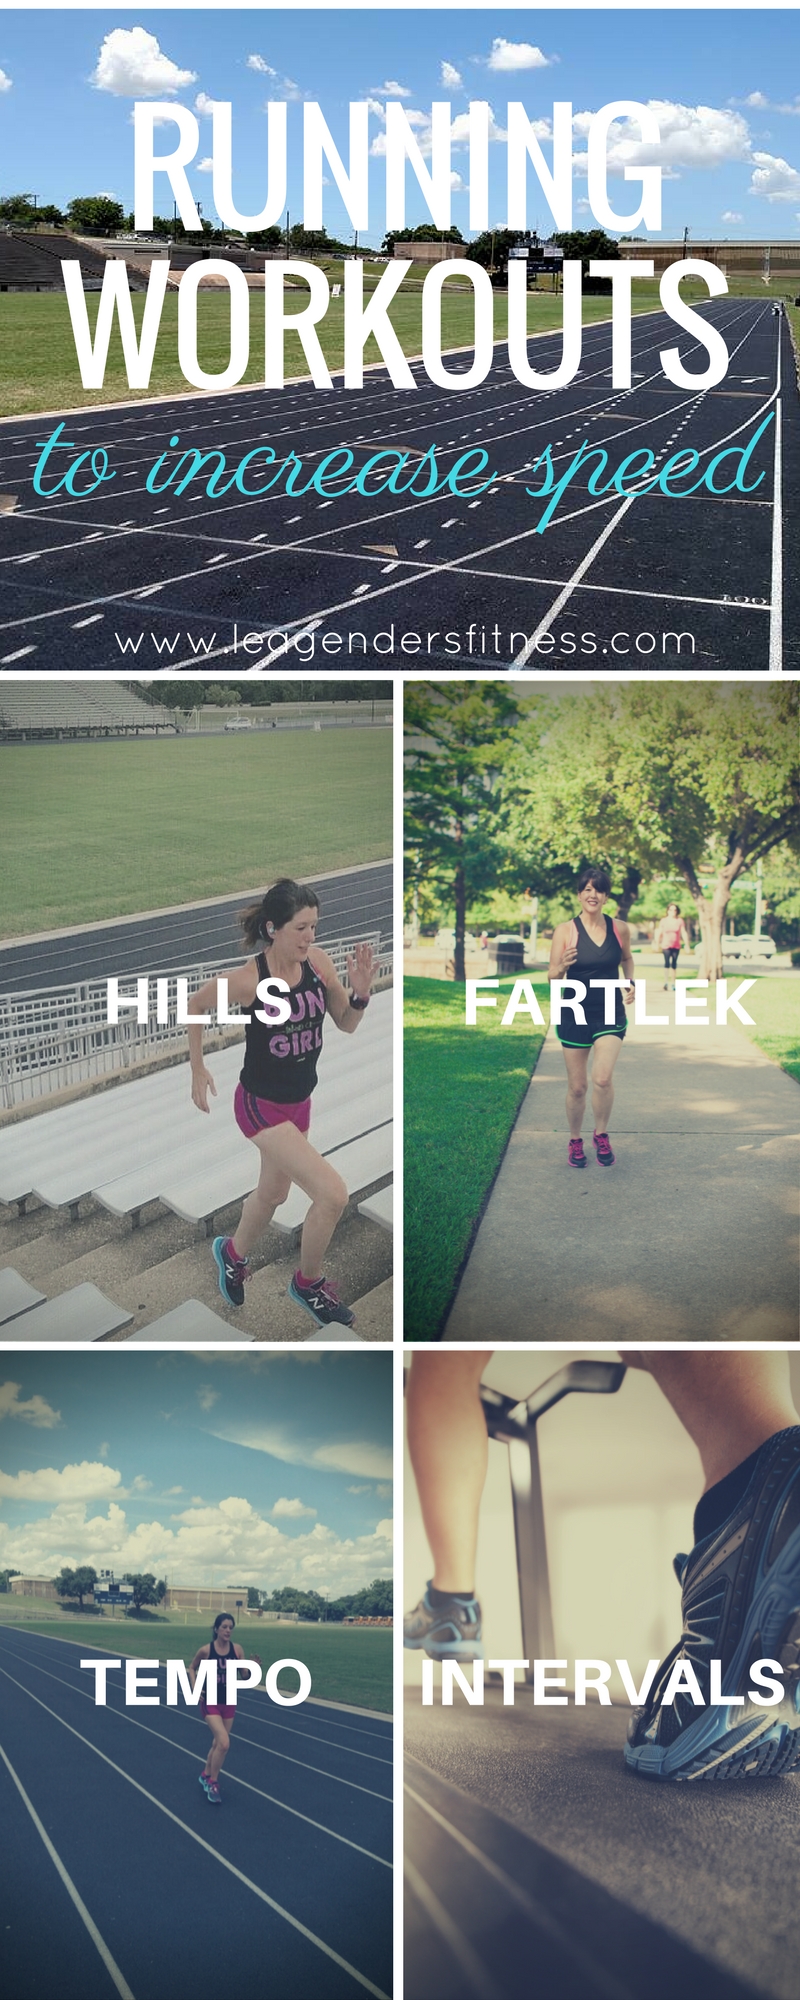
Welcome to another edition of workout Wednesday! This week we are talking about the types of running workouts that you can do to improve speed. Speed workouts, along with base runs, strength training, flexibility and balance practice are all part of a well-rounded training plan. I recommend no more than 1-2 speed workouts per week if you are just beginning speed training. Even experienced runners should limit their effort sessions to three times a week. Your body needs time to properly recover from hard workouts. Adaptation occurs during rest, so if you don't give your body the chance to recover you won't improve. 

You should have a sufficient running base before beginning any speed training. This means you should be running at least three miles at a time, several times a week at comfortable, conversational pace for a couple of months before beginning speed training. Check out my injury prevention checklist to make sure you are taking the necessary precautions to avoid injuries. Are you ready? 

Types of Running Workouts to Increase Speed

Types of Running Workouts to Increase Speed


Hills

Running hills is a great way to introduce speed work into your run training. Hills running helps to improve endurance with minimal muscle stress and promotes an efficient running form.

Warm up by jogging for 10 minutes. Starting at the bottom of a hill, run to the top maintaining a comfortably-hard effort. This would be a 7-8 on the RPE (rate of perceived exertion chart below) or about 75% of max heart-rate if you are using a heart rate monitor. Don't get too caught up in the numbers. You can begin by just running up that hill at a pace that feels a little challenging without going 100%. Once you reach the top of the hill, jog or walk back to the bottom to recover. Start with five repetitions and build up to ten gradually over time by adding an extra repetition every week or two depending on how well you recover. Cool down by jogging for 5-10 minutes and stretching and/or foam rolling

When running hills lean forward slightly with a straight back (don't hunch). Imagine there is a rope tied your waist pulling you to the top. Pump your arms quickly, keeping your elbows close to your body. Do not allow your arm to cross in front of your body, keep them moving only in the forward direction. 

You can change up the variables to challenge yourself in new ways. Changing the distance or grade of the hill, your pace and/or recovery time can place new demands on your body. 

Stair running is a good alternative to hill workouts. Find stairs outdoors (I love stadium stairs at the local high school) or the stair machine at the gym.


Fartleks

Fart what? Fartlek is Swedish for speed play and it is exactly what it sounds like: playing with speed. Fartleks are great for people new to speed training or more experienced runners who want less structure in their workouts. I wrote an entire post on Fartleks that you can reference for more detail. The goal of fartlek is to practice running faster without specific time or distance work and rest intervals. In other words, go as you please. Warm up by jogging for 10 minutes, pick up your pace for an undetermined about of time by choosing a landmark in the distance. Run faster until your reach the red minivan and then slow down to a jog or walk until your breath is recovered. Run faster until you reach the park bench in the distance and slow until you are ready to go again. Repeat for about thirty minutes, then cool down by jogging 5-10 minutes followed by stretching and/or foam rolling

Tempo

Tempo runs are done at a steady state faster than conversational pace but not at an all-out effort. It is not sprinting, it is running at a comfortably hard pace for 20 minutes to up to an hour. It may take some experimenting to find your tempo pace. It should feel challenging but not so hard that you can't maintain it over a couple of miles. This would be a 7-8 on the RPE (rate of perceived exertion chart) or about 75%-85% of max heart-rate if you are using a heart rate monitor. You should not be running so hard that you are grasping for air. 

Begin at a shorter distance, about two miles to start, and gradually build up over time by adding 1/2 mile to your tempo runs every week or two.

Runners new to speed training can ease into tempo runs by breaking up the time at tempo pace. Try running for three minutes at tempo pace, followed by three minutes of recovery at a slower pace and then repeat. Work to reduce the recovery period and increase the work period over time until you are no longer taking a recovery period in your tempo runs.

Intervals

Interval workouts are done at a specific speed and distance with a specific recovery period. Interval workouts should be performed by runners who are currently running 20 miles a week or more and have some experience with hill and fartlek training. To reduce the chance of injury, if you are a new runner or new to speed training, start with hills and fartlek training before advancing to interval work. 

You can change the variables (speed, distance, rest, repetitions) in order to meet specific goals. Long interval work periods are best for runners training for long distances like a marathon or half marathon. Shorter work intervals are best for runners competing in 5K, track racing and for improving leg speed. My favorite interval workout is just 15 minutes long and incorporates both long and short intervals at varying speeds.

I like doing intervals on the treadmill because it makes it easy to control both distance and pace. They also can done on a track or streets with a GPS watch.

IMPORTANT! The pace and speed examples in the below interval chart are for reference ONLY. You should by no means arbitrarily follow these paces. These speeds may be too fast for some runners and too easy for others. Use the RPE chart (above) to base your speed on your effort and current abilities!

TIME RPE EFFORT EXAMPLE SPEED EXAMPLE PACE
3 MINUTES 2-3 WARM UP 3-4 MPH 20:00-15:00
3 MINUTES 7-8 WORK 6-7 MPH 10:00-8:34
2 MINUTES 4-6 RECOVER 5 MPH 12:00
2 MINUTES 7-8 WORK 7-8 MPH 8:34-7:30
1 MINUTE 4-6 RECOVER 5 MPH 12:00
1 MINUTE 9 WORK 8 MPH 7:30
1 MINUTE 4-6 RECOVER 5 MPH 12:00
1 MINUTE 9 WORK 8 MPH 7:30
1 MINUTE 2-3 COOL DOWN 3 MPH 20:00

Are you currently incorporating speed workouts into your running training? Even if you don't race, most runners can benefit from at least one day of speed training per week. What is your favorite form of training to increase speed? Any questions? Let me know in the comments.

LIke this post? It helps me when you share!

Coach Lea

I am a NASM personal trainer and RRCA adult distance running coach that specializes in strength training for runners. I offer in-person training in the Shredshed, as well as online training. If you are interested in a more in-depth running or strength training plan please contact me. Have questions? I'd love to help. 

While I am a certified personal trainer, I am not your personal trainer. Since I don't know your exercise abilities, injury background or medical history, please see your doctor before beginning any new exercise program.
Workout Wednesday: Plank Workout

Welcome to another edition of Workout Wednesday! Each week I put together a quick and effective workout that you can try at home. Runners always tell me they don't have time for strength training. I suggest you work through this core circuit after you complete your run. If you complete 10 minutes of strength training after each run this week, you could squeeze in a full body workout! 

I love planks. They are effective for building core strength, which is essential for runners! I like to do at least one to two minute low plank every day. #plankaday. If I miss a day, the @Plankpolice come after me. (No. I'm not kidding.)

Let's get planking!

HI PLANK

In a high plank position place your shoulders directly over your wrists. Your body should form a straight line from your head to your heels. Engage your abs and breathe normally. Hold for one minute.

MARCHING PLANK

In a marching plank you will transition from a high plank to a low plank position. Lower your right arm, then your left arm until you are in an elbow plank position. When transiting multiple times, like you will during this circuit, be sure to alternate the arm you first use to push up. Push back up to high plank starting with the right arm, but on the next rep, pushup to plank by starting with the left arm to minimize pressure on the shoulders. This is challenging! Work to complete one minute.

LOW PLANK

Position your elbows on the floor with your shoulders directly over your elbows. Your body should be in a straight line parallel to the floor. Engage your core, pulling your belly button into your spine while breathing normally. Squeeze your glutes. Be careful not to sink your hips or raise your butt in the air. Do not clasp hands. Hold for one minute. If you need to rest, break it up into 15 or 30 second increments. 

LOW PLANK SPIDERMAN

While in the low plank position, bring your knee out to side and bring as close to your elbow as your flexibility will allow. Be careful not to sink your hips low or raise your butt in the air. Alternate sides for one minute. 

SIDE PLANK

With a straight arm lift yourself up into a side plank position. Your shoulders should be directly over your wrists. Stack your feet and don't allow your hips to drop. Hold for 30 seconds before switching sides.

If a straight arm side plank is too challenging, start in a side elbow side plank and break it up into 10 or 15 seconds increments. Repeat on other side.

I recommend doing the circuit two to three times a week while continually challenging yourself. In order to keep progressing and getting stronger, you'll want to continuously make the circuit more difficult, either by adding more time, sets or progressing the exercises.

Like this post? Please consider sharing!
 

Coach Lea

I am a NASM personal trainer that specializes in strength training for runners. I offer in-person training in the Shredshed, as well as online training. If you are interested in a more in-depth strength training plan for runners, please contact me. Have questions? I'd love to help. 

While I am a certified personal trainer, I am not your personal trainer. Since I don't know your exercise abilities, injury background or medical history, please see your doctor before beginning any new exercise program.


Shuffle Up Your Workout with a Deck of Cards!

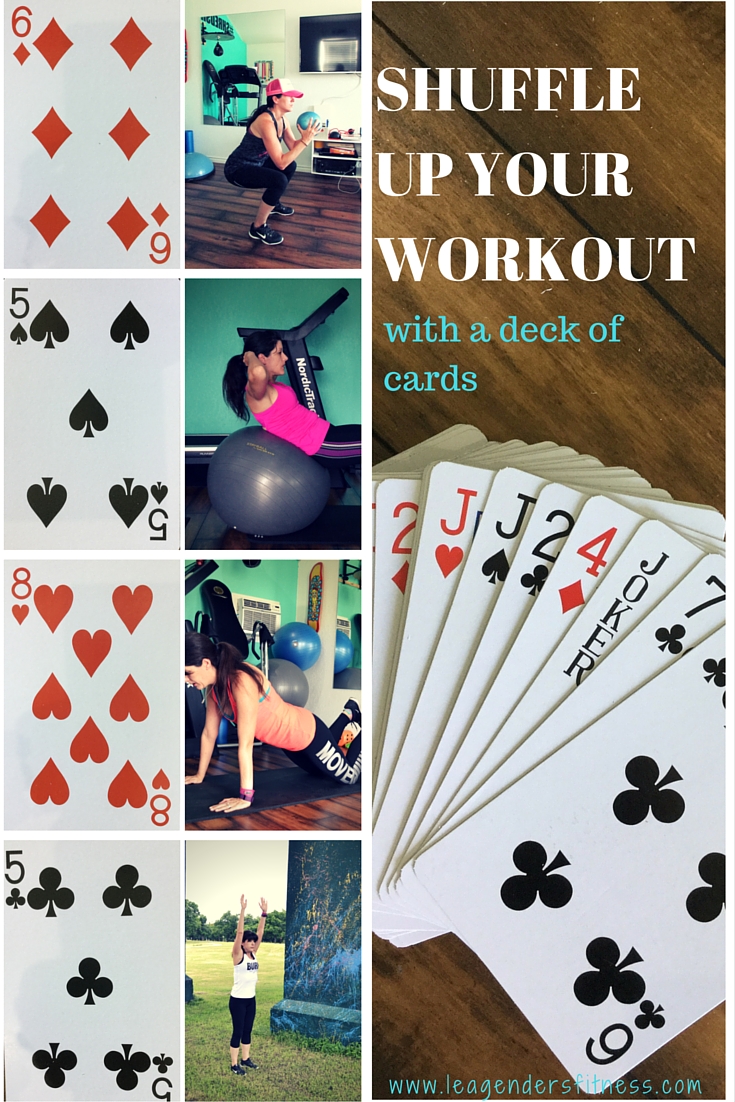
Welcome to Workout Wednesday! No one ever said working out had to be boring. As a bootcamp instructor I am always looking for ways to keep our sessions fun and interesting. There are lots of way to add a game component to your workouts. For this one we are going to use playing cards for a fun full body workout challenge.

Shuffle up your workout with a deck of cards.

Shuffle up your workout with a deck of cards.


What You'll Need

A deck of playingcards

Timer 

52 Pick-up

When I was a young girl one of my boy cousins approached me with a deck of cards and asked me if I wanted to play a game called 52 pick-up. I was excited my much older cousin wanted to play a game with me. When I enthusiastically agreed to play, he threw all the cards on the floor and walked away, "There are 52 cards, now pick them up."  Jerk. That is a trick you only fall for once.

I promise my workout won't be a trick, but I can almost guarantee you'll be working to pick yourself up off the floor after this one. 

How it works

Shuffle the cards, place them face down in a stack, then choose the first card off the top. Set your timer for 20 minutes and complete as many cards as you can in that timeframe. 

Hearts = pushups

Diamonds = squats

Spades = crunches

Clubs = burpees

You perform the number of repetitions on the card. For example, if you flip over a 4 of hearts, you perform 4 pushups. 6 of diamonds means you do 6 squats.

King, Queen, Joker and Jacks = 12 reps each. 

Hearts = Pushups

Start in a high plank position with your hands placed a little wider than your shoulders. Keeping your body in a straight line, while engaging your core slowly lower your chest to the floor. Once in the low position, push back up to the starting position. If this is too challenging, drop to your knees. 

Diamonds = Squats

Starting with your feet hip width apart push your hips back and lower until your thighs are parallel to the floor (like you are sitting back in a chair) or as low as your flexibility allows. In the low position, engage your core, squeeze your glutes and push up to standing. Take a deep breath in as your lower to the squat and breath out as you return up to standing.

Spades = Crunches 

Start by lying on your back with your knees bent at a 90 degree angle. Push the small of your back into the floor. Contract your abs while breathing normally and lift your shoulders and upper back off the floor a few inches. Hold in the top position for 3 counts before lowering back to the floor.

You could also use a stability ball for this exercise, follow the above instructions but positioning a stability ball under your lower back.

Clubs - Burpees

Burpees (Everyone's favorite!)

Burpees (Everyone's favorite!)

Start with your feet hip width apart, lower into a squat position until your hands are flat on the ground in front of you. Jump your legs backwards into a high plank position. Jump both feet forward so you are back in the squat position. Jump up and raise both hands over your head. If this is too challenging, step back and forward from plank position instead of jumping. 


SUCCESS TIPS

Don't be tempted to skip cards. Since there are only four exercises, you may find yourself doing the same exercise several times in a row. That's ok, you are building endurance. 

Work to complete the reps on the cards only resting for as long as it takes you to flip the next card. The goal is to keep moving for the entire 20 minutes. Since the clock is ticking, you want to maximize your time.

All of these exercises can be completed using only your bodyweight, but you can challenge yourself further by adding weights to the exercises.

See how many cards you can get through in twenty minutes. I'd love to know, send me a message on Twitter or leave a note in the comments. 

Partner Challenge

You could make this a partner challenge by competing with a friend to see who can get through the most cards in 20 minutes. Just remember that proper form is always more important than speed. Rushing through the exercises with improper form will make them less effective and you could risk injury. Play smart!

Please remember that while I am a personal trainer, I am not your personal trainer who knows your medical history, exercise background and unique needs. Please consult with your doctor before beginning any new exercise program. 
Any questions? I'd love to help. Let me know in the comments.

Coach Lea

Like this post? You can help me out by sharing!


Strength & Cardio Ladder Circuit Workout

Welcome to another edition of Workout Wednesday. Each week I give you a new workout that is quick and effective. If your excuse for not exercising is that you don't have enough time, I have that excuse debunked! Most of the circuit style workouts I share are from 4-15 minutes. You can make time for that, right? 

I am returning from a long weekend at the IDEA World Fitness convention. I had a great time soaking up the knowledge and connecting with my fellow fitness professional and bloggers. It can be hard to squeeze in a workout when you're traveling. This workout is a perfect bodyweight workout that takes up little space and little time. You could knock it out on the floor of your hotel room or whenever you have limited time or space. 

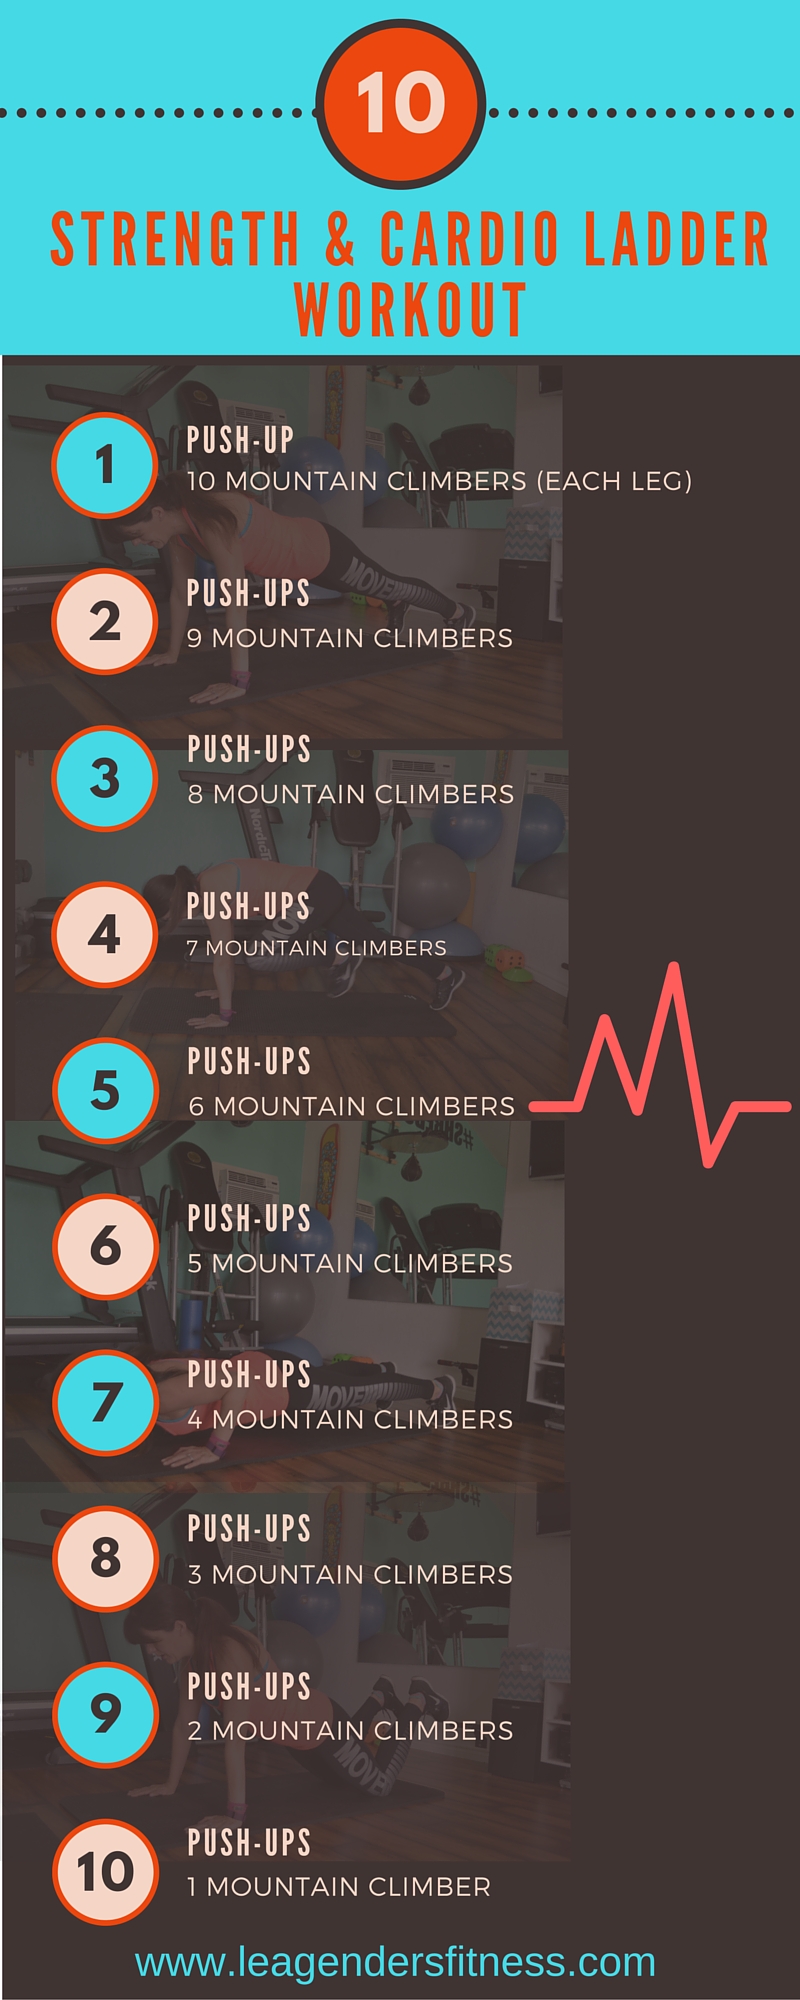
This is a ladder workout that combines a strength move with a cardio move. You count up reps of the strength move from 1-10 and count down on the cardio move from 10-1. For example, in this first circuit, you would complete 1 rep of a pushup and 10 reps (each leg) of a mountain climber. Then you would move on to 2 reps of the pushups and 9 reps (each leg) of a mountain climber. Then 3 push-ups and and 8 mountain climbers and until you worked your way up to 10 reps of the push-up and 1 rep (each leg) of the mountain climber. 

strength & cardio ladder workout

strength & cardio ladder workout

There are just two moves in this circuit. The push-up and the mountain climber.

Push-Up

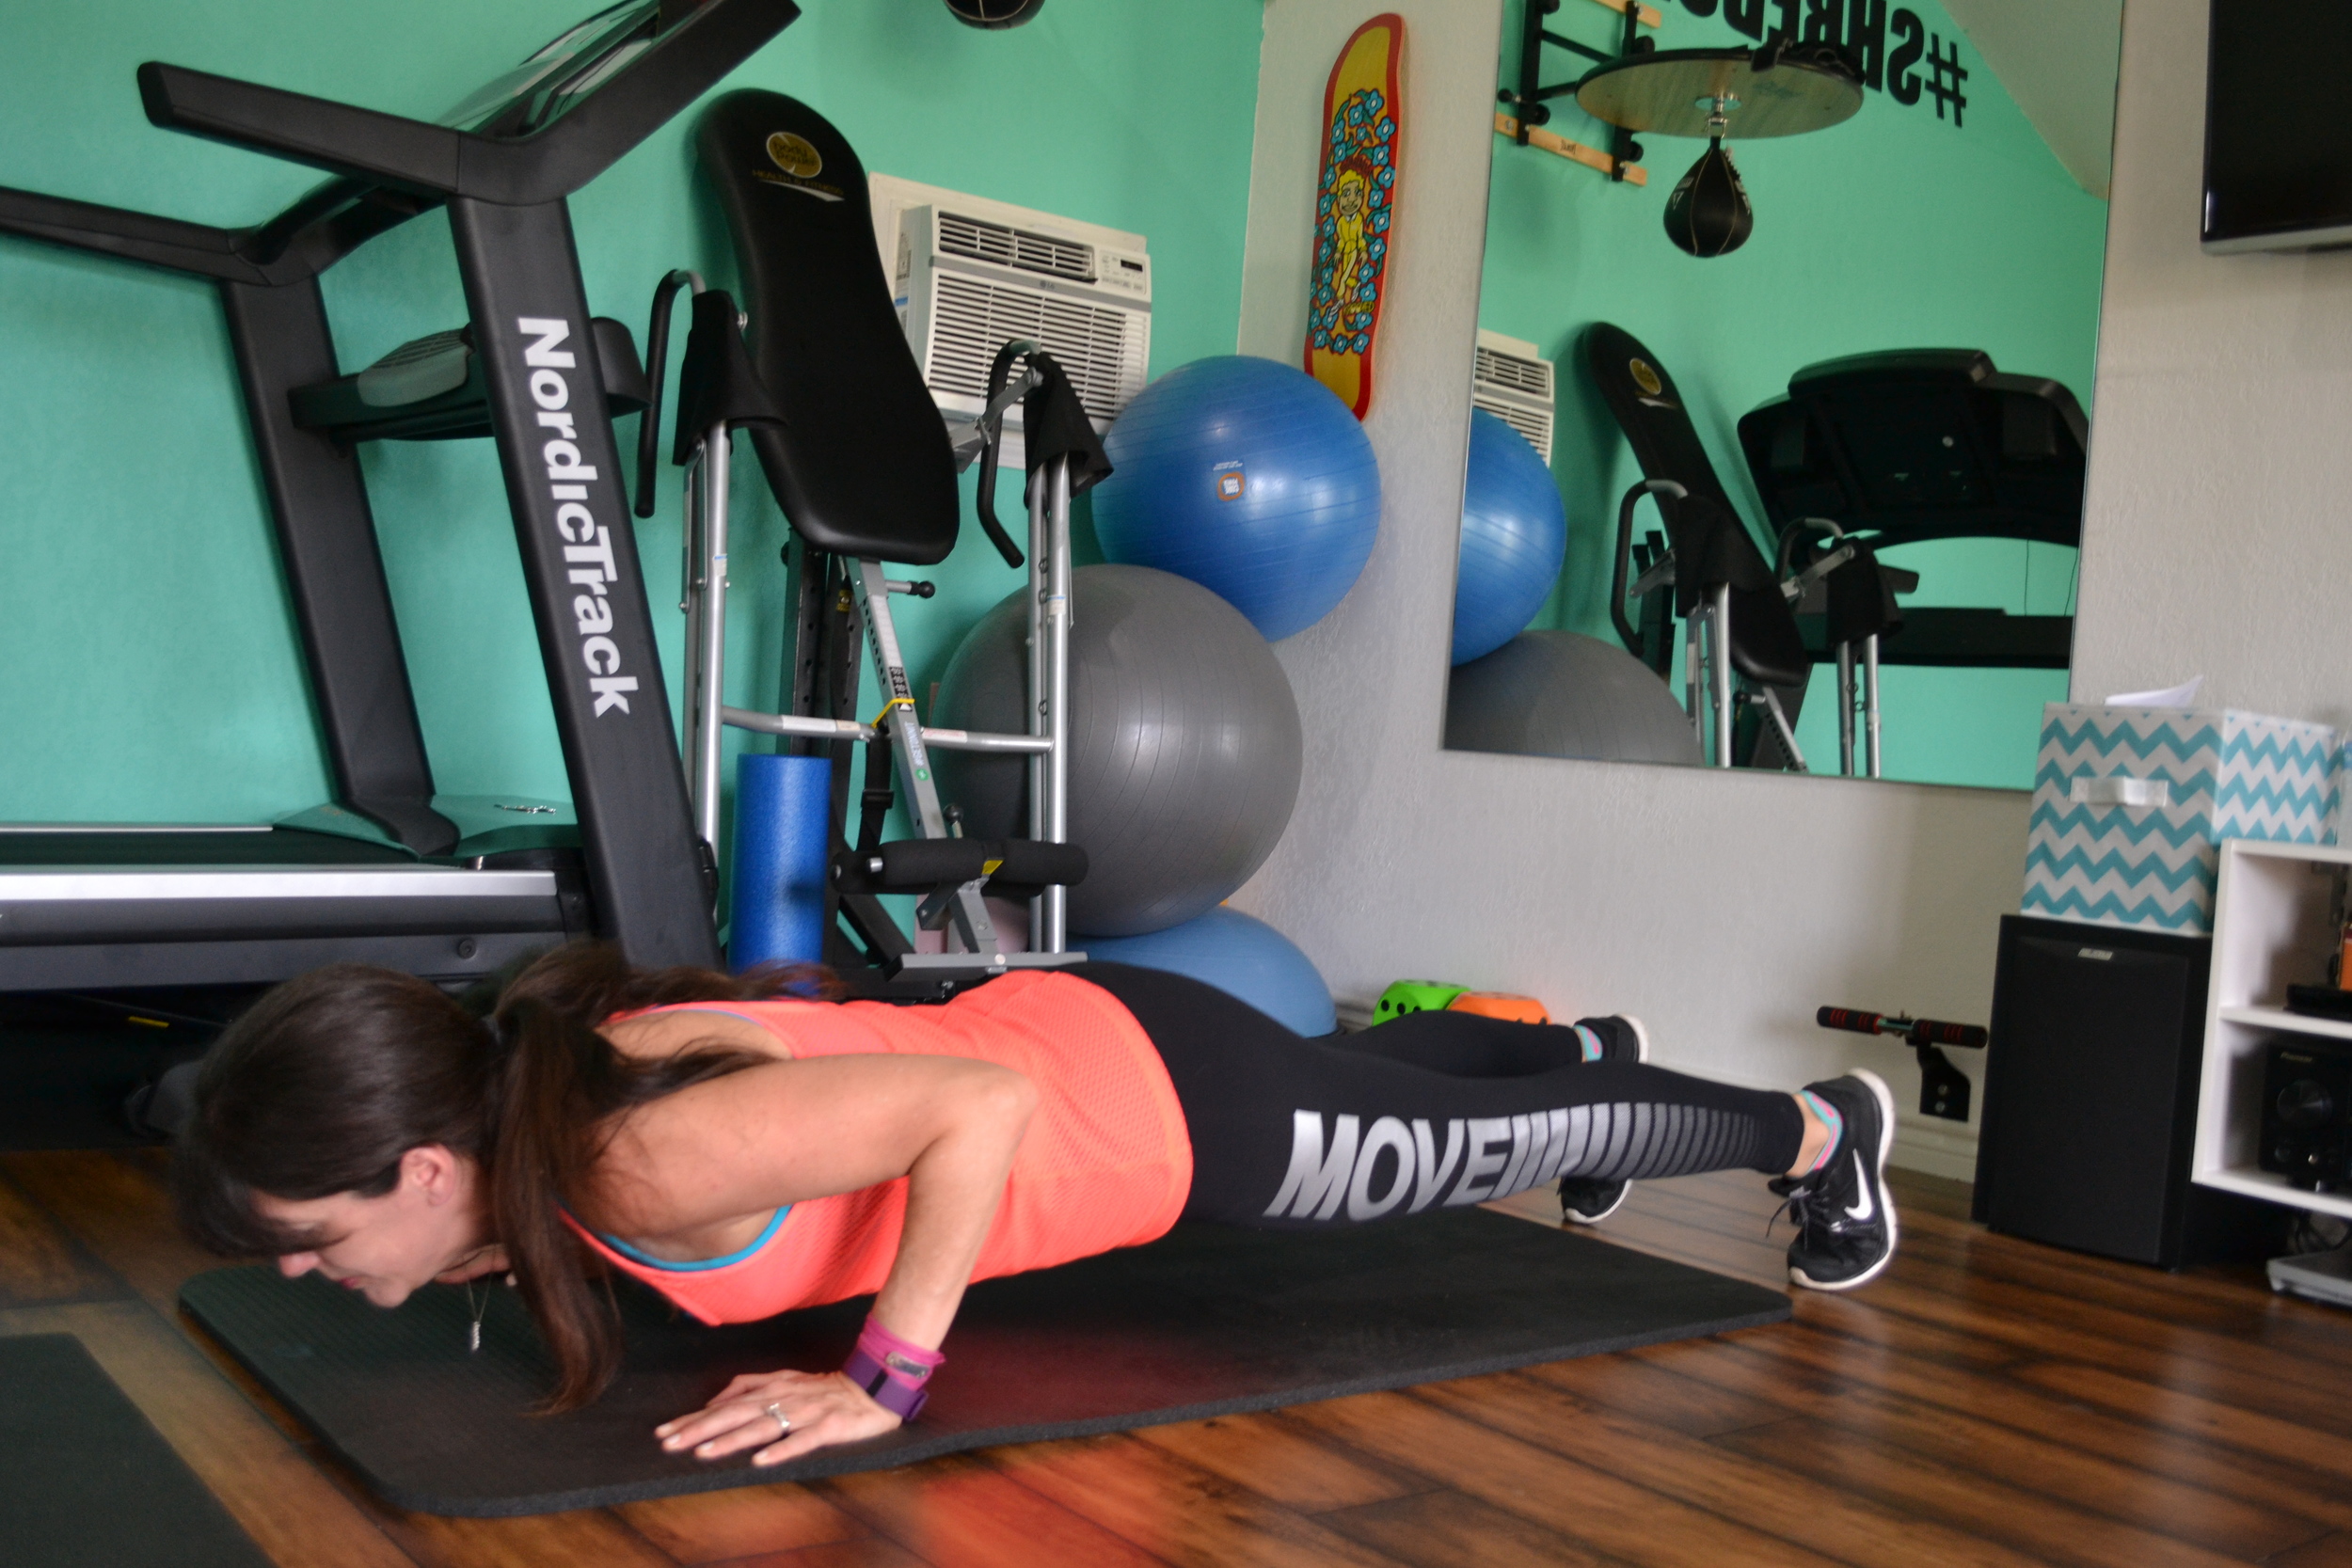
Start in a high plank position with your hands placed a little wider than your shoulders. Keeping your body in a straight line, while engaging your core, bend your elbows slowly to lower your chest to the floor. Once in the low position, push back up to the starting position. If this is too challenging, drop to your knees. 

starting push-up position

starting push-up position

low push-up position

low push-up position

Mountain Climbers

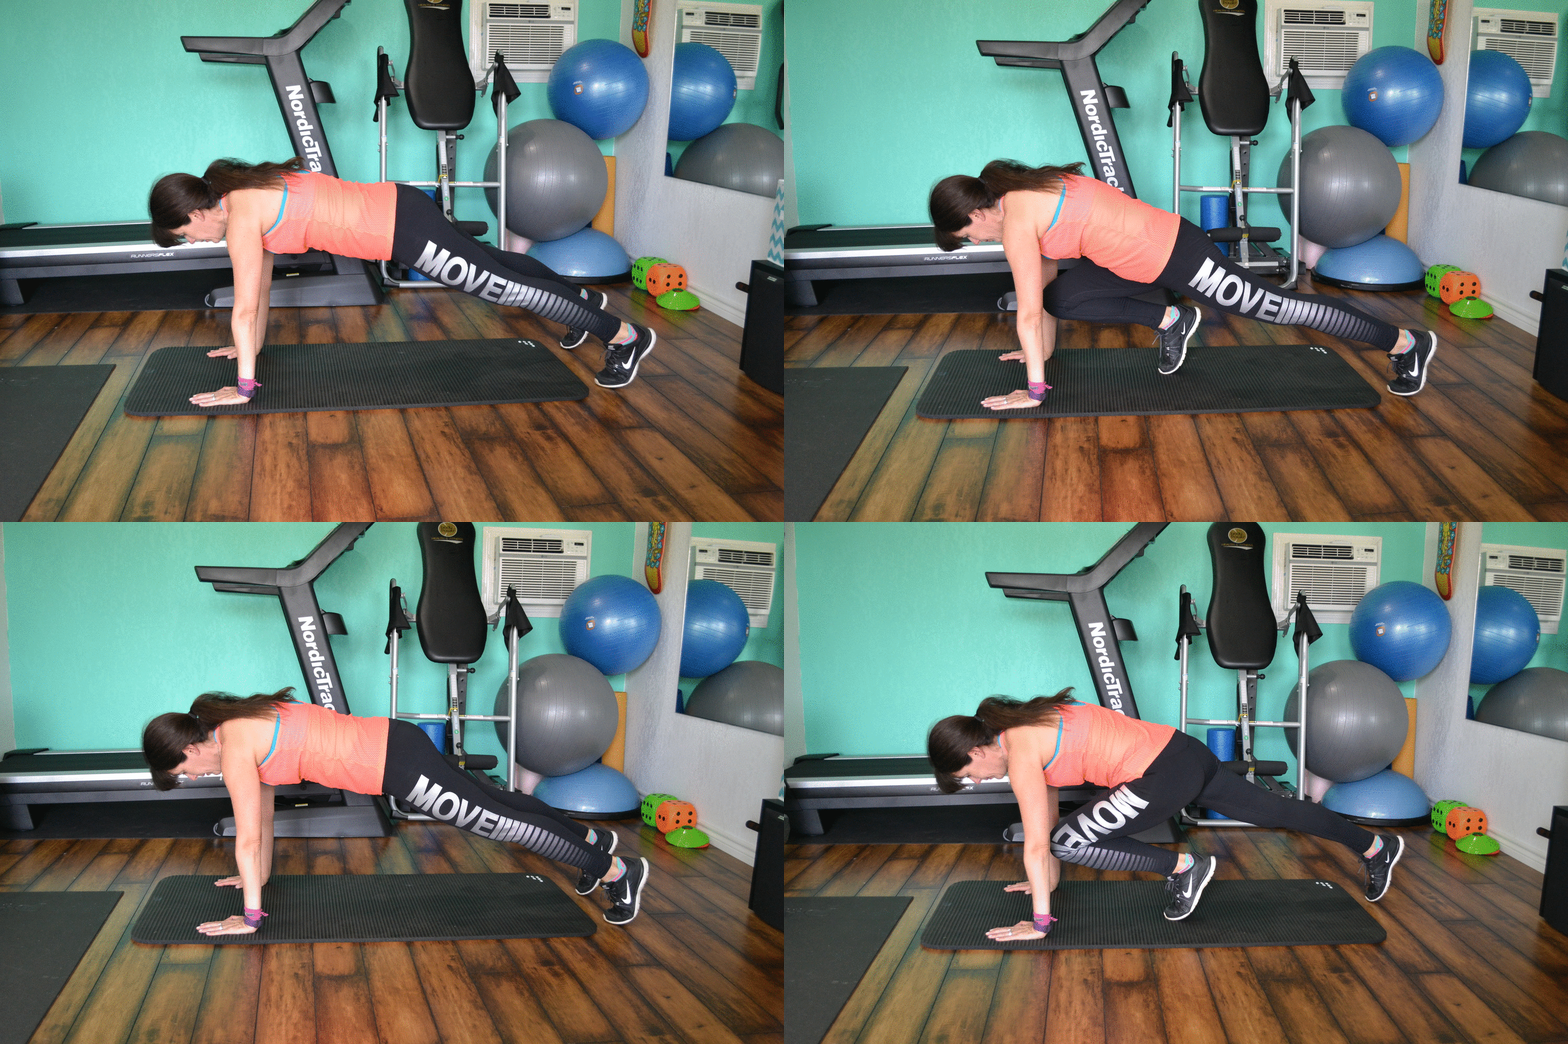
Start in a high straight arm plank position with your wrists directly under your shoulders with your legs wider than hip width for stability. Keep your body in a straight line from your shoulders to ankles while engaging your core. Do not allow your hips to hike up or sag down. Quickly bring your right leg, then your left leg in to touch your elbows. Right then left equals one rep.

This is a great format for strength and cardio in one workout. You could make it a full body workout by completing this circuit then switching up the exercises to a squat and high knees! 

It's important to remember that while I am personal trainer, I am not your personal trainer. Please speak to your doctor before beginning any new exercise program. Have questions? I'd love to help!


Like this post? Please consider sharing. 


Coach Lea