WORKOUTS

Strength & Cardio Ladder Circuit Workout

Welcome to another edition of Workout Wednesday. Each week I give you a new workout that is quick and effective. If your excuse for not exercising is that you don't have enough time, I have that excuse debunked! Most of the circuit style workouts I share are from 4-15 minutes. You can make time for that, right? 

I am returning from a long weekend at the IDEA World Fitness convention. I had a great time soaking up the knowledge and connecting with my fellow fitness professional and bloggers. It can be hard to squeeze in a workout when you're traveling. This workout is a perfect bodyweight workout that takes up little space and little time. You could knock it out on the floor of your hotel room or whenever you have limited time or space. 

This is a ladder workout that combines a strength move with a cardio move. You count up reps of the strength move from 1-10 and count down on the cardio move from 10-1. For example, in this first circuit, you would complete 1 rep of a pushup and 10 reps (each leg) of a mountain climber. Then you would move on to 2 reps of the pushups and 9 reps (each leg) of a mountain climber. Then 3 push-ups and and 8 mountain climbers and until you worked your way up to 10 reps of the push-up and 1 rep (each leg) of the mountain climber. 
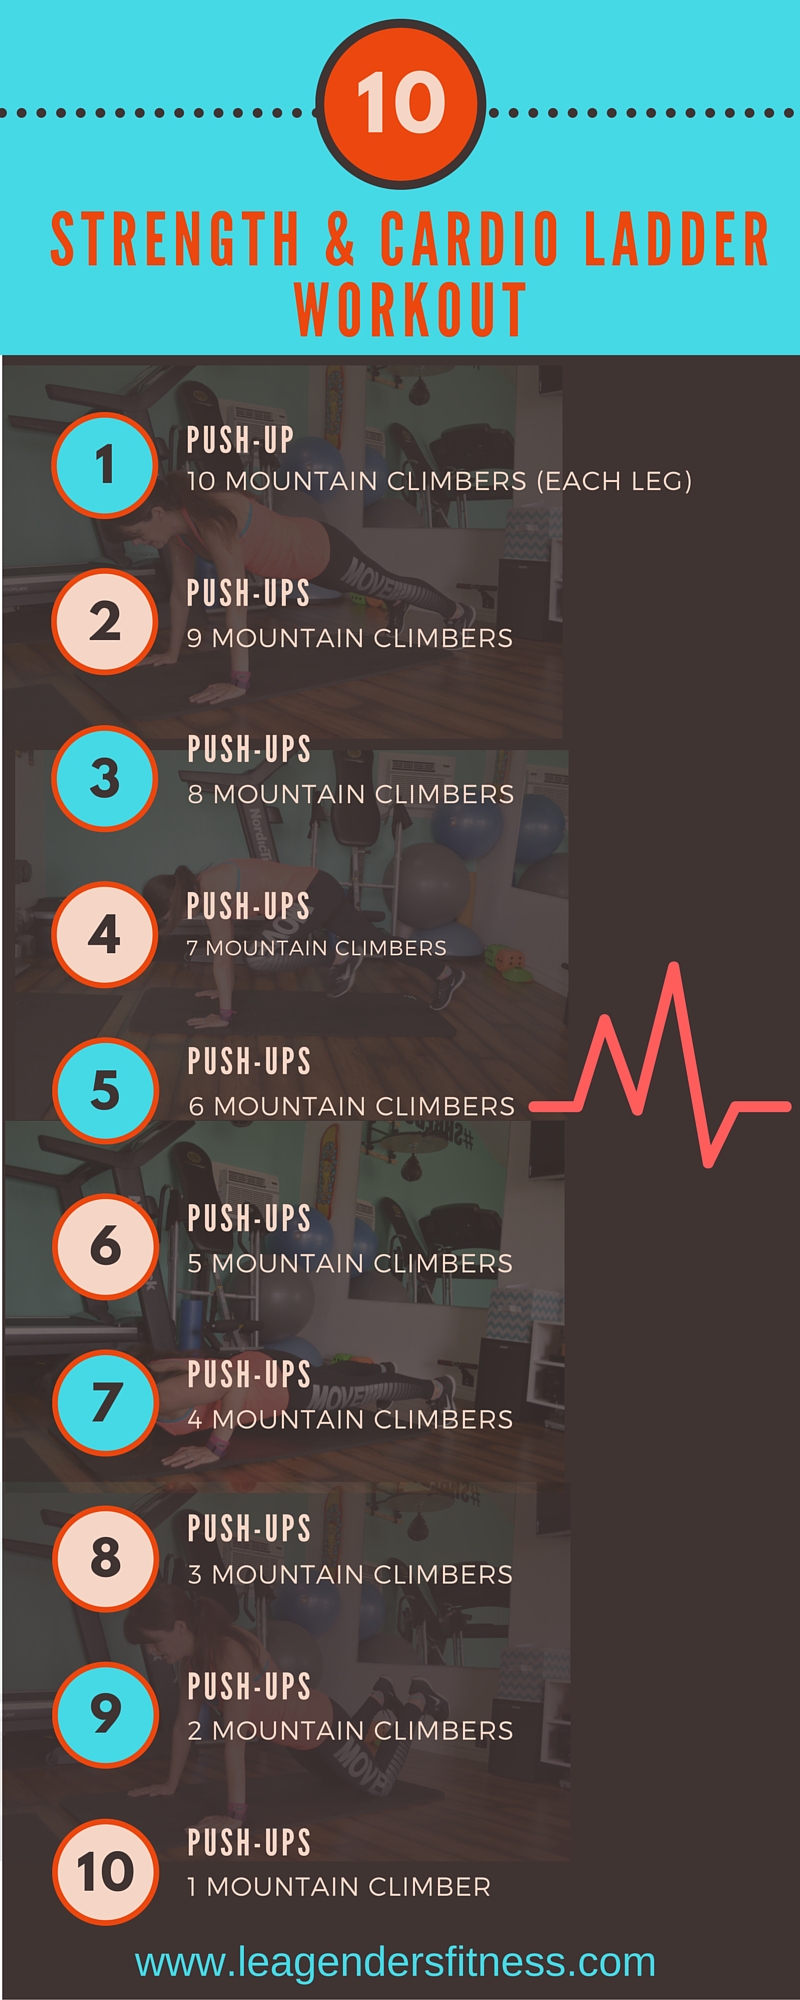
strength & cardio ladder workout

strength & cardio ladder workout

There are just two moves in this circuit. The push-up and the mountain climber.

Push-Up

Start in a high plank position with your hands placed a little wider than your shoulders. Keeping your body in a straight line, while engaging your core, bend your elbows slowly to lower your chest to the floor. Once in the low position, push back up to the starting position. If this is too challenging, drop to your knees. 

starting push-up position
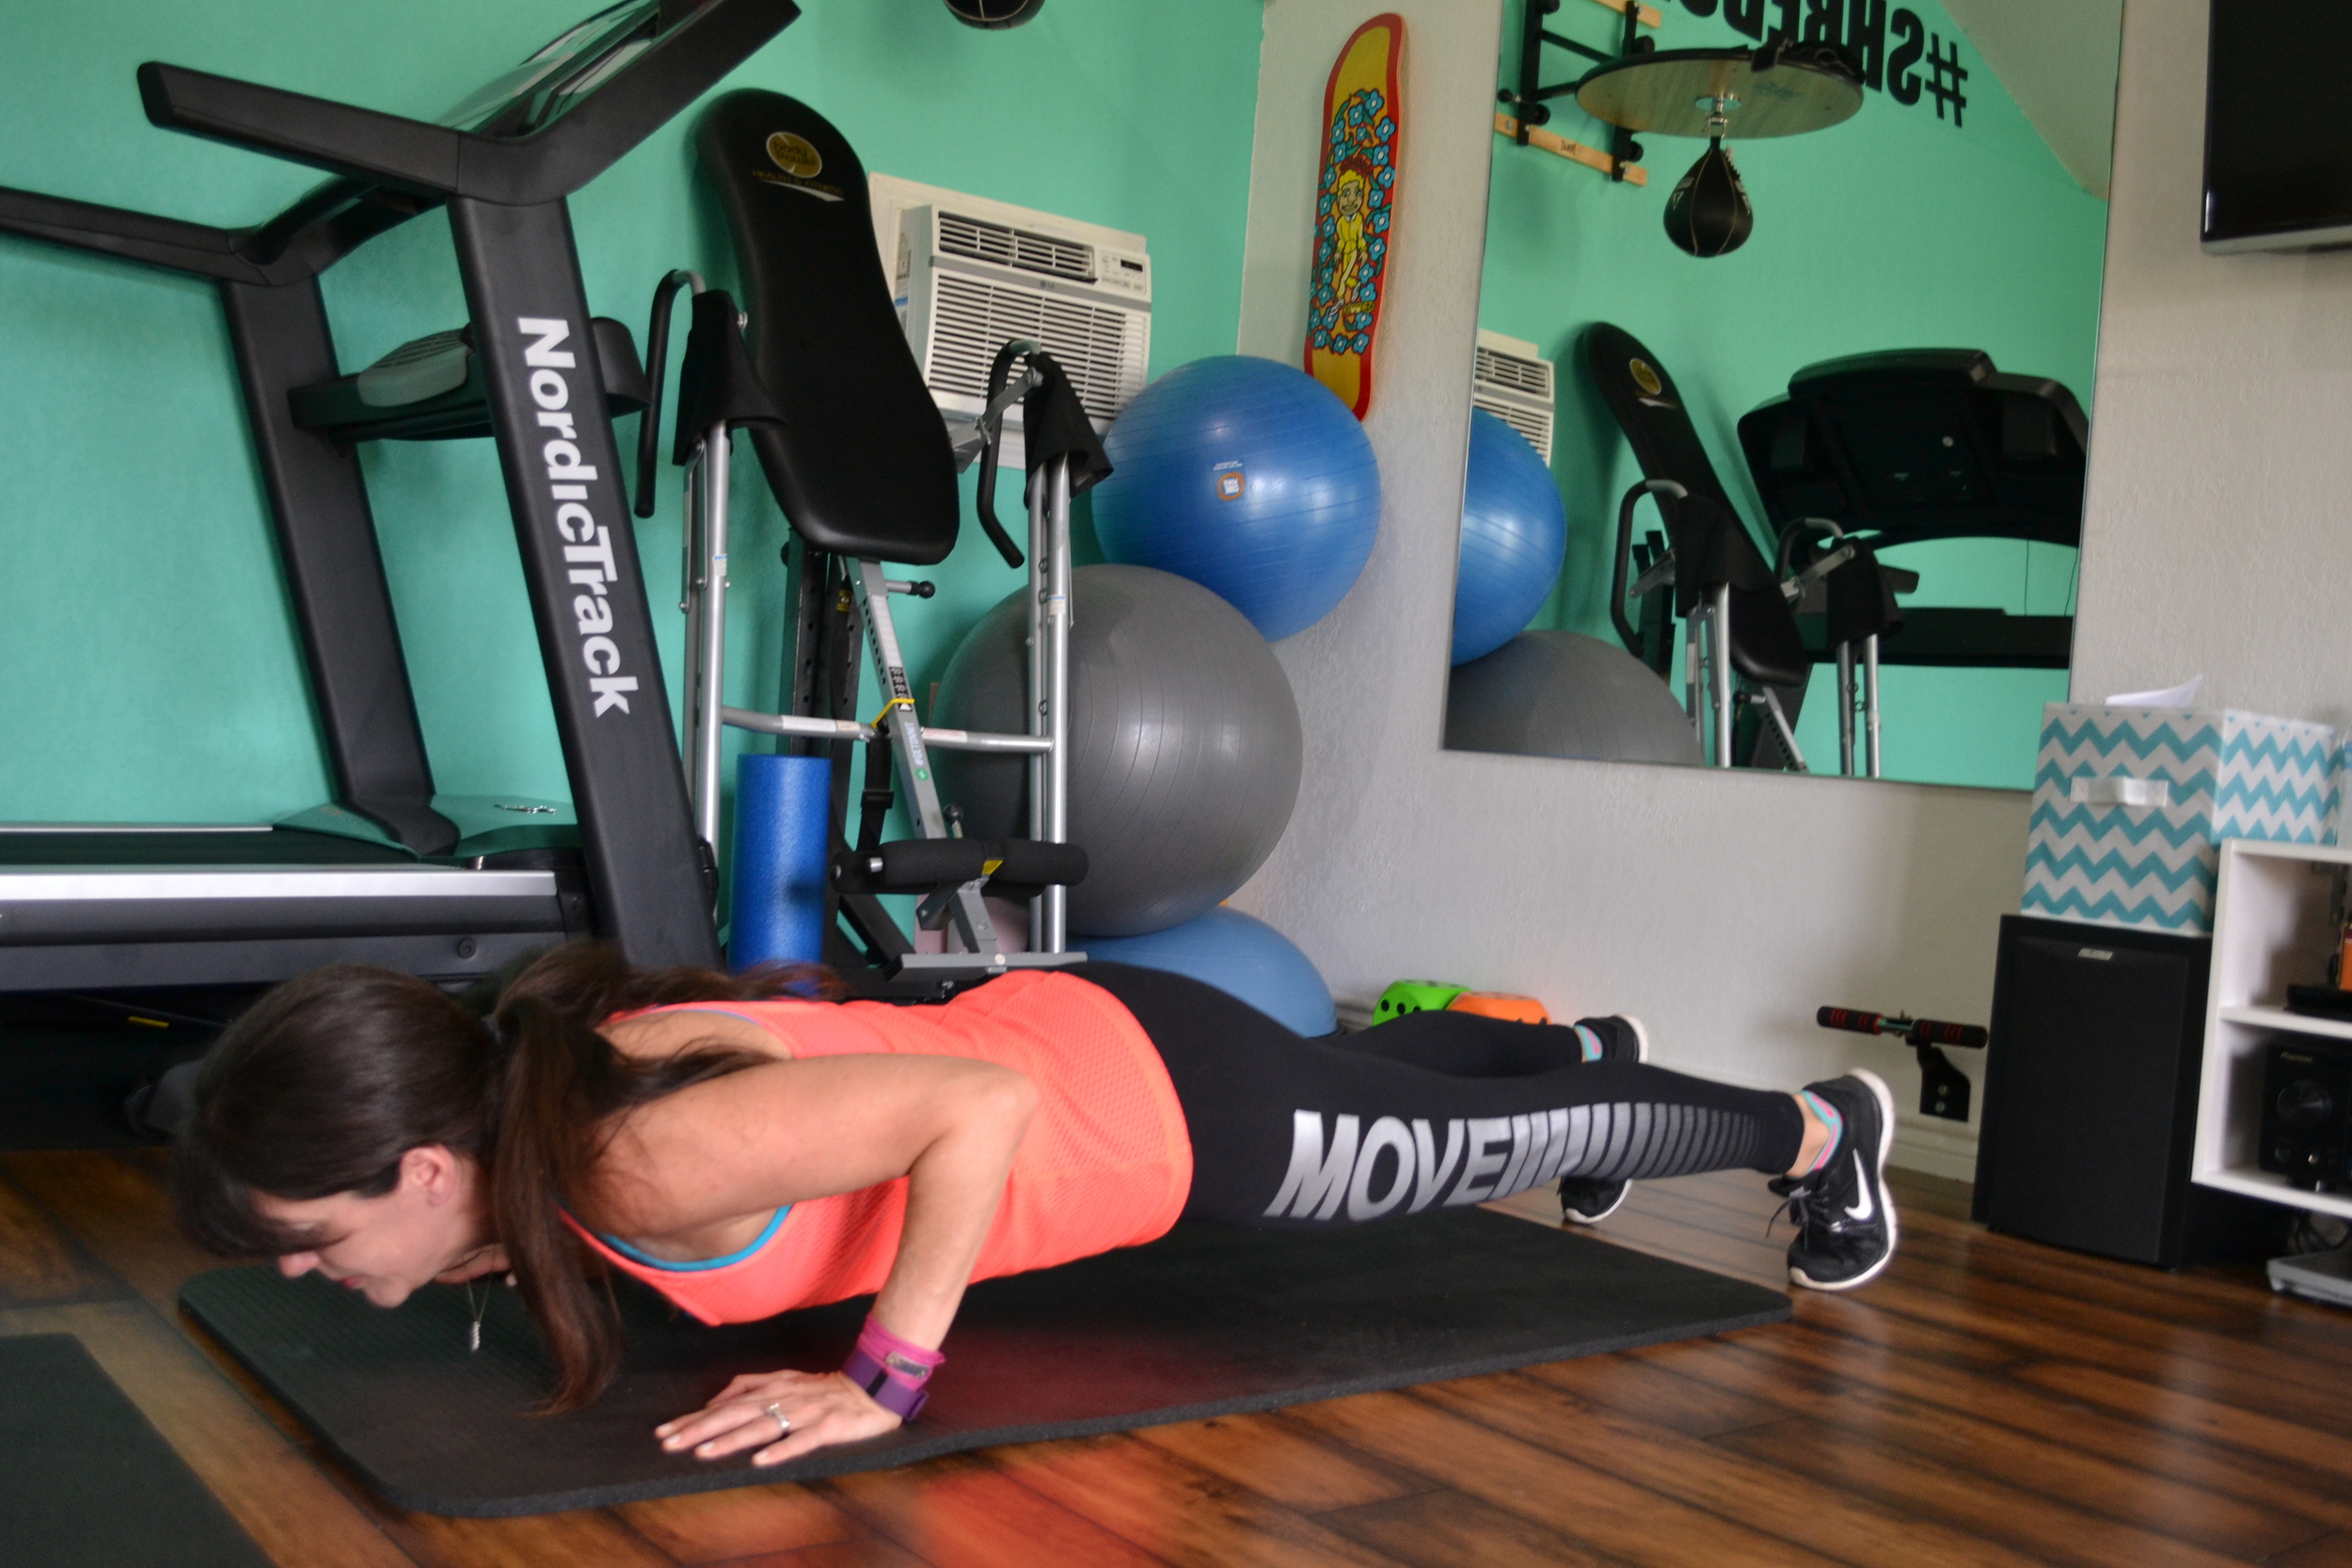
starting push-up position

low push-up position

low push-up position

Mountain Climbers

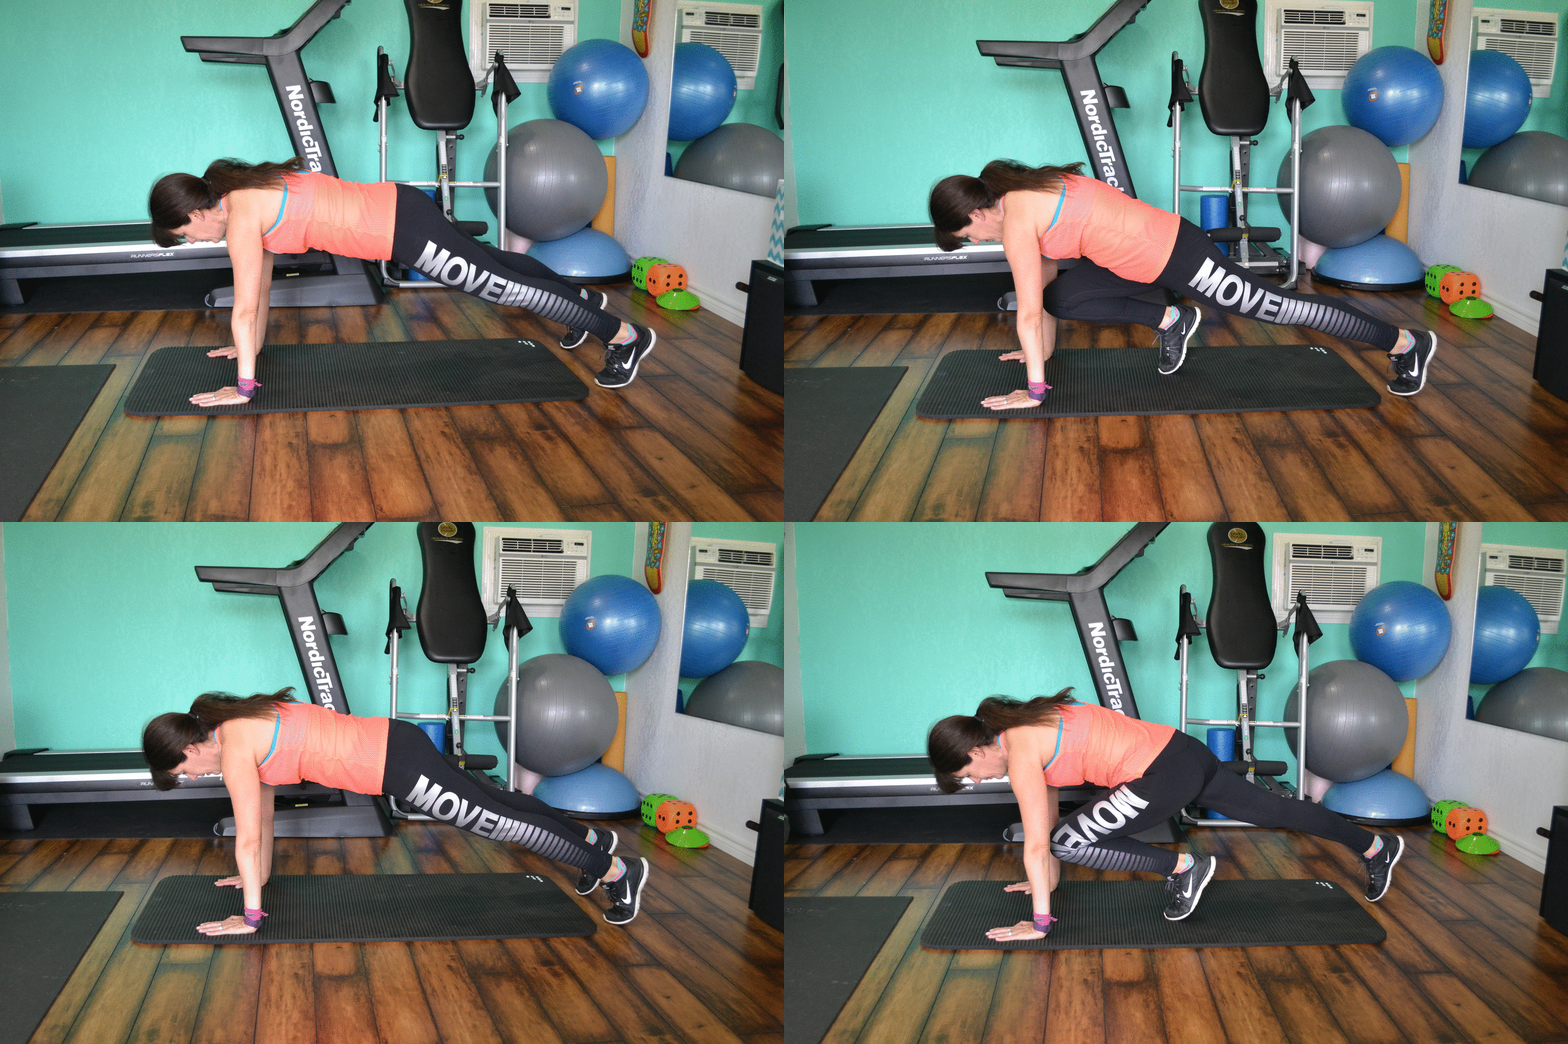
Start in a high straight arm plank position with your wrists directly under your shoulders with your legs wider than hip width for stability. Keep your body in a straight line from your shoulders to ankles while engaging your core. Do not allow your hips to hike up or sag down. Quickly bring your right leg, then your left leg in to touch your elbows. Right then left equals one rep.
This is a great format for strength and cardio in one workout. You could make it a full body workout by completing this circuit then switching up the exercises to a squat and high knees! 

It's important to remember that while I am personal trainer, I am not your personal trainer. Please speak to your doctor before beginning any new exercise program. Have questions? I'd love to help!


Like this post? Please consider sharing. 
 

Coach Lea


Running A-Z: I is for Injury Prevention for Runners

It's another week of Running A-Z, where I cover a running-related topic following the order of the alphabet. This week is the letter I. We will be talking about exercises for injury prevention. If you missed any of our past editions, you can catch up with letters A-H in the archives.

If you read this blog on a regular basis you know that I am a huge proponent of strength training for runners. In fact, I run my whole business on the notion that runners who strength train are stronger, faster and less prone to injury. But I get it. Runners generally don't enjoy the strength training aspect as much as they love to run. The good news is that you don't need to spend hours in the gym for basic injury prevention exercises. Runners generally need to work on strengthening their hips and abs. I challenge you as a runner to find 15 minutes three times a week to perform these exercises. Our goal is to strengthen those hip muscles to avoid injury.

You'll want to progress the exercises to make them more difficult over time, either by adding an extra set, a few reps, or adding resistance. Begin with two sets of ten reps for each exercise. After a week add an extra set. Once you are doing three sets, start adding additional reps each week until you're at three sets and 20 reps. Then make the exercises more challenging or add resistance. By continually progressing the exercises you will avoid adaptation and will get stronger over time. 

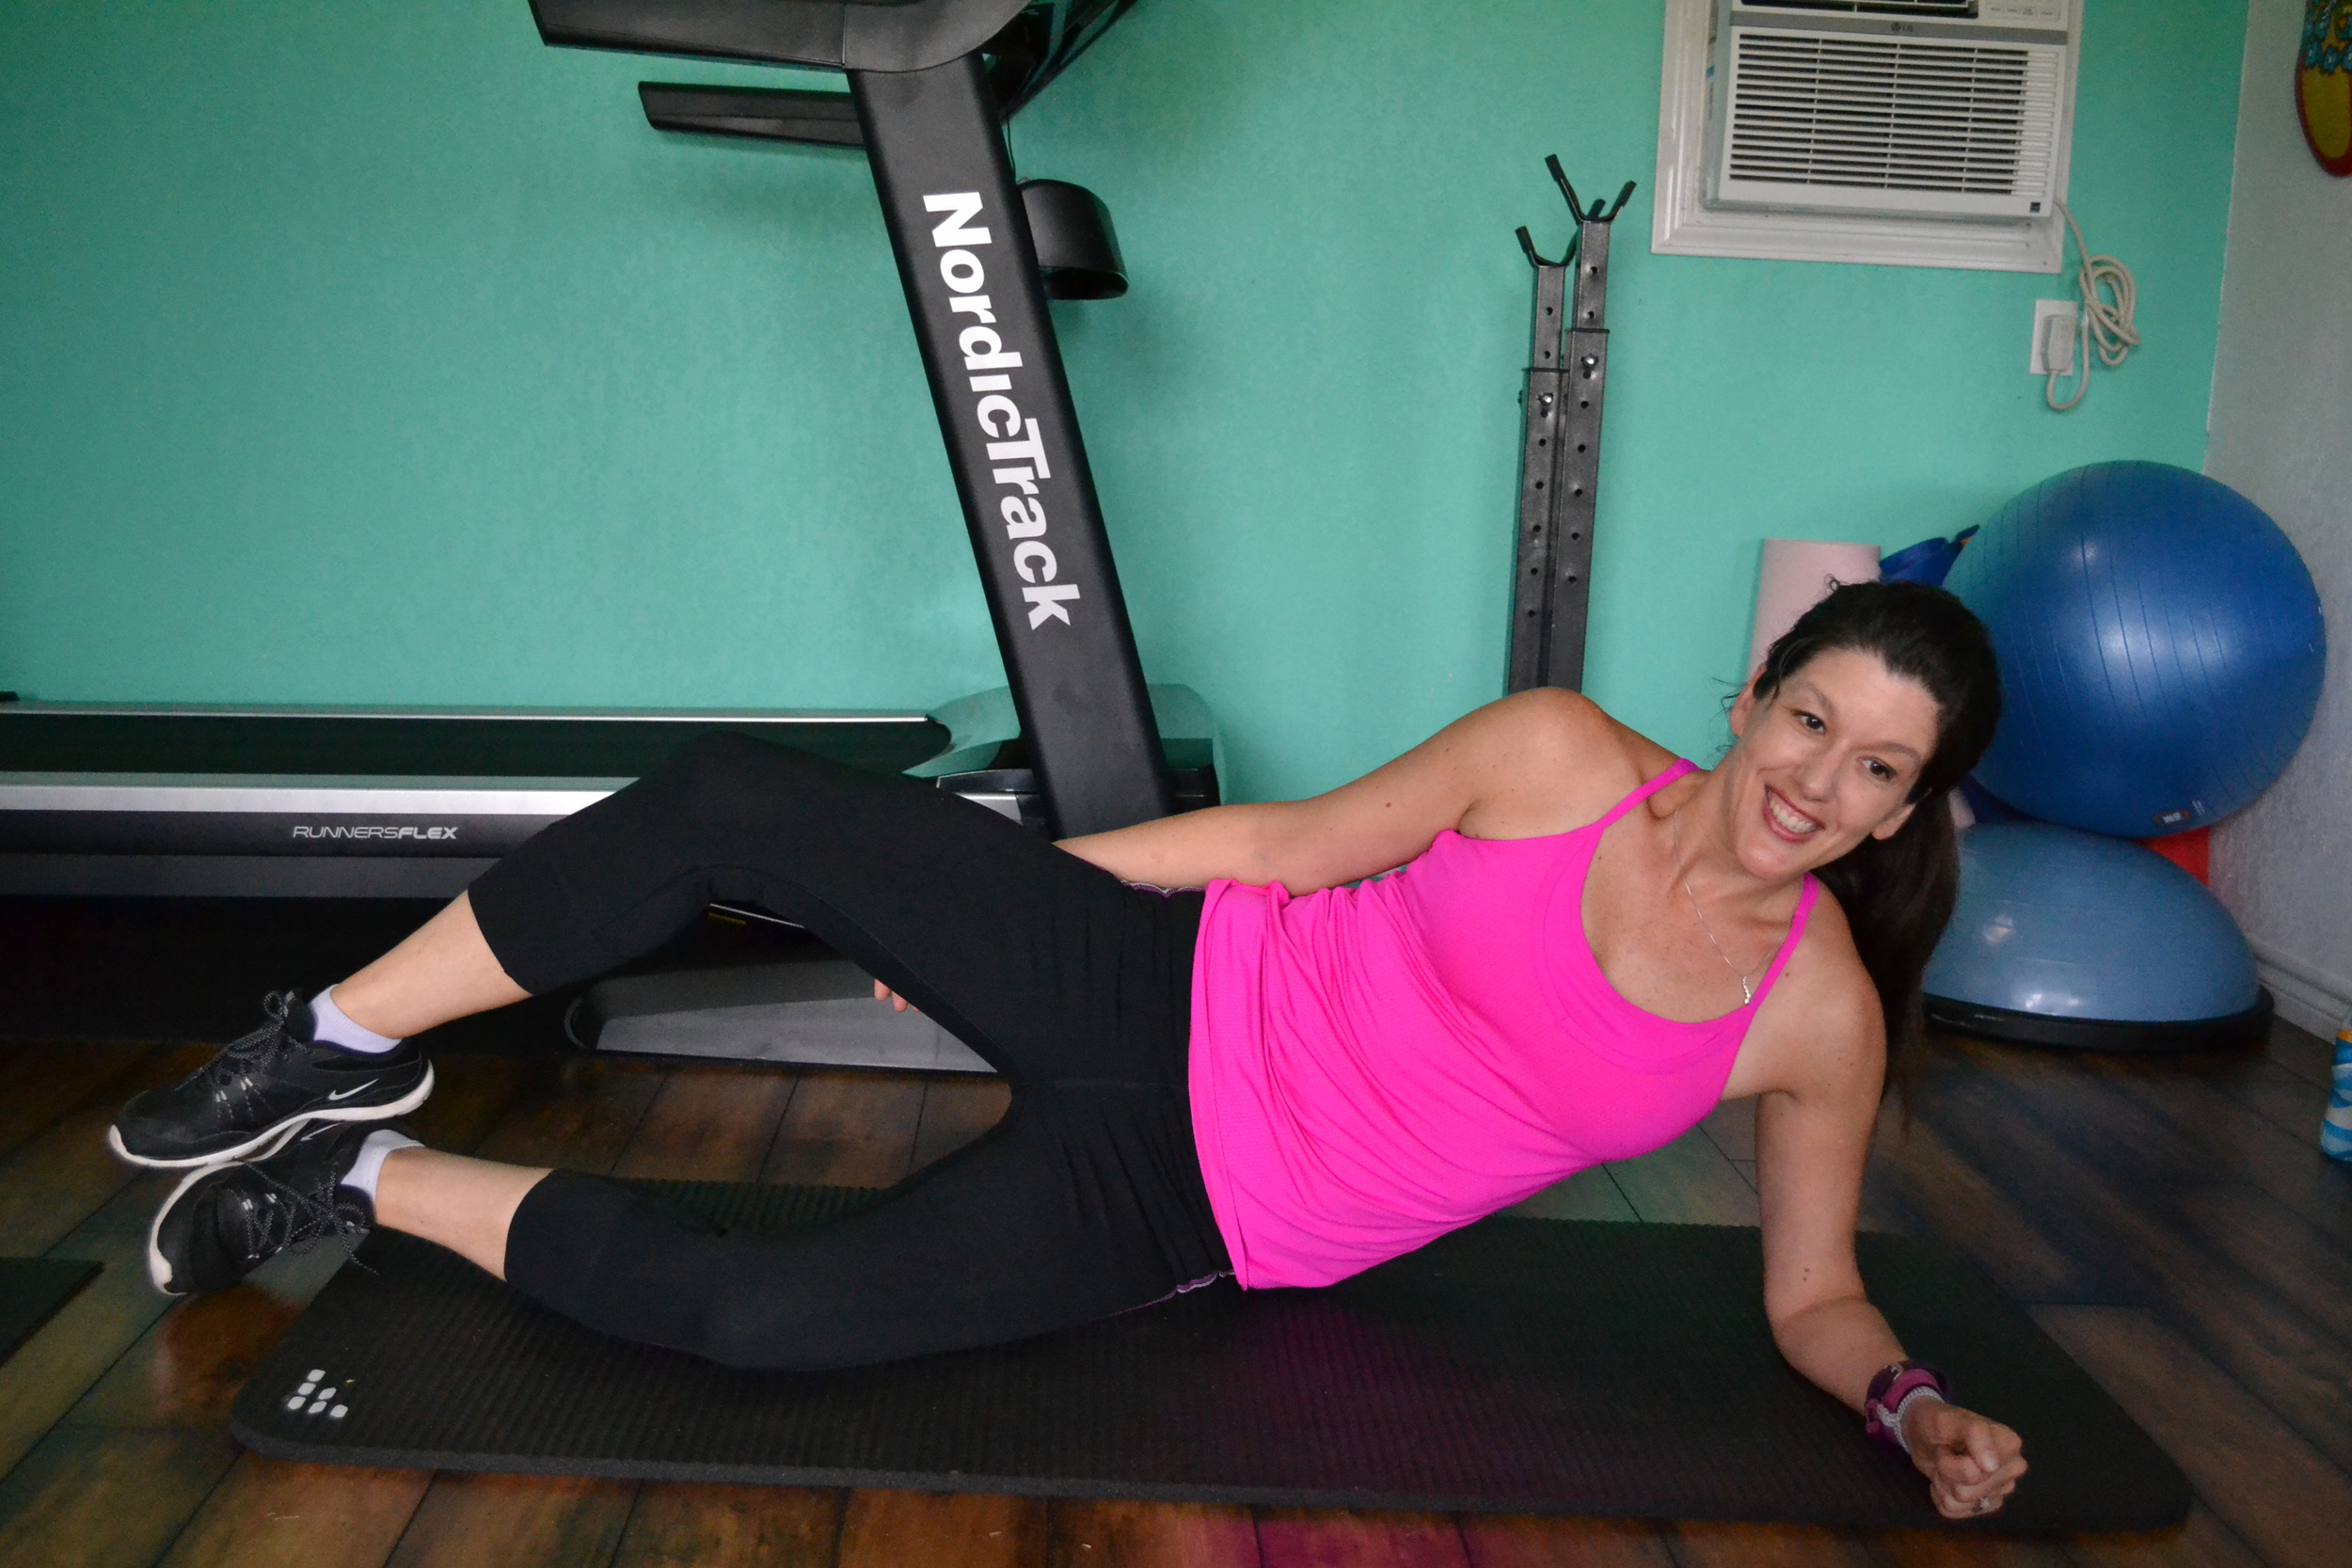
CLAMSHELLS

Lie on your side with your knees slightly bent with your legs and ankles together. You can prop yourself up on your forearm during the exercise. Open and close your knees like a clam by lifting your top knee up. Repeat on the opposite side.

Progress the exercise by adding a resistance band to your thighs.

BIRD DOG

On all fours with your wrists directly underneath your shoulders lift one arm off the floor to shoulder height while lifting the opposite leg in line with the hip. Switch arms/legs after 30 seconds. Squeeze your abs and glutes during the move while breathing normally.

Progress the exercise by extending the time in position.

HIP ABDUCTION

Lie on your side with your legs stacked on top of one another. Lift your top leg to about 45 degrees before lowering. Switch sides and repeat.

Progress the hip abduction when you're ready by advancing to the side plank hip abduction.

With a straight arm lift yourself up into a side plank position. Your shoulders should be directly over your wrists. Stack your feet and don't allow your hips to drop. Lift your top leg. Switch sides and repeat.

GLUTE BRIDGE

Lie on your back with your knees bent and lift your hips off the floor while engaging your glutes and abs. Your body should be in a straight line from your knees to your shoulders.  Lower your hips to the floor and repeat. 

Progress the exercise my lifting one leg, then alternating the leg. 

I encourage you to work these four exercises into your weekly routine to build hip strength. It is important to remember that while I am a personal trainer and running coach, I am not your personal trainer and running coach. Please get clearance from a medical professional before beginning any new exercise routine.

Any questions? 

Like this post? Please consider sharing.

'Round the World Lunges: 4 Minute Lunge Workout

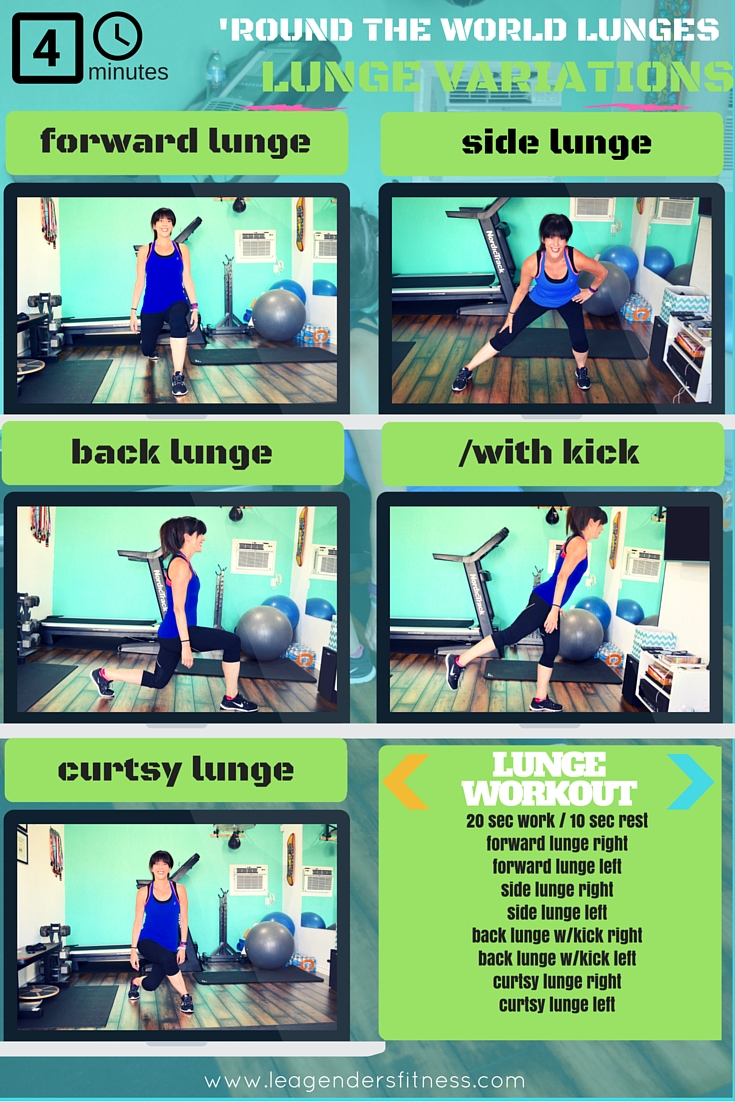
It's workout Wednesday and today we are talking lunge variations. With this 'round the world lunge workout you can hit your lunges from all angles. This workout is a great finisher after a run.

I love the lunge because it works several major muscle groups at once. It targets big muscle groups including the glutes, hamstrings and quadriceps. Your abdominal, back and calf muscles act as stabilizers during this exercise. A lunge is great for challenging balance and stability. Exercises like the lunge that work unilaterally (one leg at a time) are ideal for runners, since while we run we transfer our body weight on one leg at a time. 

This workout is structured Tabata-style, that means that you do 20 seconds of reps followed by 10 seconds of rest for 8 rounds, which equals four minutes. It is a great workout for people (I'm looking at you runners) who do not have a lot of time to get in their strength training. You could go for a run and finish it with this great four minute lunge circuit (or repeat 3 times with a one minute rest between rounds for a total of 15 minutes). Change up the exercises after each run and sneak in a full body workout each week at only four minutes at a time. 

Round the World Lunges

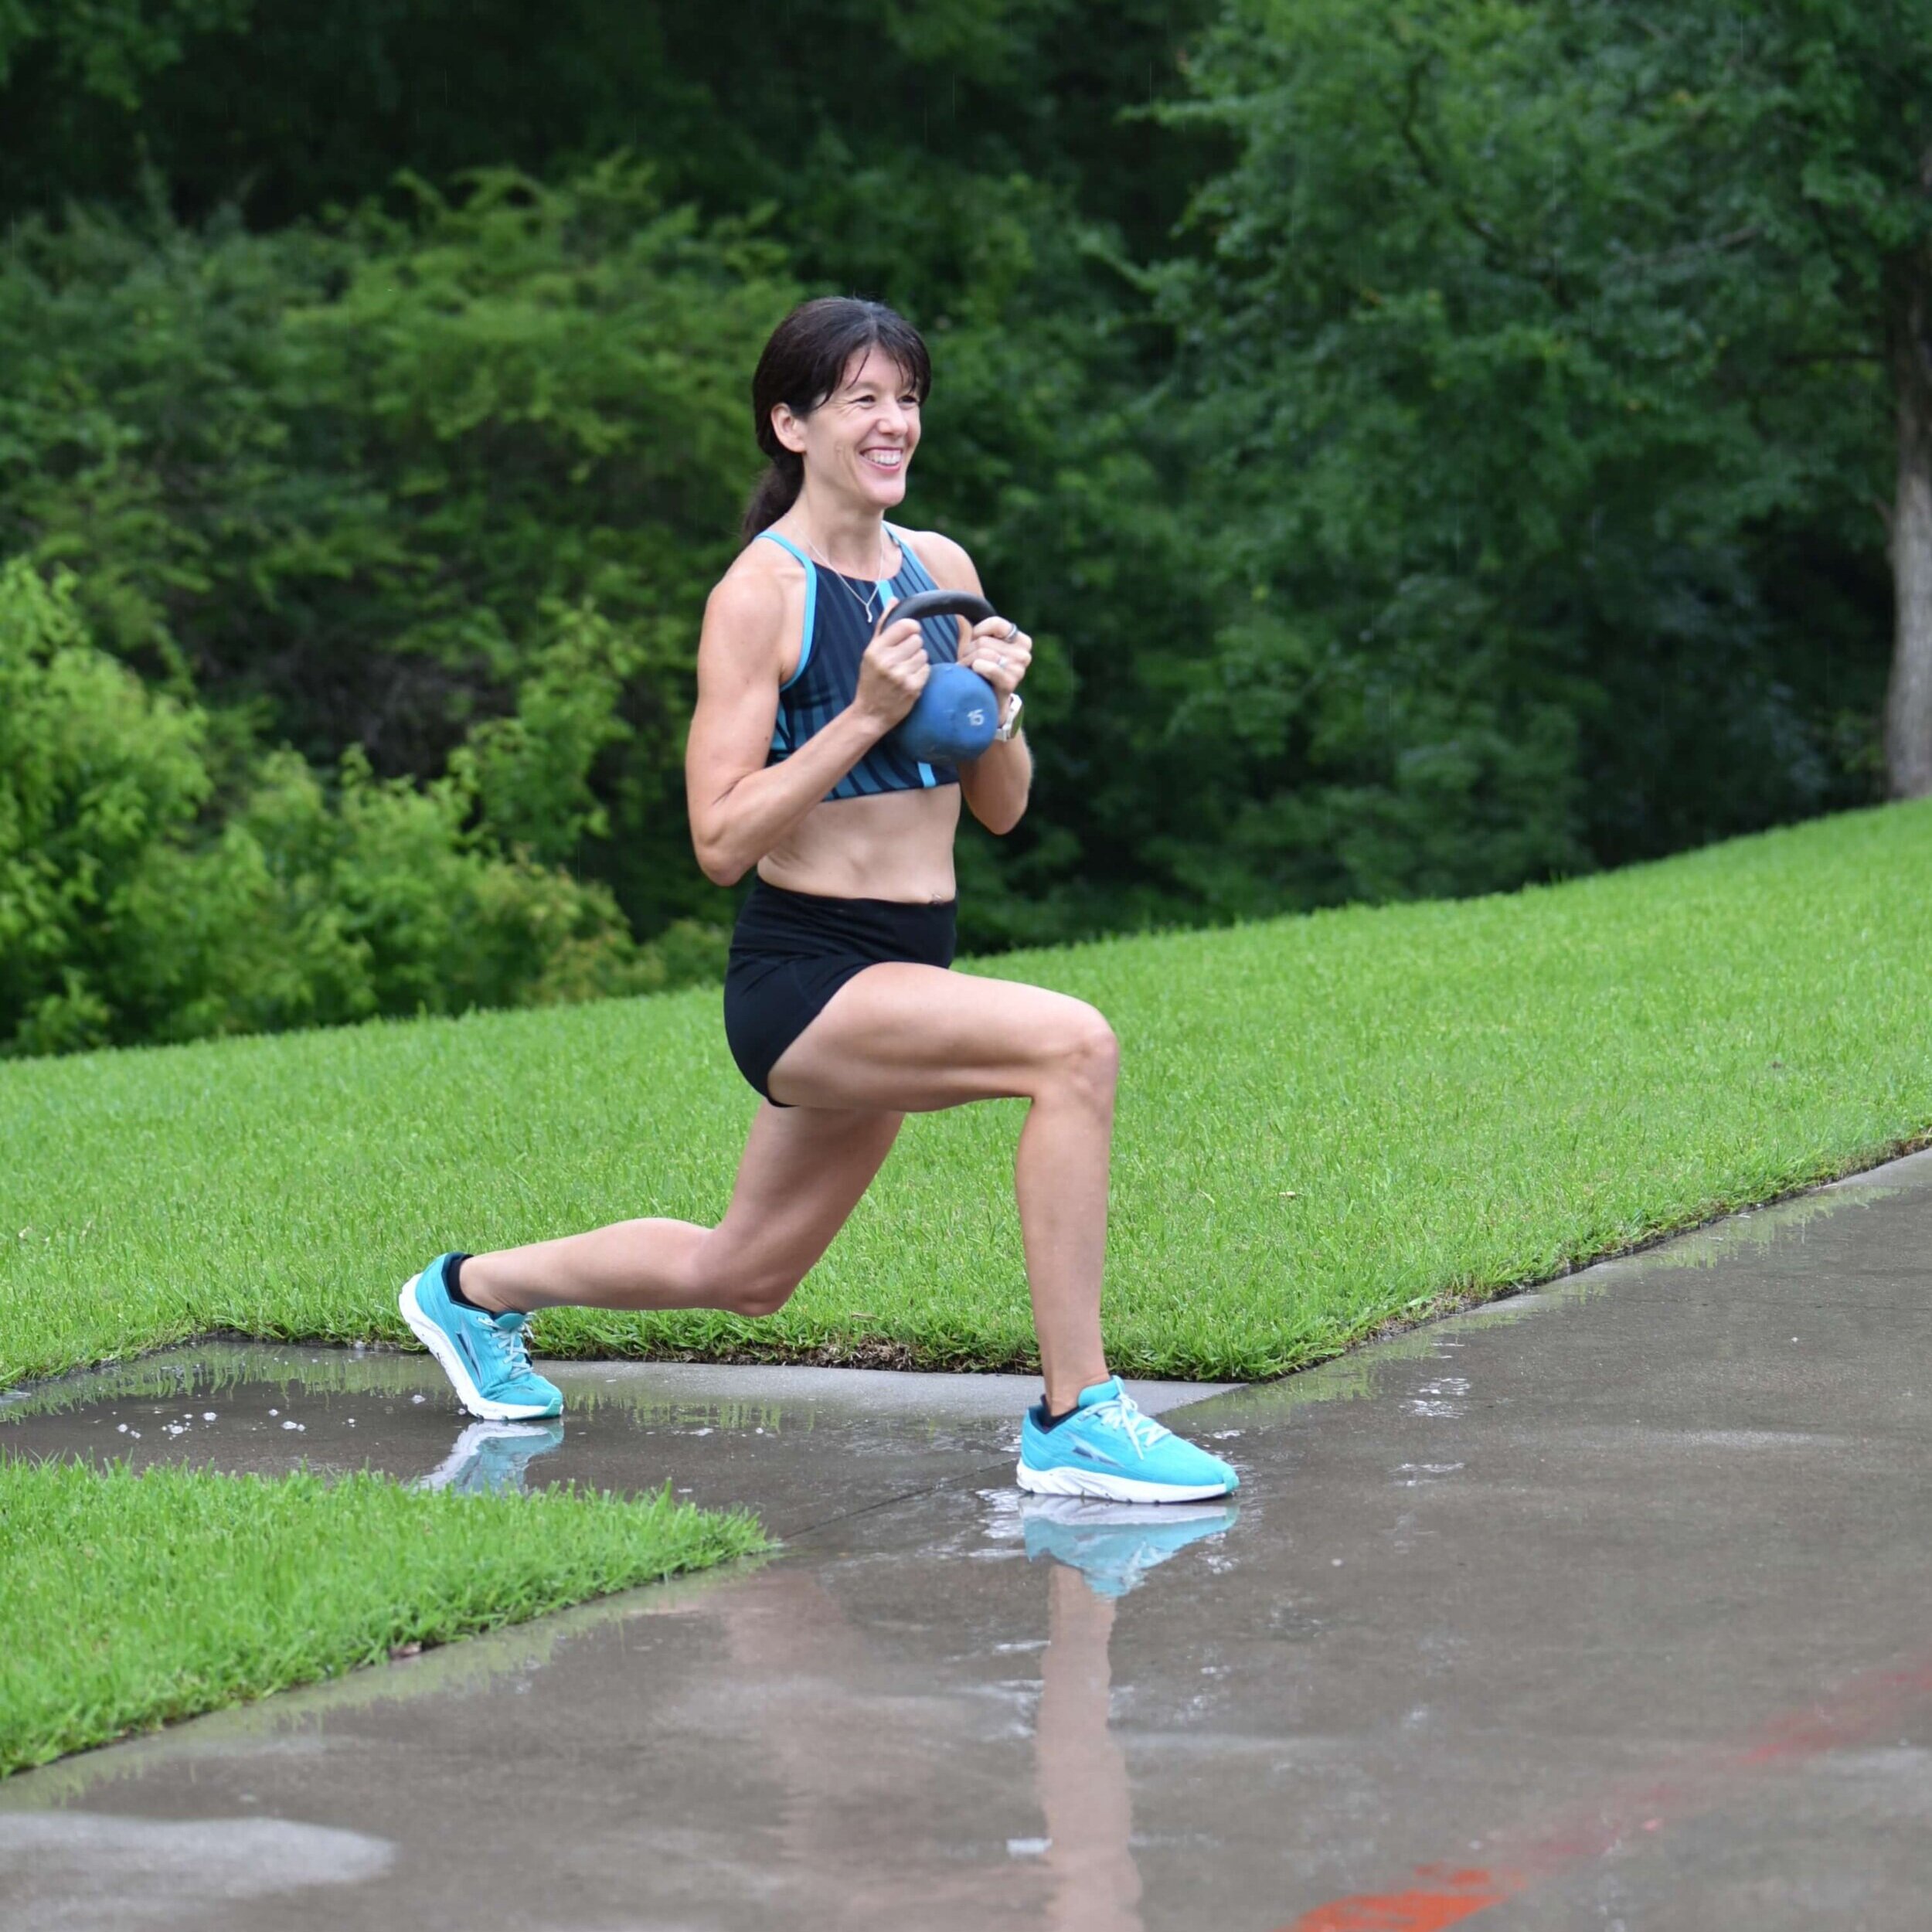
FORWARD LUNGE

With your feet hip width apart and your toes pointed straight ahead, engage your core and keep your back straight. Take one large step with your right leg to lunge forward until your front knee is lined up over your ankle and your back knee is nearly touching the floor. Do not allow your knee to move forward over your toes. Resist the urge to lean forward or rest your arms on your thighs. Once you are in the lunge position push back up to starting position. Repeat for 20 seconds on the right leg, rest for 10 seconds, then repeat on the left leg for 20 seconds. 

SIDE LUNGE

With both toes pointing forward, push your hips back and take a large step to your right and bend your right knee into a side lunge position and straighten your left leg. Do not allow your knees to move forward past your toes. Lower your hips as low as your flexibility will allow. Push back to starting position and repeat on the right side for 20 seconds before resting for 10 seconds, then moving onto the left side. 

BACK LUNGE

With your feet hip width apart and your toes pointing straight ahead, take a large step backward with your right leg, so your right knee almost touches the floor and your left leg lunges at a 90 degree angle. Do not allow your left knee to move forward past your toe. Push back up to starting position. Once in starting position, kick your right leg straight out behind you. Repeat for 20 seconds, rest for 10 seconds, then change sides.

kick your leg straight out behind you once you return to the starting position.

kick your leg straight out behind you once you return to the starting position.


CURTSY LUNGE

Stand with your feet hip apart. Cross your right leg behind the body and to the left. Bend left knee 90 degrees, or as low your flexibility will allow, toes pointing forward, then return to starting position. Repeat for 20 seconds on one side. Rest for 10 seconds before moving on to the other side.

Give it a try and let me know how it goes. Stay tuned for more workouts that you add to the end of your run. 

It is important to remember that while I am a personal trainer, I am not your personal trainer that knows your medical background and exercise abilities. Please consult a medical professional before beginning any new exercise program. 

Like this article? Please consider sharing.

FULL BODY STABILITY BALL CIRCUIT WORKOUT

I love the stability ball. Even though most people associate the stability ball with ab exercises, it is an extremely versatile piece of exercise equipment that can be used to strengthen the entire body while challenging your balance and core stability. 

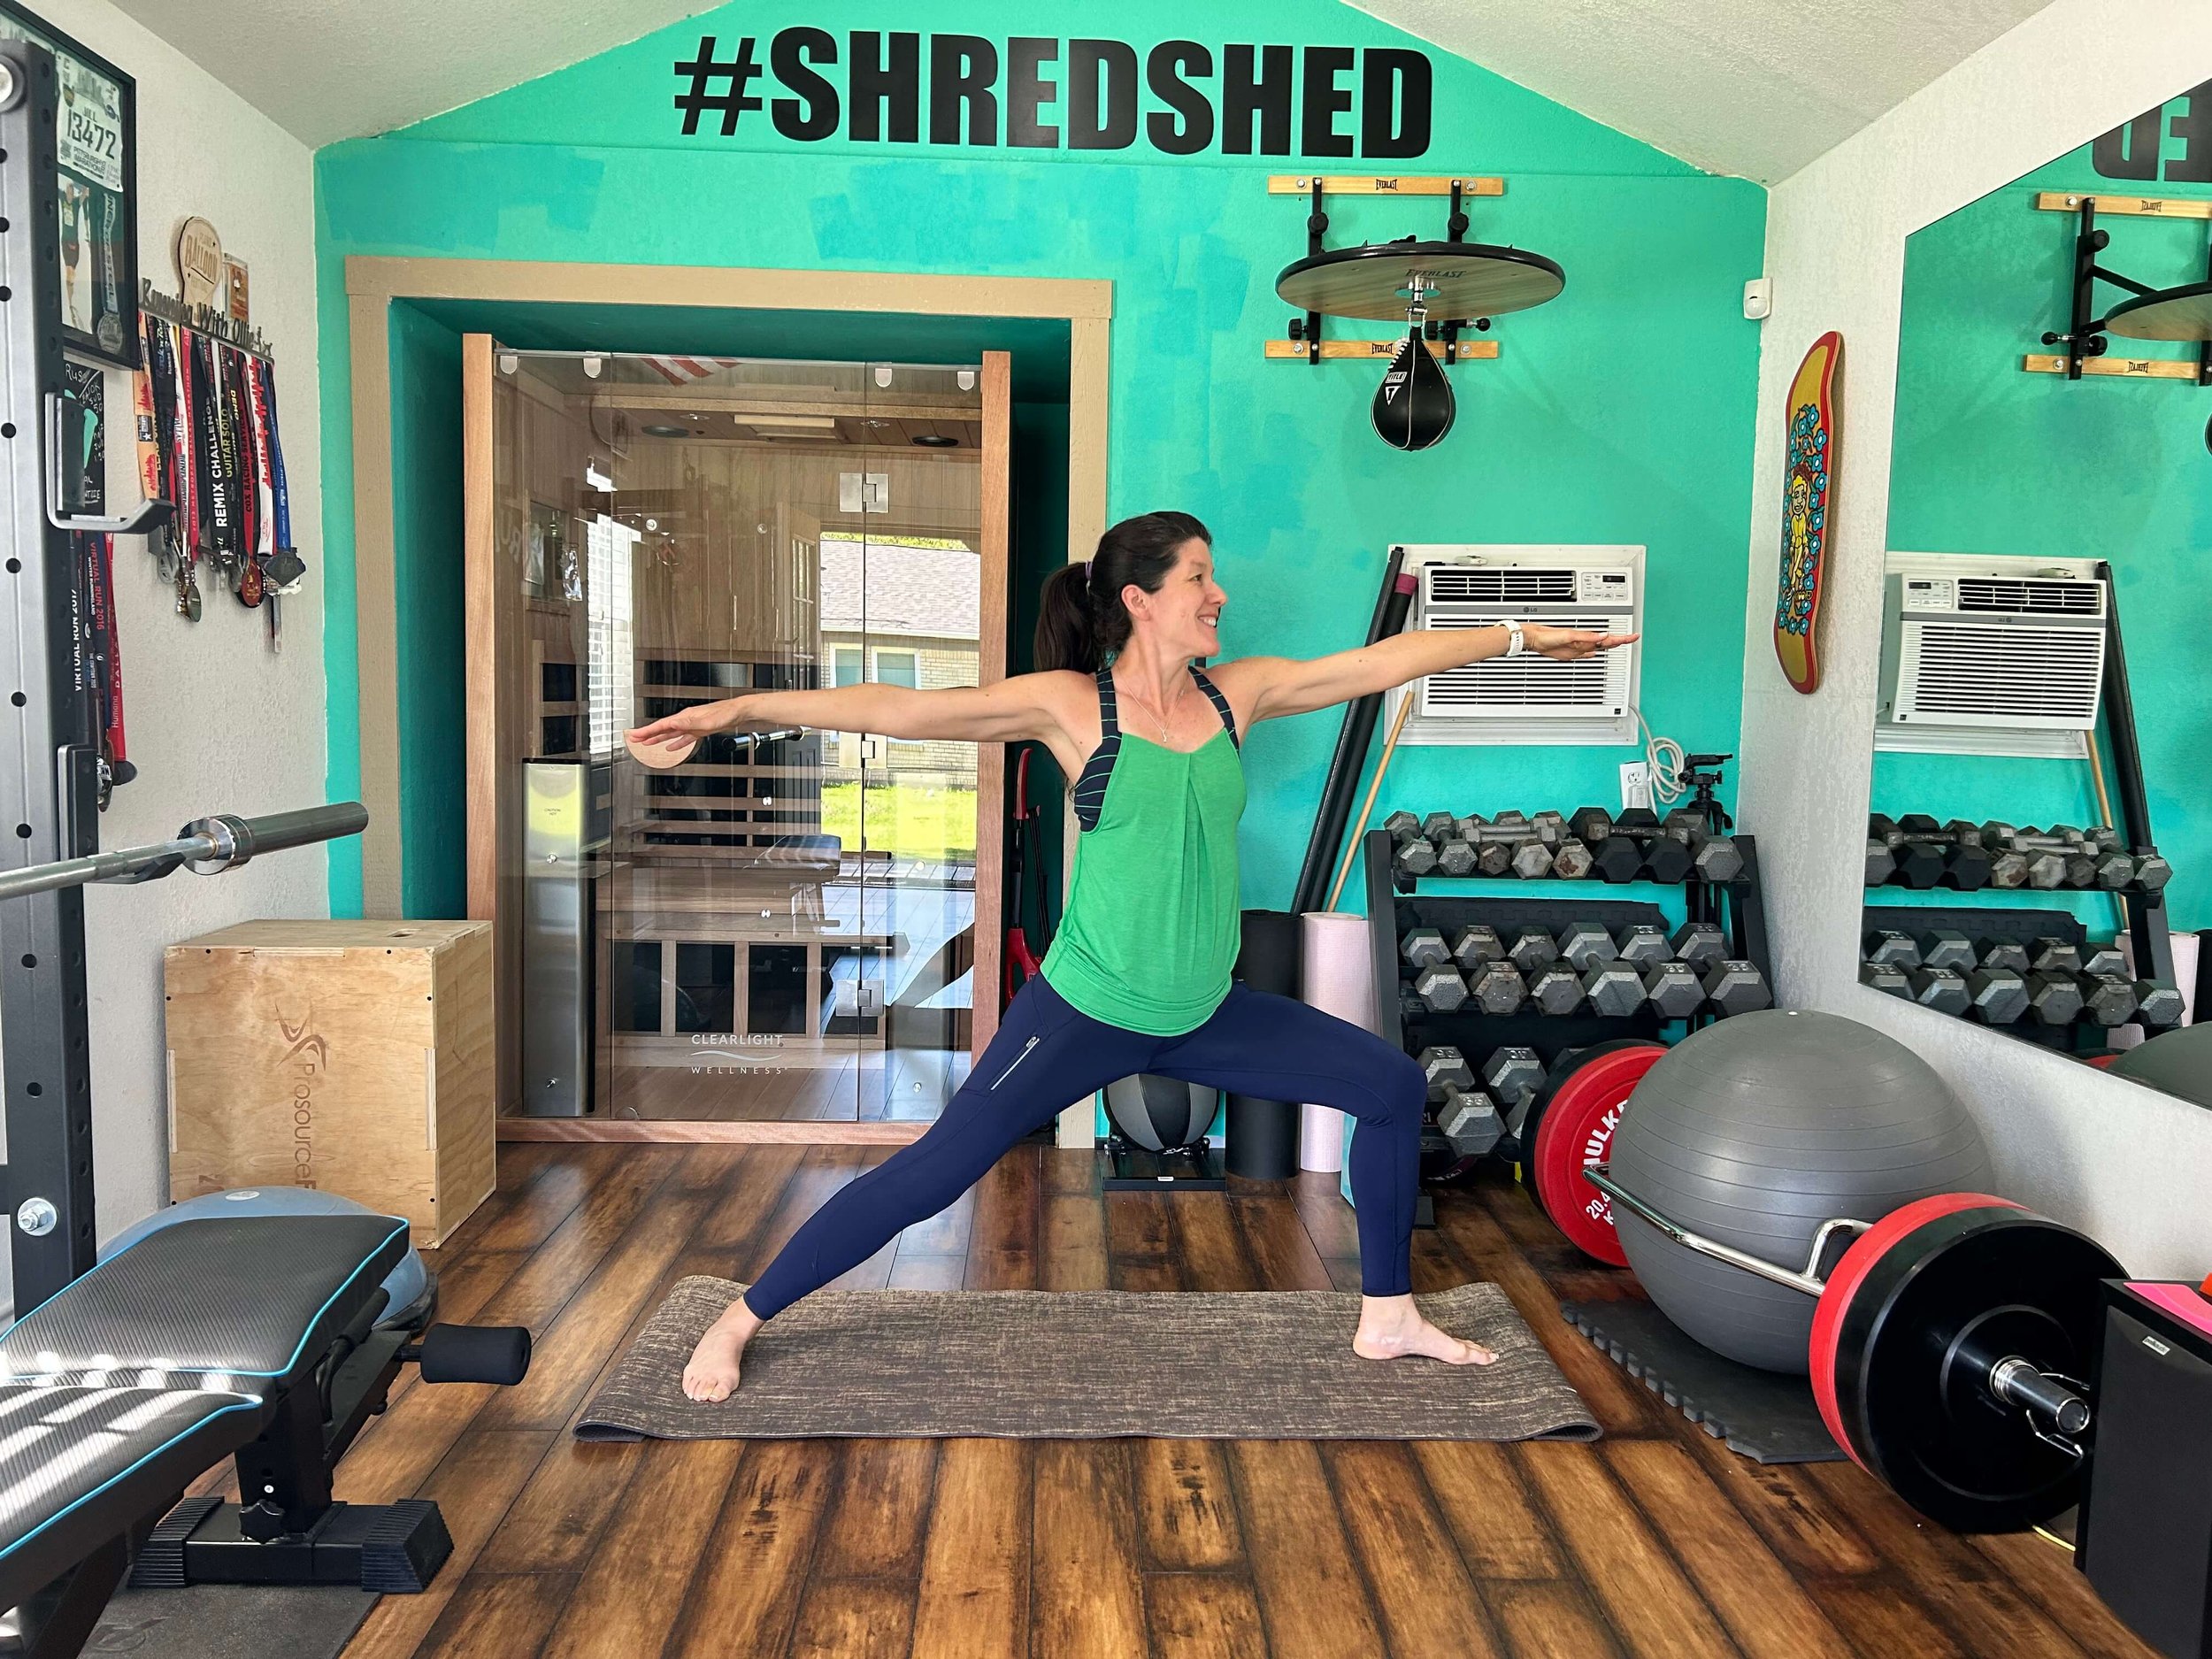
Stability ball training in the Shredshed

Stability ball training in the Shredshed

If you were to build a house you would start with the foundation. Before you start lifting heavy weights, it is best to build a strong foundation by working on balance and stabilization first. The stability ball will challenge your proprioception and help strengthen your stabilization muscles and joints by providing an unstable (but controllable) base. 

Some of the benefits of balance and stabilization training are enhanced joint stability, increased flexibility, improved posture control, improved balance, stabilization, and coordination.

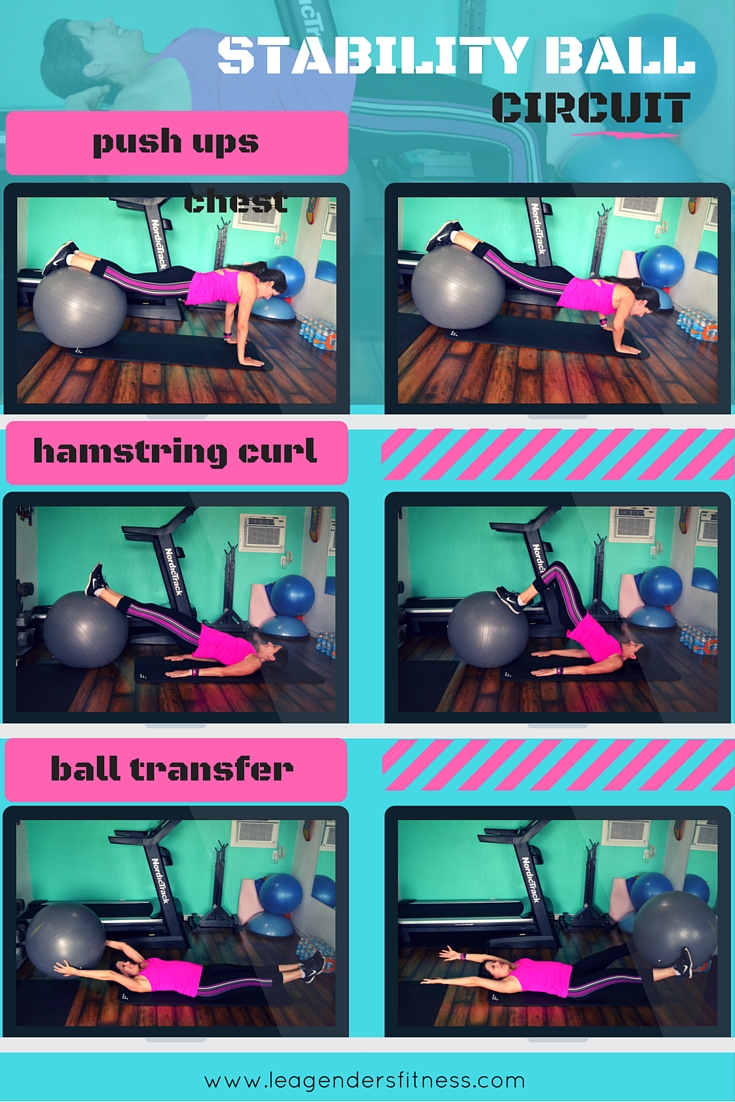
Full body stability ball circuit #1

Full body stability ball circuit #1

Perform each exercise for 12-15 reps before moving on to the next exercise with little or no rest. Repeat the circuit three times, resting for up to one minute between circuits.

Stability Ball Push-ups

Position the stability ball under your thighs and walk your hands out until you come into a high plank position with your shoulders directly over your hands and the ball under your shins. Bend your elbows to lower yourself down to perform a push-up. Repeat for 12-15 repetitions.

Hamstring Curls

Lie on your back and position the stability ball under your calves. Engage your abs and squeeze your glutes as you lift your hips off the ground into the starting position. Bend your knees and lift your hips to curl the ball towards your body using your hamstrings. Straighten your legs back out and repeat 12-15 repetitions without lowering your hips to the ground.

Stability Ball Transfer 

Start by lying on your back with your arms and legs both fully extended hovering off the ground. Place the ball between your feet, extend your arms overhead and slightly raise your shoulders off the mat into a crunch.

Using your lower abs, lift the ball to the center. At the top, pass the ball into your hands. Lower your legs and lower your arms holding the ball overhead, so that the ball hovers over the floor, but doesn't touch. Crunch back up to pass the ball back to the legs to complete one full repetition. Complete 8-12 reps (or as many as you can complete, this is challenging!).

Once you complete three rounds of the first circuit, grab a quick water break and move on to the next circuit.

Stability Ball Circuit #2

Stability Ball Circuit #2

Perform each exercise for 12-15 reps before moving on to the next exercise with little or no rest. Repeat the circuit three times, resting for up to one minute between circuits.

Ball Squats

Place the ball against a wall and position the ball in the small of your back. With your feet slightly wider than hip width, walk your feet forward. Lower yourself into a squat until your thighs are parallel to the floor, or as lower as your flexibility will allow. Be careful not to lean back into the ball, but to use it as a guide to lower yourself. Once in the low position, press through the heels, engage the glutes to push back up to standing. Repeat for 12-15 reps.

Ball Tucks

Position the stability ball under your thighs and walk your hands out until you come into a high plank position with your shoulders directly over your hands and the ball under your shins. Using your lower abs, pull your knees in towards your chest. Extend your legs back straight, engage your core and make sure not to lower the hips between reps. Repeat for 12-15 repetitions.

Ball Crunch

Position the stability ball under the small of your back. Place your hands behind your head (do not pull) and lift your shoulders and chest up into a crunch. Hold for 3 seconds in top position while engaging your entire core. Slowly lower down, slightly extending back over the ball. Repeat for 12-15 repetitions.

It's important to remember that while I am a personal trainer, I am not your personal trainer. Please consult with a medical professional before beginning a new workout program. 

Do you own a stability ball? I'd love if you would give my circuits a try and let me know what you think!

Like this post? Please consider sharing. 


Workout Wednesday: Speed and Strength Track Workout for Runners

As a running coach and a personal trainer I understand that it can be challenging for runners to find the time to do their (needed!) strength training. You want to run more in order to improve in running. You're afraid if you do lower body strength training that you'll be sore and it will hurt your future runs. Not to mention, when do you find the time to squeeze it all in?
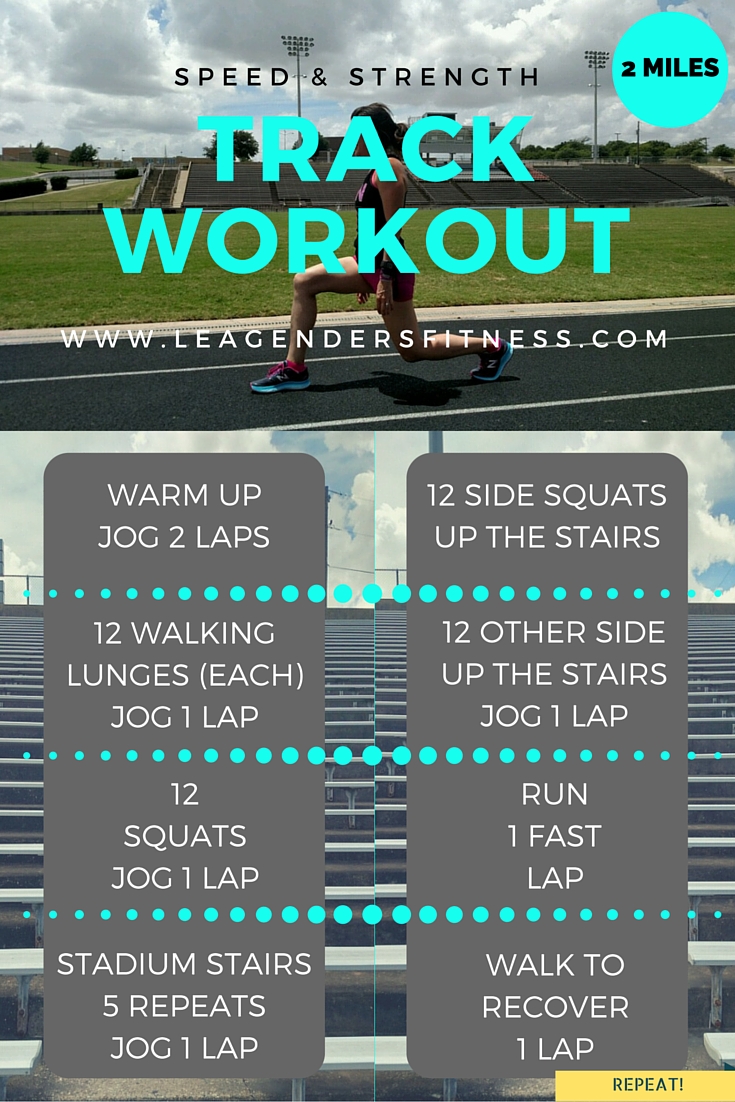
I developed this track speed and strength interval workout so that you can do your running workout and leg strength workout on the same day! It should about an hour to complete and you'll be stronger for it. It may make you temporarily sore, especially if you are not used to strength training, but in the long run you'll be stronger, faster and less prone to injury. What's not to love about that? 

Speed and Strength Track Workout

Warm up by jogging two times around the track, which is 800 meters or a 1/2 mile. 

WALKING LUNGES

Perform 12 walking lunges on each leg on the straight of the track. Be sure if there are other people or runners on the track that you yield to them and always stay on the farthest inside lane (aka out of the way). Once you complete 12 walking lunges on each leg jog the rest of the way around the track at a conversational pace. 

With your feet hip width apart and your toes pointed straight ahead, hold your core stable and your back straight. Take one large step to lunge forward until your front knee is lined up over your ankle and your back knee is nearly touching the track. Do not allow your knee to go forward past your toes. Once you are in the lunge position push back up to standing with your back leg. Repeat with other leg. While in the low position resist the urge to lean forward or rest your arms on your thighs.

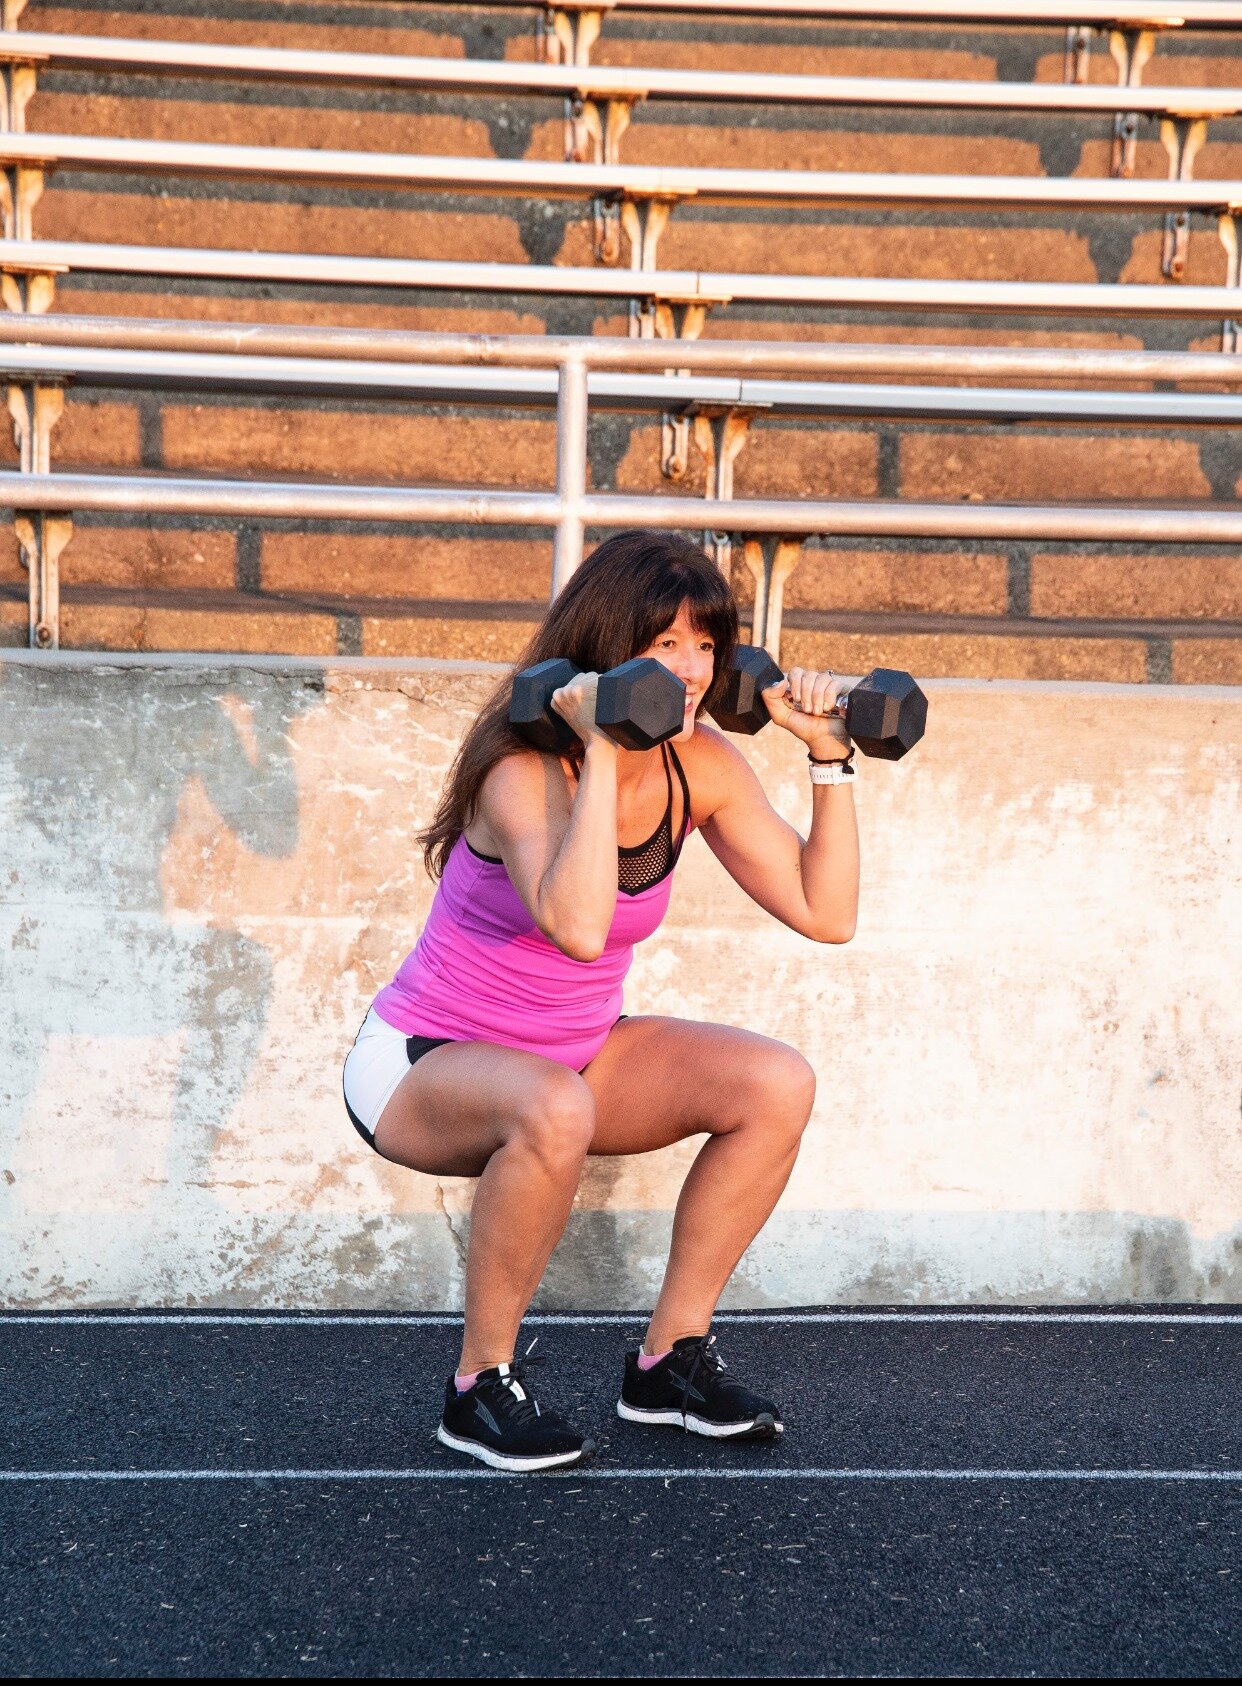
SQUATS

Perform 12 squats and then jog the rest of the way around the track at a conversational pace.

Starting with your feet hip width apart push your hips back and then lower  your body by bending your knees until your thighs are parallel to the floor or as low as your flexibility will allow. In the low position, engage your core, squeeze your glutes and push up to standing. 

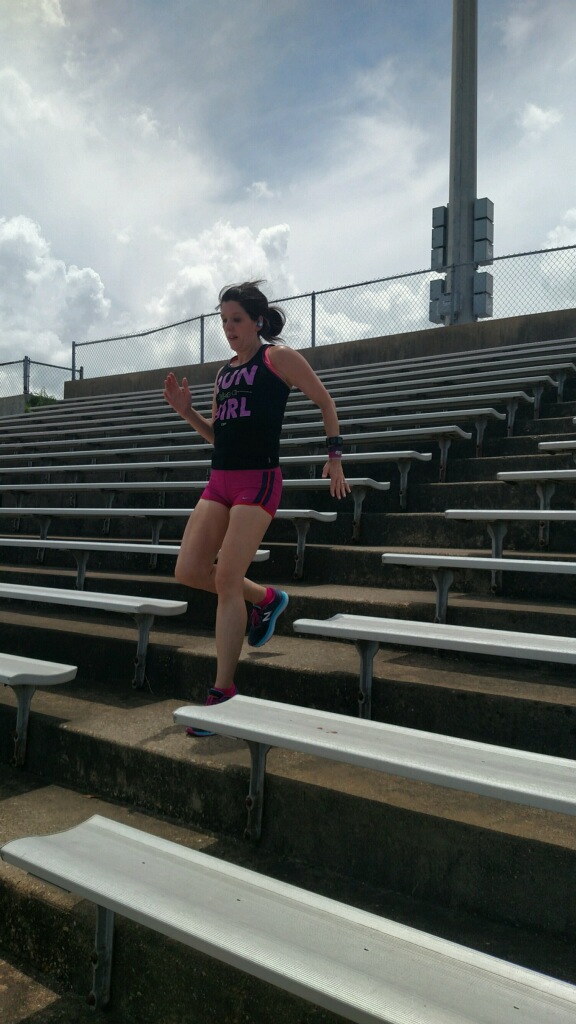
STAIR REPEATS

Run up and jog or walk down the stadium stairs. Run up the stairs as quickly as you can, swinging your arms as you go. Repeat five times, then jog one time around the track. 

SIDE SQUAT UP STAIRS

Side squat up 12-15 steps. Face the other direction to work the other leg and side squat 12-15 steps. Jog or walk back down the stairs and jog one time around the track.

Stand sideways on the bottom step. With your back straight, push your hips back and bend your knees to lower into a squat position. Using your leading leg, step up to the next highest stair. Follow with your back leg. Try to stay in the low position as you work up in 12-15 steps. 

Face the other direction to work the other leg and repeat on other side for 12-15 steps.

RUN!

Run fast for one lap around the track. You should be working hard and breathing heavily for this lap. You get to rest after this, so give it all you have!

Walk one lap around the track to recover.

That's 1.25 miles work + your warm up and cool down = 2 miles. Beginners, you're done! Good job. 

Intermediate to advanced runners: Rest and repeat 1 or two more times or until an hour is up.

It is important to remember that while I am running coach and personal trainer, I am not your running coach and personal trainer. Please speak to your doctor before beginning any new exercise program and/or work with a fitness professional who knows your unique abilities and goals. 

I'd love if you would give this speed and strength track workout a try and let me know what you think!

Like this post? Please consider sharing.