WORKOUTS

30 MINUTE TABATA-STYLE FAT BLASTER WORKOUT (GREAT FOR RUNNERS)

Hi, Friends. Welcome to the latest edition of Workout Wednesday. This week I put together a workout that is great for runners who want to squeeze in some strength training but don't have a lot of time. This is a perfect workout for after your run on an easy day (less than 30 minutes) or on a non-running day. It only takes 30 minutes, doesn't require any equipment and is a full body workout. This workout will benefit runners by improving running performance and overall athleticism. Strength training goes a long way in injury prevention for runners by strengthening the muscles surrounding the joints and strengthening the muscles that are not worked during running to help prevent muscle weaknesses and imbalances. Ready to get started?

WHAT YOU'LL NEED

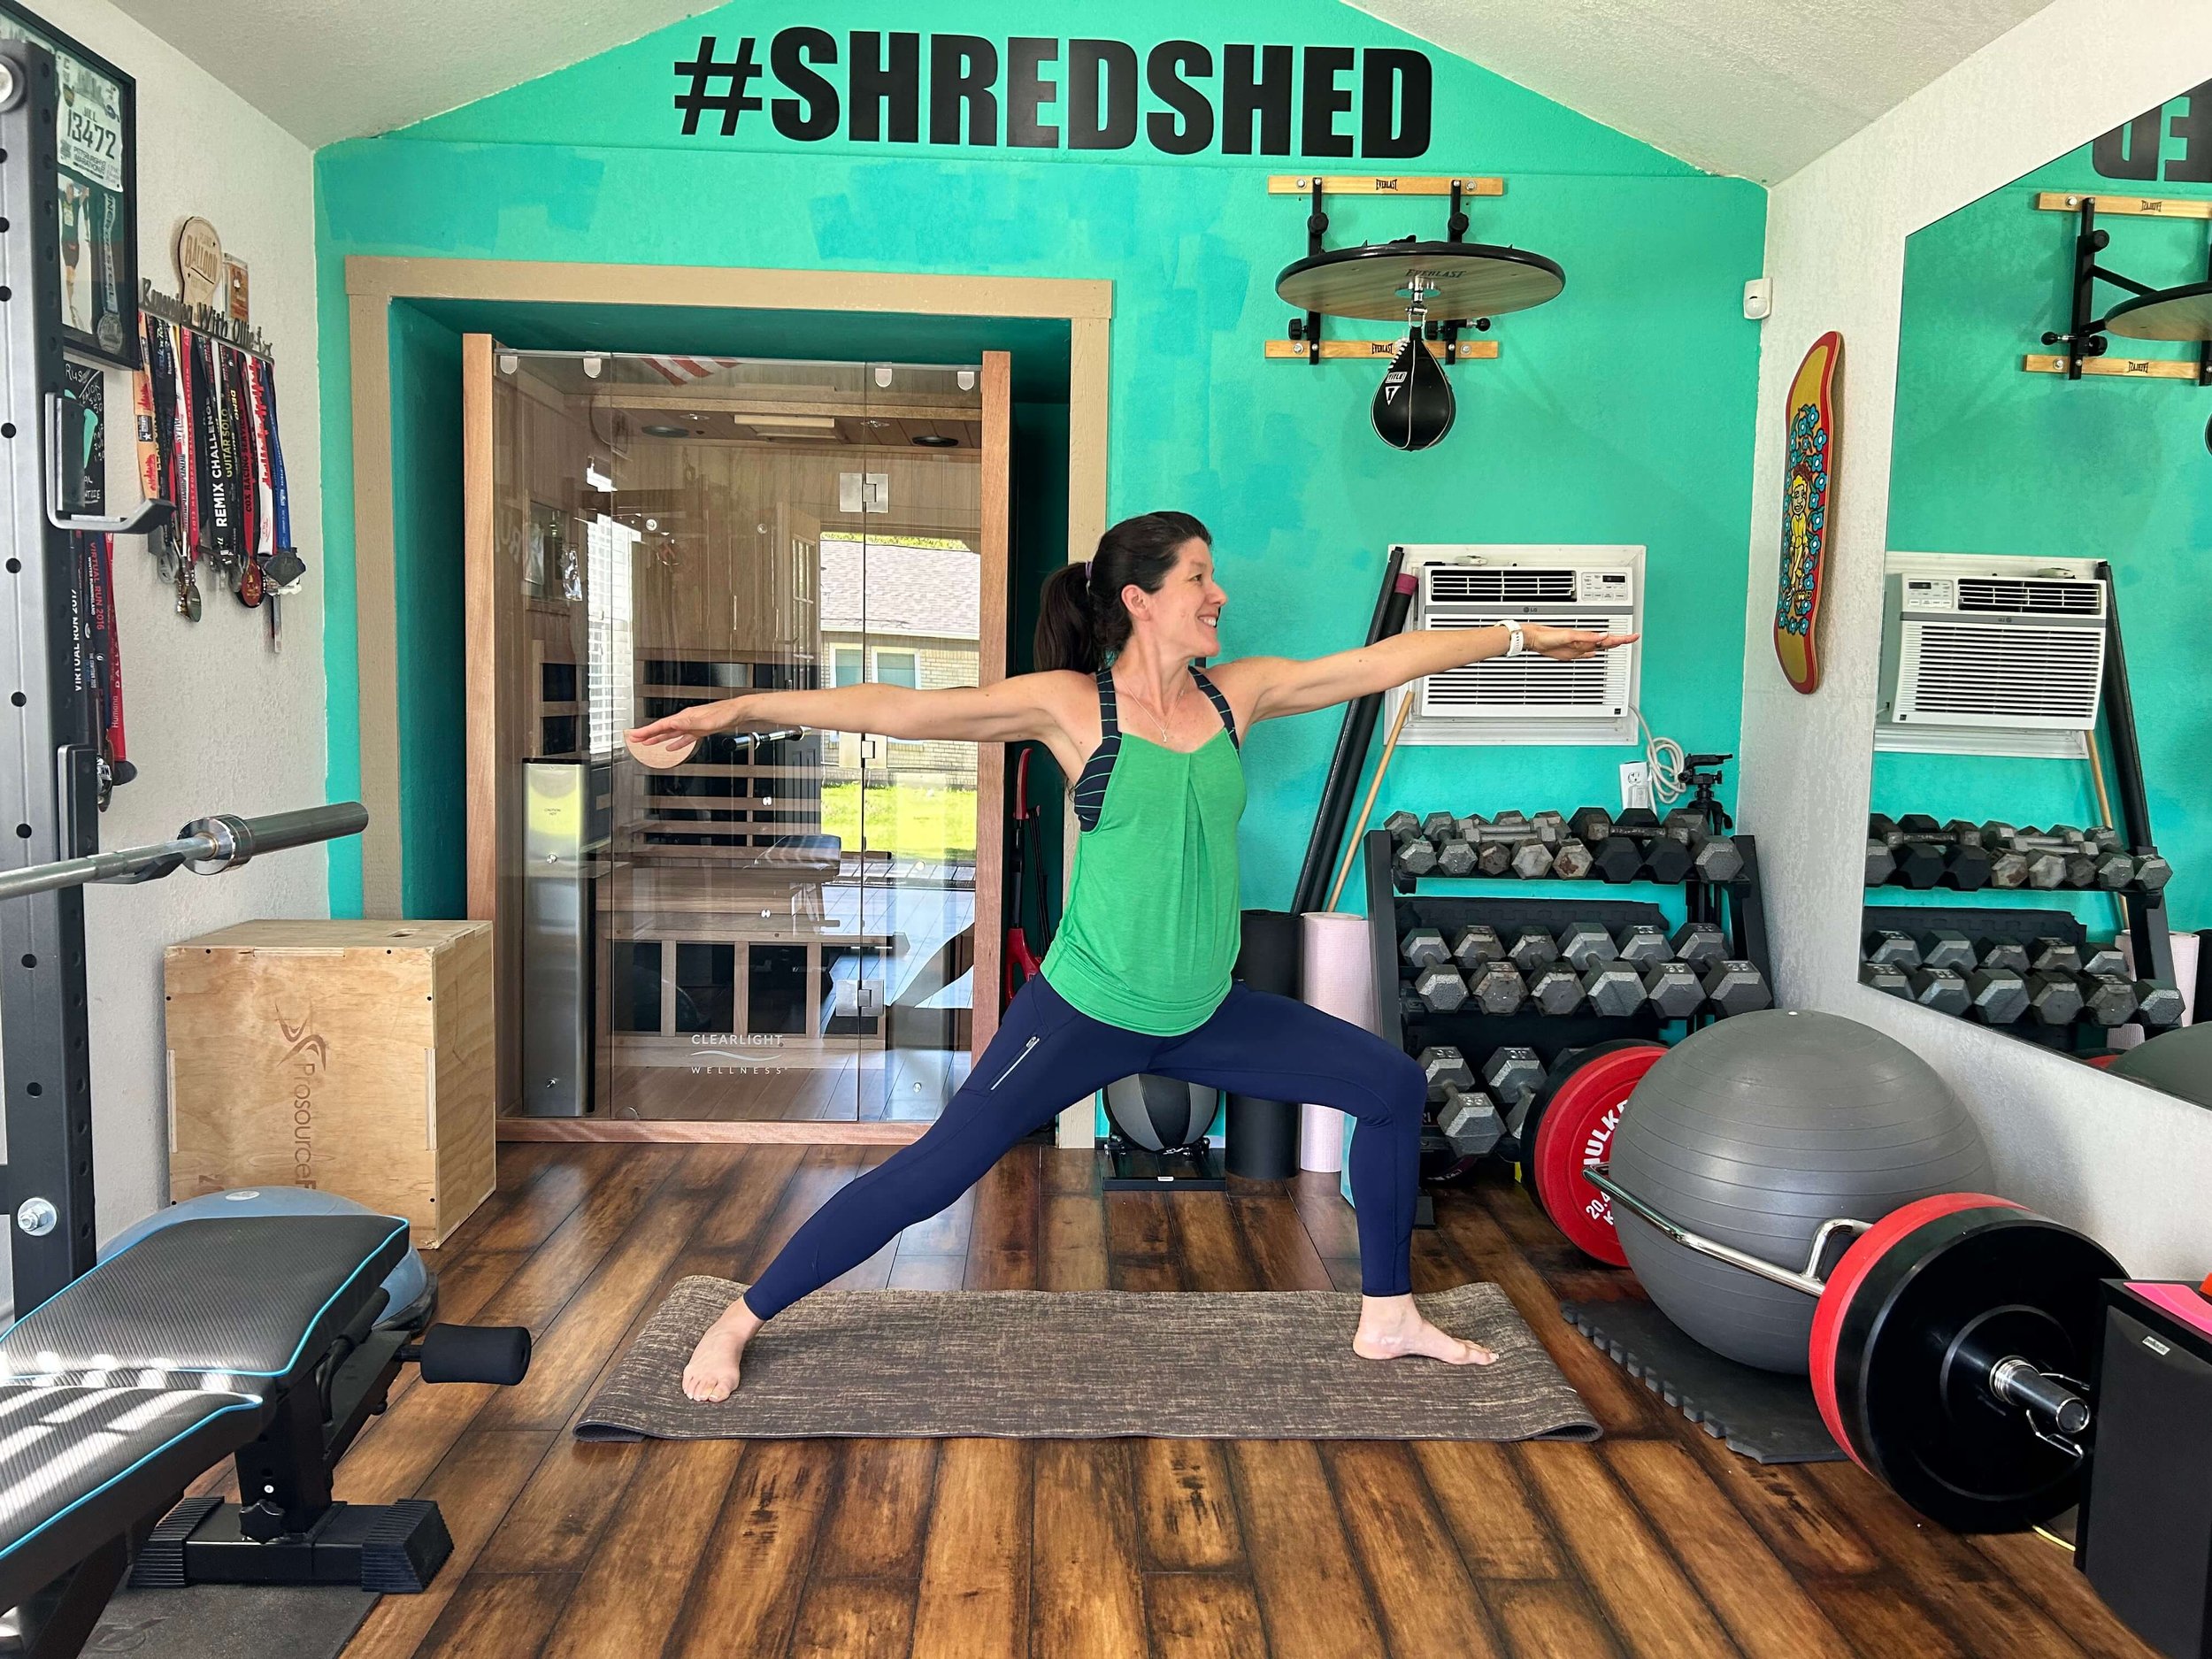
You will need a Tabata timer. You can download free timers in the app store or play store. There are plenty of free options if you don't mind the ads. I use a GymBoss Timer (<--affiliate link) in the #shredshed and at my bootcamps

TABATA: HOW IT WORKS

Tabata is one of my favorite workout formats because it is quick and effective. The idea is to workout as hard as possible (high intensity) for 20 seconds, rest for 10 seconds and repeat for four minutes. 

In this circuit we are combining a strength exercise with a cardio exercise. In each round you will perform:

EXERCISE 1: 20 SECONDS

REST: 10 SECONDS

EXERCISE 2: 20 SECONDS

REST: 10 SECONDS

EXERCISE 1: 20 SECONDS

REST: 10 SECONDS

And so on...for four minutes.

Rest for one minute between rounds. Please always warm up before your workout and cool down/stretch afterwards.

THE EXERCISES

ROUND 1

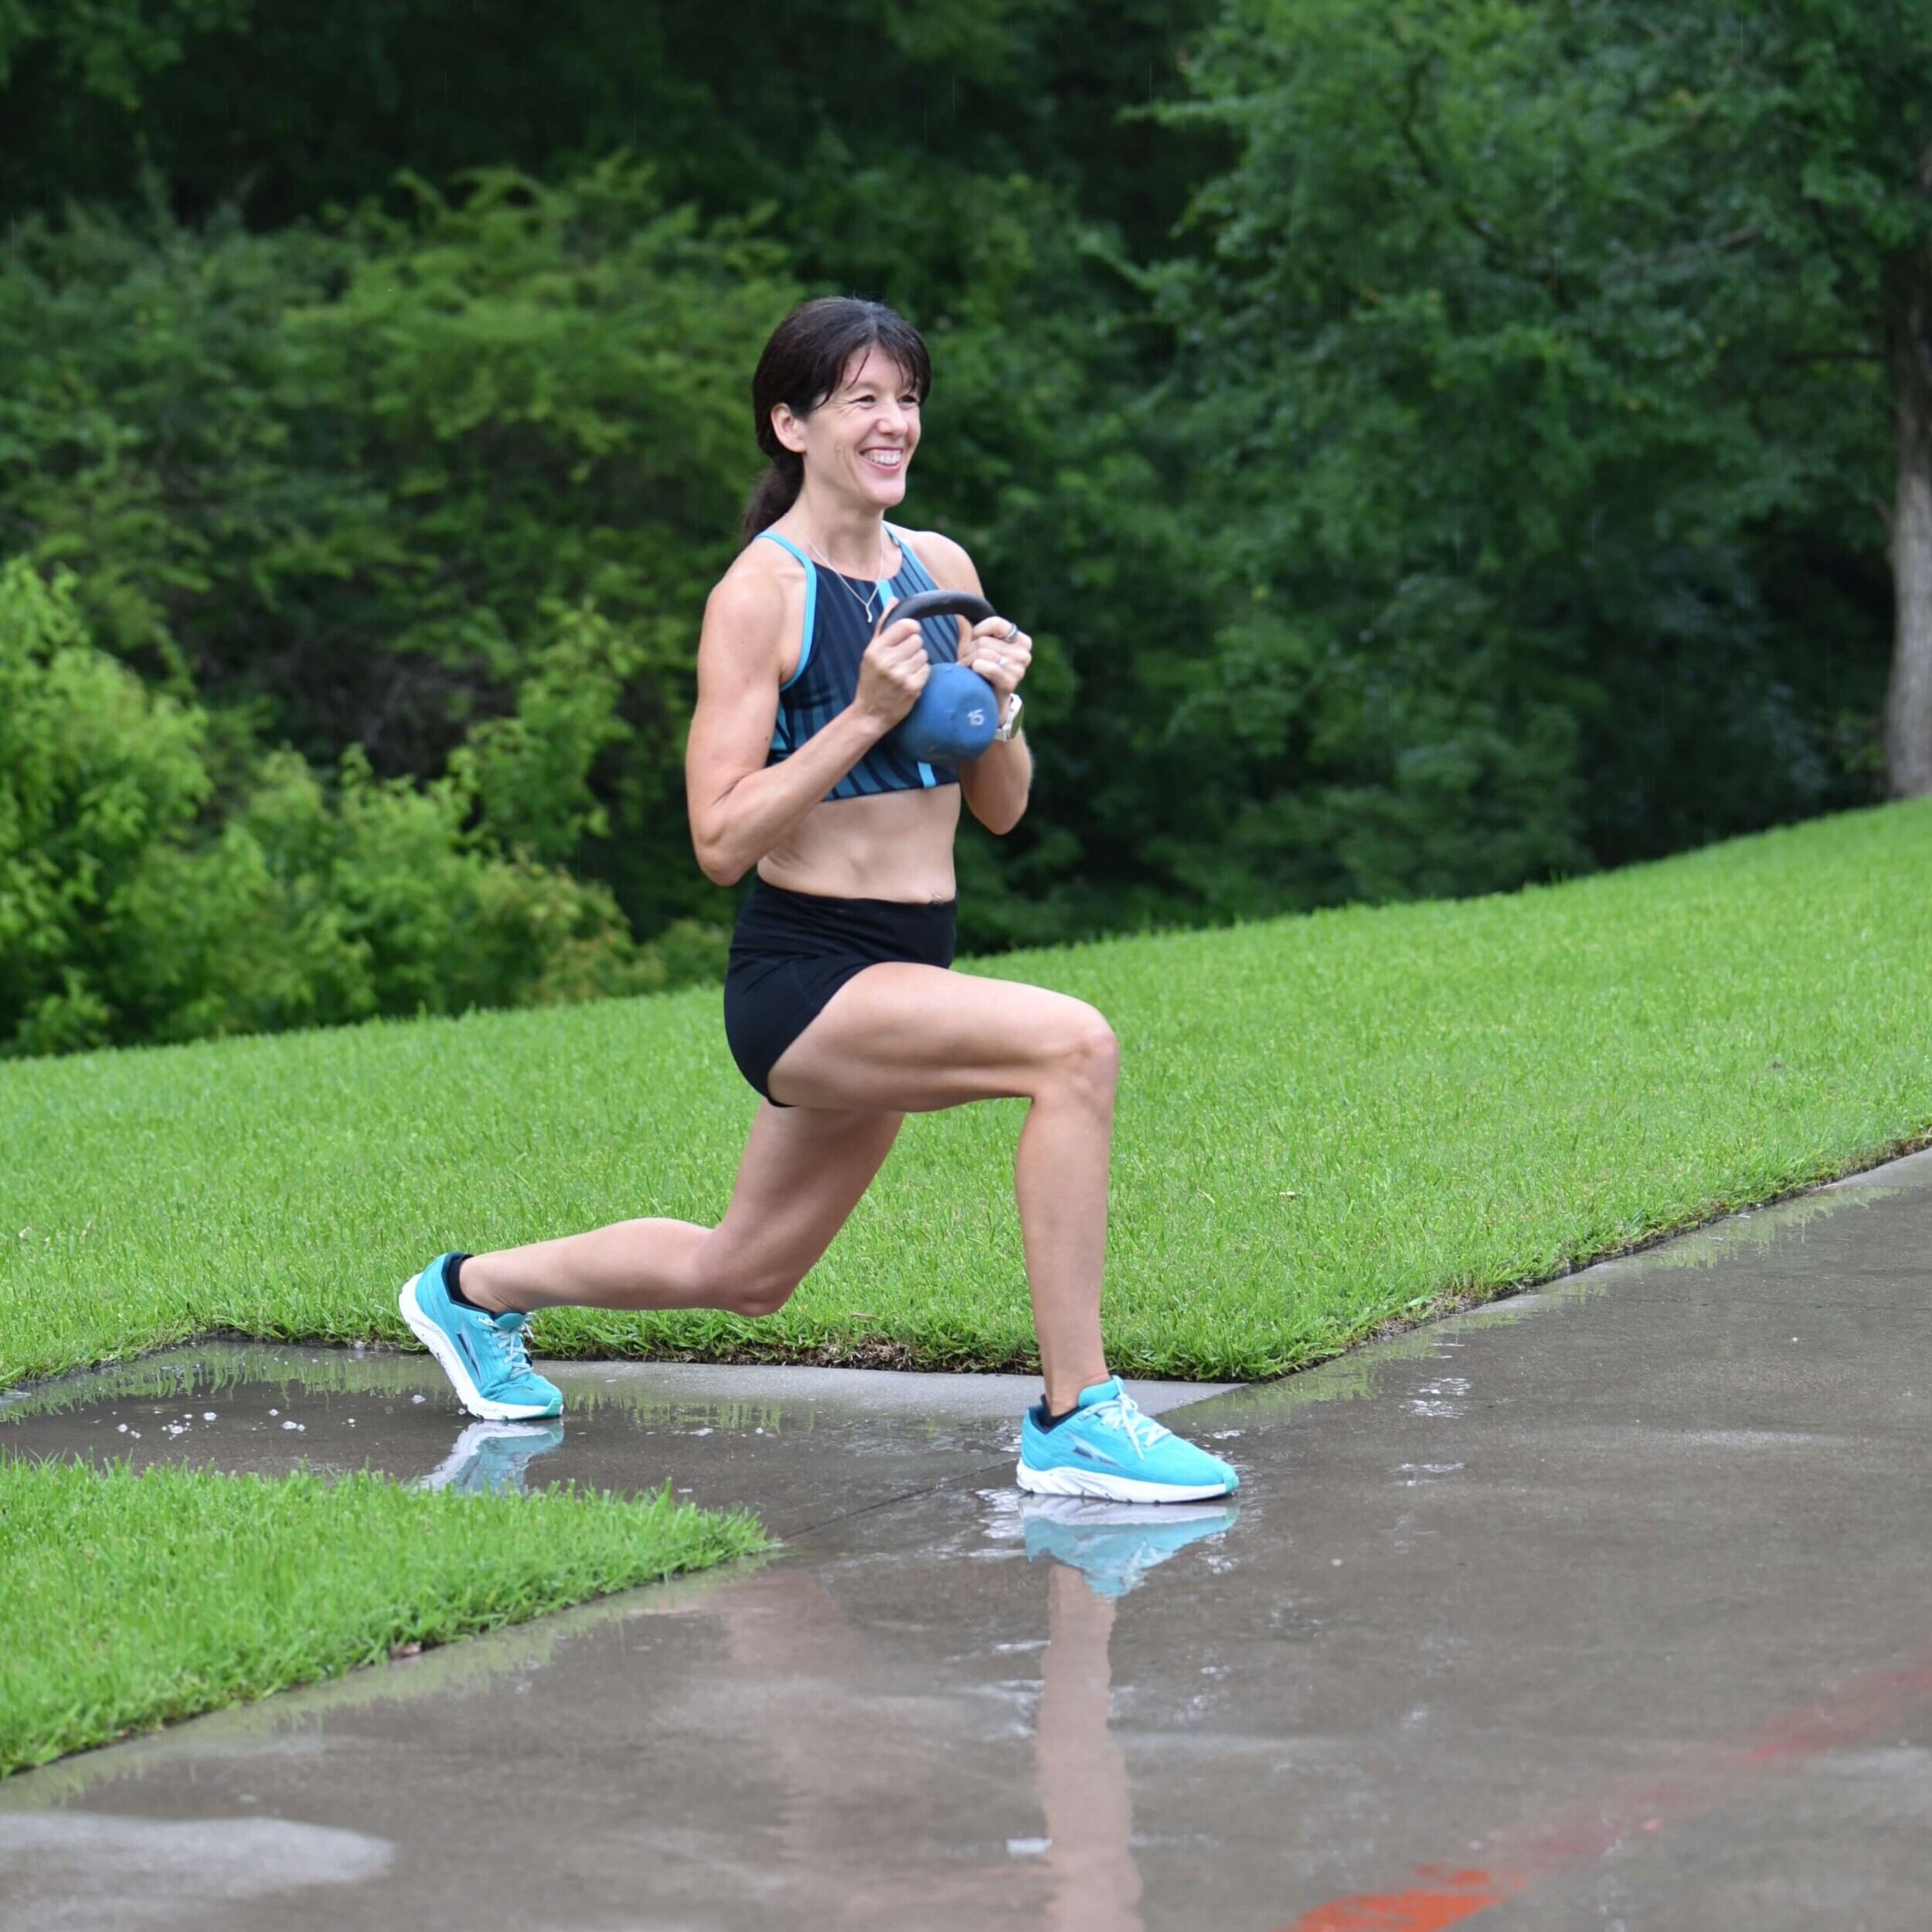
ALTERNATING LUNGES

With your feet hip width apart and your toes pointed straight ahead, engage your core and keep your back straight. Take one large step with your right leg to lunge forward until your front knee is lined up over your ankle and your back knee is nearly touching the floor. Resist the urge to lean forward or rest your arms on your thighs. Once you are in the lunge position pause for one second and push back up to starting position. Repeat on opposite leg, alternating for 20 seconds.
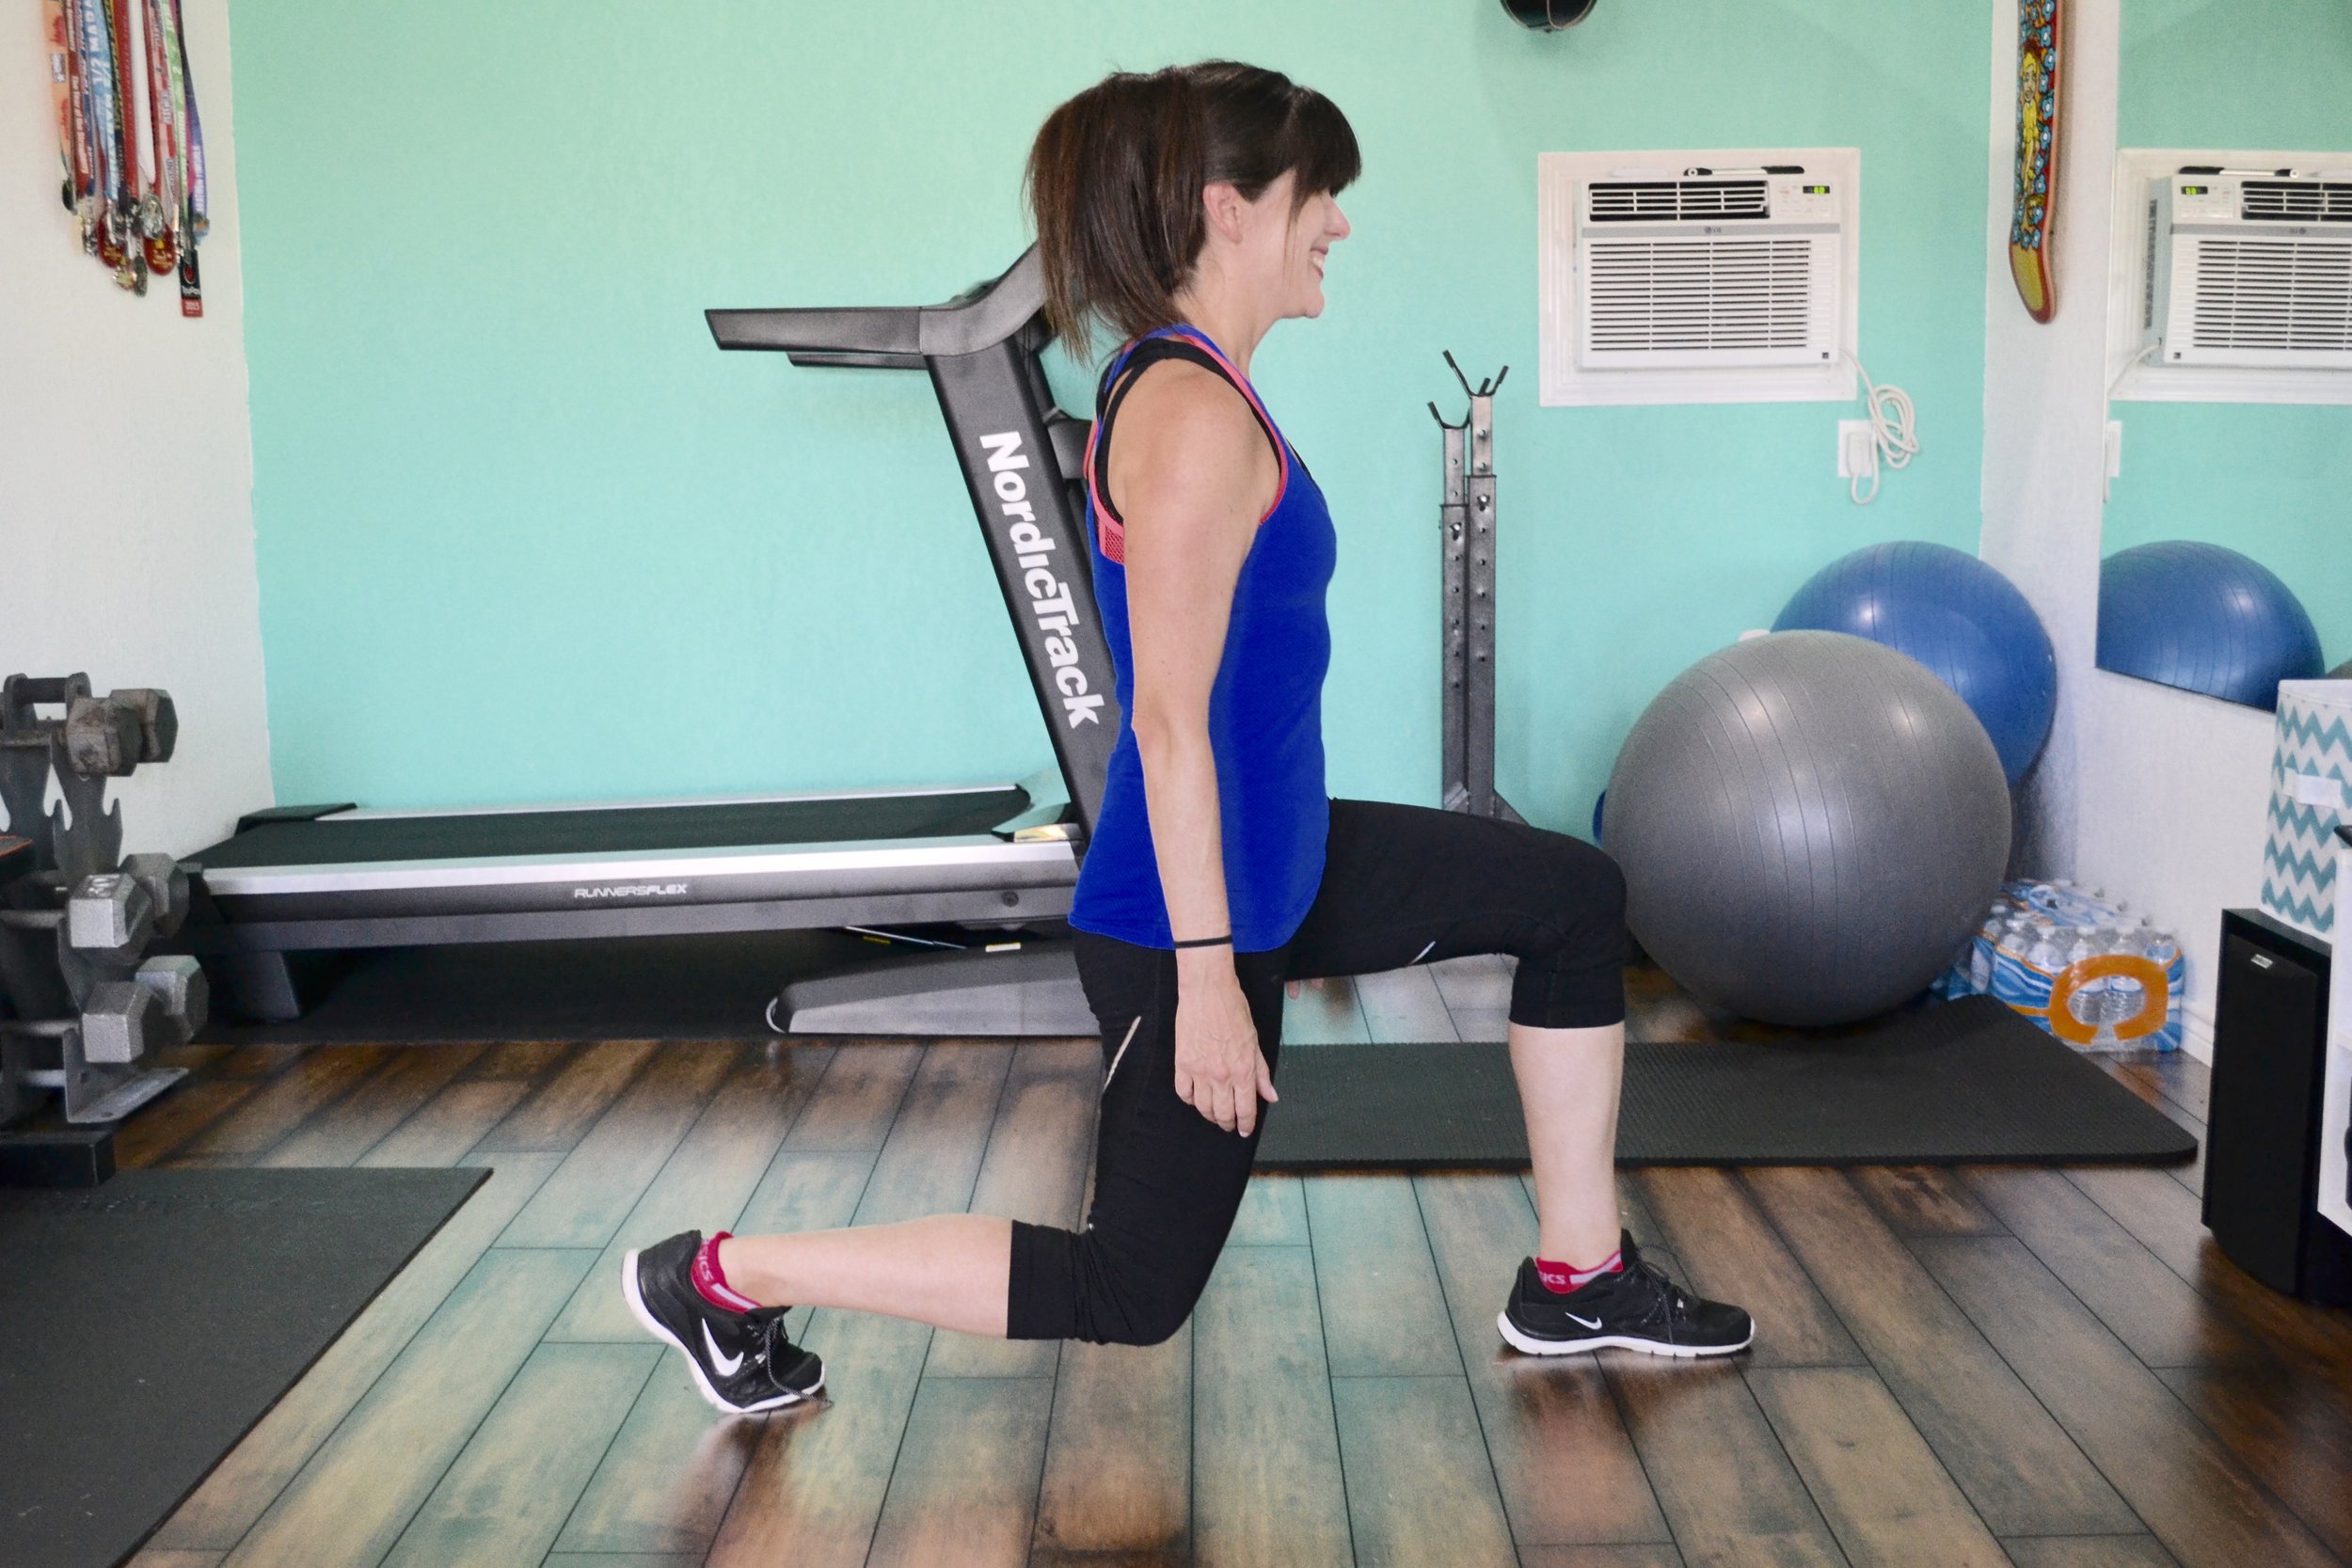
Lunge

Lunge

SWITCH LUNGES

Lunge forward as described above with your right thigh parallel to the floor. Swing your arms for balance and momentum, jump up and switch legs landing in a lunge with your left foot forward. Repeat for 20 seconds.

ROUND 2

PUSH UPS

Start in a high plank position with your hands placed directly under your shoulders. Keep your body in a straight line from your shoulders to ankles. While engaging your core slowly bend your elbows to lower your chest to the floor. Once in the low position push back up to the starting position. If this is too challenging, drop to your knees. 

MOUNTAIN CLIMBERS

Start in a straight arm plank position with shoulders directly over wrists. Bring your knee in towards your elbow then back to plank position. Repeat with opposite foot. This is one rep. Move as quickly as possible while keeping your core engaged.

Mountain Climbers

Mountain Climbers

ROUND 3

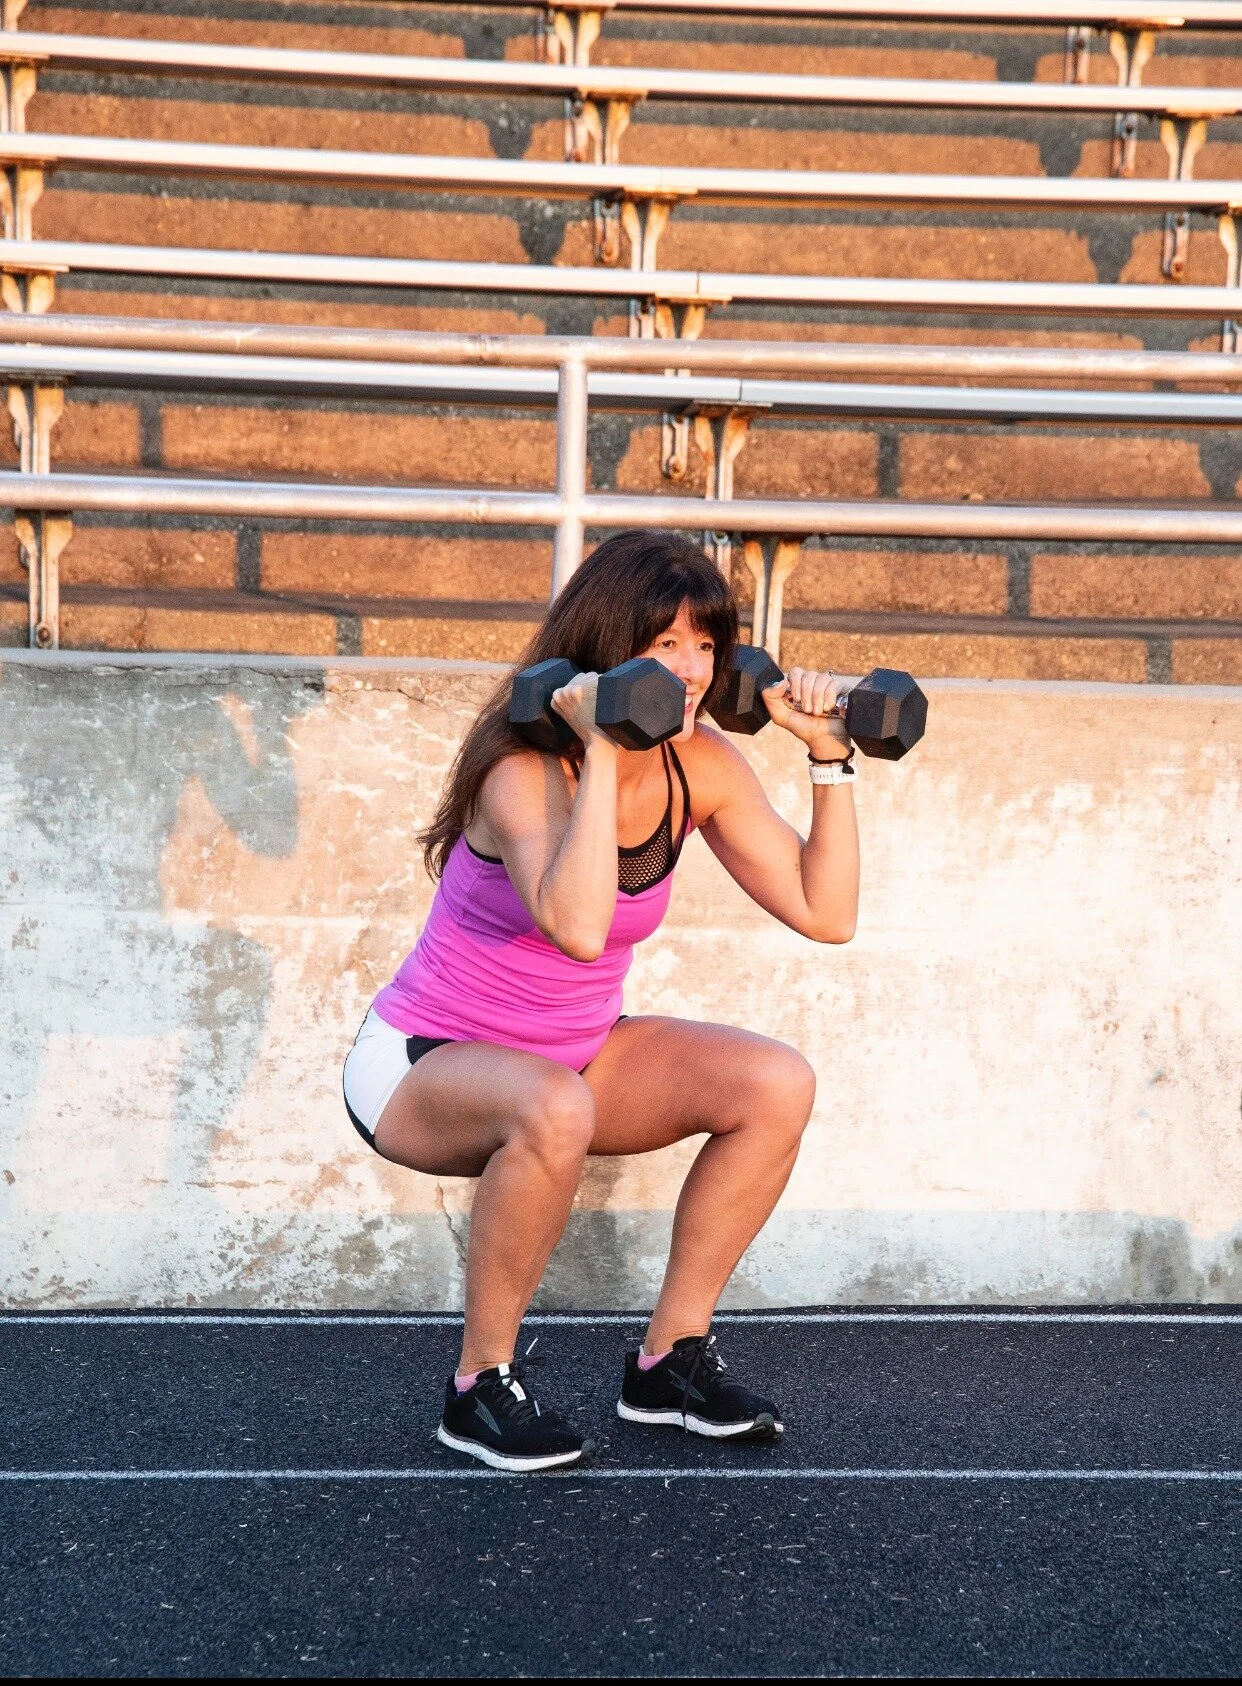
SQUATS

Starting with your feet hip width apart push your hips back and lower until your thighs are parallel to the floor (like you are sitting back in a chair) or as low as your flexibility allows. In the low position, engage your core, squeeze your glutes and push up to standing. Take a deep breath in as your lower to the squat and breath out as you return up to standing.

Squat

Squat

HIGH KNEES

Stand up straight with the feet hip width apart. Jump from one foot to the other while using your core to lift your knee to hip height. Swing your arms with each rep. Touch the ground with the balls of your feet quickly moving back and forth between legs.

ROUND 4

HIGH PLANK

In a high plank position place your shoulders directly over your wrists. Your body should form a straight line from your head to your heels. Don't allow your hips to drop or raise up. Engage your abs and breathe normally. Hold for 20 seconds

High plank

High plank

PLANK JACKS

Starting in a high plank position as described above with your feet together at the starting point. Jump your legs wide out to the sides (like the motion of a standing jumping jack) and then back together.

ROUND 5

SIDE LUNGE (EACH SIDE)

With both toes pointing forward, push your hips back and take a large step to your right and bend your right knee into a side lunge position and straighten your left leg. Lower your hips as low as your flexibility will allow. Push back to starting position and repeat on the other side alternating for 20 seconds.

CURTSY SQUAT WITH HOP

Stand with your feet hip apart. Cross your right leg behind the body and to the left. Bend left knee 90 degrees or as low your flexibility will allow, toes pointing forward. From the low position hop back up to the starting position and lower to the other side. Repeat for 20 seconds.

Curtsy squat in the #shredshed

Curtsy squat in the #shredshed

ROUND 6

SUPER MAN

Lie face down on your stomach with your legs and arms extended and your palms facing the floor. Simultaneously lift your chest, arms and thighs several inches off the floor up toward the ceiling while holding your midsection stable. Hold for two seconds and lower back down.

BURPEES

Stand with your feet hip width apart, lower into a squat position until your hands are flat on the floor in front of you. Jump your legs backwards into a high plank position. Jump both feet forward so you are back in the squat position. Jump up and raise both hands over your head. If this is too challenging, step back and forward from plank position instead of jumping. 

Burpees don't like you either.

Burpees don't like you either.

Give it a try and let me know what you think. Always remember that intense workouts like this one should be surrounded by easy days and/or rest days. Adaptations (aka getting strong) occur during rest. Allow your body the time it requires to repair, recover and get stronger. 

Have questions? Leave them in the comments or be a part of my new series "Ask the Trainer" and have your questions answered in a future blog post.

Like this post? It helps me when you share or save to Pinterest

Coach Lea

I am a NASM personal trainer and RRCA adult distance running coach that specializes in strength training for runners. I offer in-person training in the Shredshed, online training and Fit to Run bootcamps. If you are interested in a more in-depth running or strength training plan, please contact me. Have questions? I'd love to help. 

While I am a certified personal trainer, I am not your personal trainer. Since I don't know your exercise abilities, injury background or medical history, please see your doctor before beginning any new exercise program. This is an opinion blog. No information in this blog is intended to be taken as medical advice or prescription. Please see your doctor and/or registered dietitian for any health concerns.

The Great Pumpkin Workout

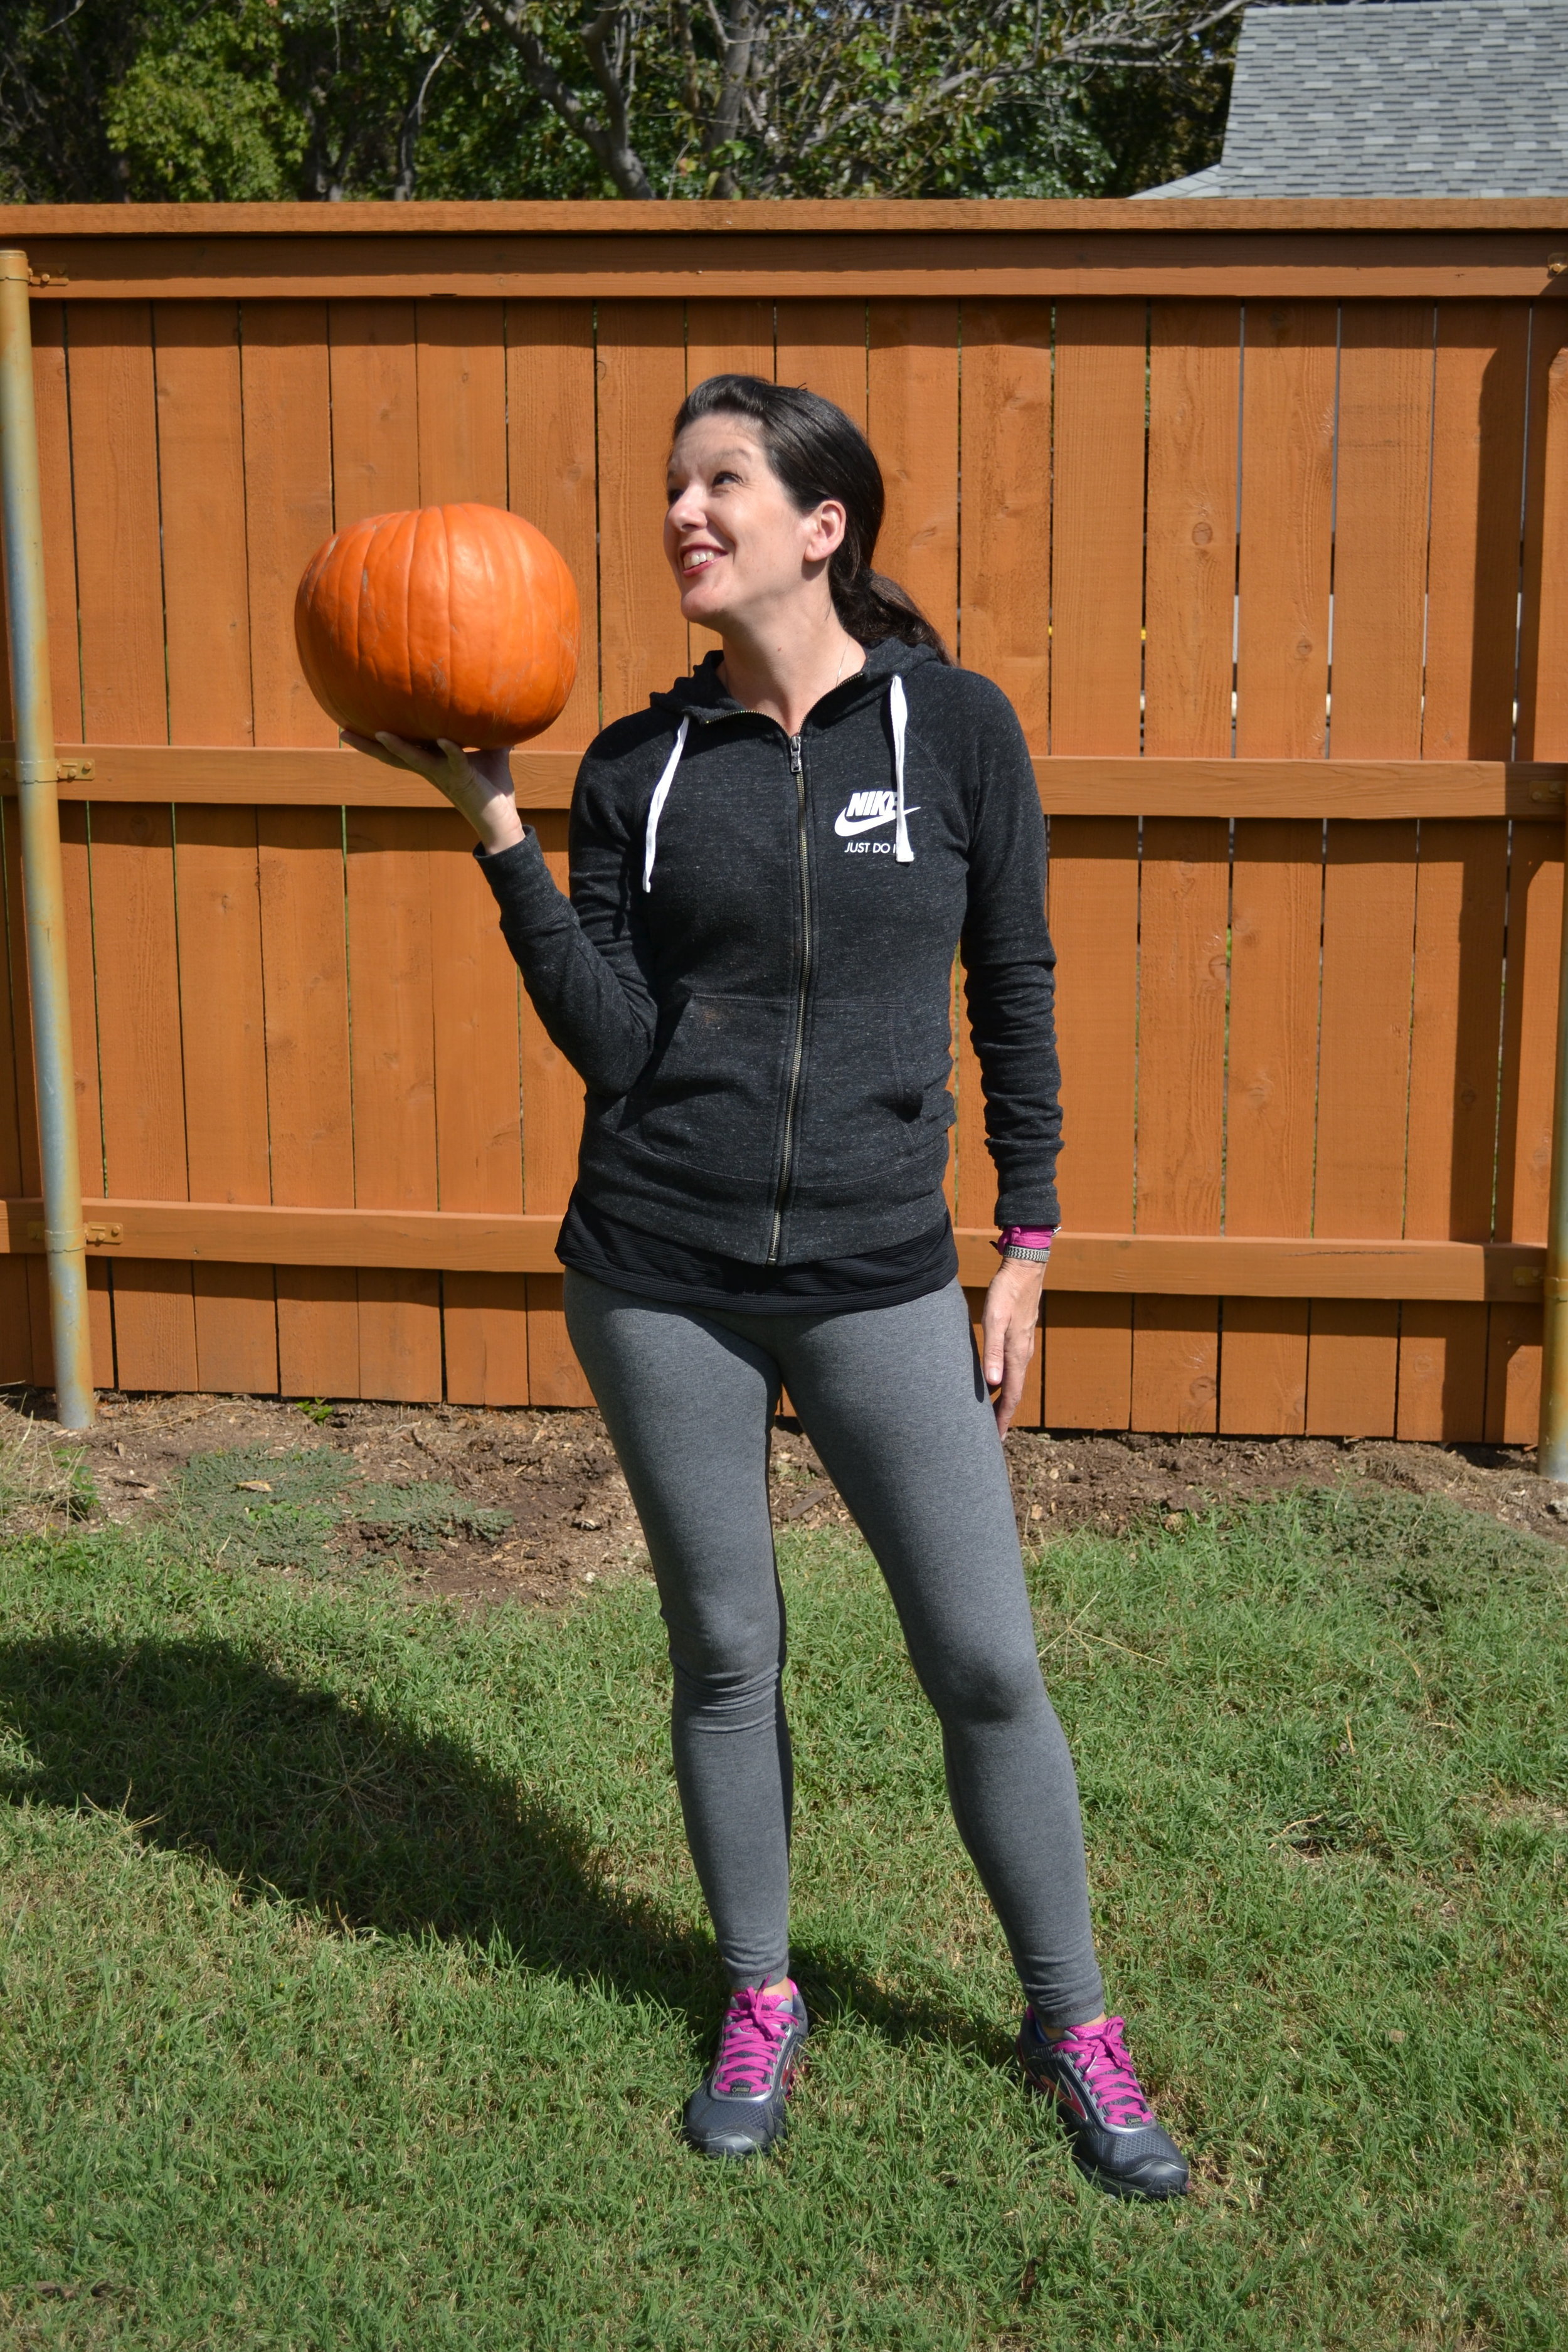
Welcome to another edition of workout Wednesday! This week we are having some fun with a pumpkin. I picked up a 9 lb pumpkin from the grocery store and realized that a pumpkin is very similar to a medicine ball. With everyone going pumpkin-everything crazy lately, I thought a full body pumpkin workout would be a fun way to celebrate the upcoming fall holidays. Maybe when we're done, we can make a pie with it. It's called balance. 

Pumpkin or medicine ball...you decide.

Pumpkin or medicine ball...you decide.


The Great Pumpkin Workout

Repeat each exercise for the numbers of reps indicated below, moving quickly from one exercise to the next. Repeat 3 times. If you don't have a pumpkin, then you can do this workout with a medicine ball. 

SQUAT WITH OVERHEAD PRESS x 12

FORWARD LUNGE WITH STRAIGHT ARM TWIST (ALTERNATING LEGS) x 12 EACH LEG

LATERAL SQUAT (RIGHT LEG LEAD) x 9

LATERAL SQUAT (LEFT LEG LEAD) x 9

RUSSIAN TWIST X 6 EACH SIDE

LIFT AND CHOP  X 6 EACH SIDE

AB REACH x 9

CARDIO - LATERAL JUMPS OVER THE PUMPKIN FOR ONE MINUTE

No worries. If I drop it, I'll just make pumpkin pie.&nbsp;

No worries. If I drop it, I'll just make pumpkin pie. 

Have questions? Leave them in the comments or be a part of my new series "Ask the Trainer" and have your questions answered in a future blog post.

Like this post? It helps me when you share.


Coach Lea

I am a NASM personal trainer and RRCA adult distance running coach that specializes in strength training for runners. I offer in-person training in the Shredshed, online training and Fit to Run bootcamps. If you are interested in a more in-depth running or strength training plan, please contact me. Have questions? I'd love to help. 

While I am a certified personal trainer, I am not your personal trainer. Since I don't know your exercise abilities, injury background or medical history, please see your doctor before beginning any new exercise program.

How to Banish Shin Splints Forever

No one ever said "You're a pain in the shin!" but they should, because it seems to me that shin pain (aka spin splints) are much more common and annoying than a pain in the butt.

I know the feeling. You start running (or start running again), everything is going fine but then you're sidelined by shin splints. It is a very common problem among new runners, but luckily one that is easily treatable. The medical name for spin splits is Tibial Stress Syndrome and while they are metaphorically a pain in the butt, they are literally a pain in the shins. Shin splints are a result of inflammation in the muscle tissue in the front of your leg, generally from overuse or too-much-too-soon.

If you experience mild to moderate discomfort in the shin area when running, you may be experiencing shin splints. Here are a few things you can do to help reduce pain so you can get back to running. Everyone is different, so if you are not improving or the pain gets worse, please see your doctor. You may have a stress fracture or other condition more serious than shin splints. Please don't read blogs for medical advice.

REST

The first step to healing your shin splints is to rest to allow your shins to heal. Low impact cross training like swimming or biking are your best bets to keep up your cardio fitness while you heal.

ICE

Ice your shins to help reduce inflammation. Try icing for 30 minutes on/30 minutes off multiple times throughout the day. 

COMPRESSION

Compression can help circulate blood flow and stimulate healing. Calf sleeves or compression socks while resting is a good place to start.

STRENGTHEN

Try this exercise to build strength around the shin bone.

With bare feet place your heel on the edge of a step or curb with your foot hanging off the edge. With your legs straight, point your toes as far down as you can, then point your toes up as far as you can, repeat rapidly for 30 seconds.

Now bend your knees at a 45 degree angle (about half way to a full squat) and repeat the same thing with bent knees.

Rest for 1 minute

Repeat two more times

Repeat every day

Struggling with shin splints? Have questions? Leave them in the comments or be a part of my new series "Ask the Trainer" and have your questions answered in a future blog post.

Like this post? It helps me when you share.


Coach Lea

I am a NASM personal trainer and RRCA adult distance running coach that specializes in strength training for runners. I offer in-person training in the Shredshed, online training and Fit to Run bootcamps. If you are interested in a more in-depth running or strength training plan, please contact me. Have questions? I'd love to help. 

While I am a certified personal trainer, I am not your personal trainer. Since I don't know your exercise abilities, injury background or medical history, please see your doctor before beginning any new exercise program.


Interval Track Workout to Increase Speed

Welcome to another edition of Workout Wednesday! A few weeks ago I wrote a post called types of running workouts to increase speed and I received some feedback that while it was interesting to learn about the types of workouts, people were looking for the specific workouts they could do to increase speed. 

It is hard to provide general interval training plans for people that I don't know. As a running coach, I develop training plans based on my client's current abilities, while keeping in mind their specific goals and limitations. 

It is challenging to assign specific running paces to use for intervals on the internet. One pace would be much too easy for some runners and much too challenging for others. Trying to run at an arbitrary pace because a blog post told you to can lead to injury, overtraining and burnout. AKA don't do it. 

I can get around this limitation by providing paces based on your current 5K pace. This way everyone can work at their own level based on a recently timed race. Have you ran a 5K recently? If not, just map out 3.1 miles on the road and record the time it takes you to complete. Run this 5K as you would an actual 5K race, moderately faster than what is comfortable. It shouldn't be a light easy jog and it shouldn't be an all-out effort run. The sweet spot is somewhere in the middle. Once you have established your current 5K pace, you'll be able to determine the appropriate pace to run each interval. It is important to run based on your current 5K pace, not a 5K race you ran 3 years ago and not the 5K pace you hope to run one day. You should only increase your interval paces when your 5k pace proves to be faster. Got it? 

THE TRACK

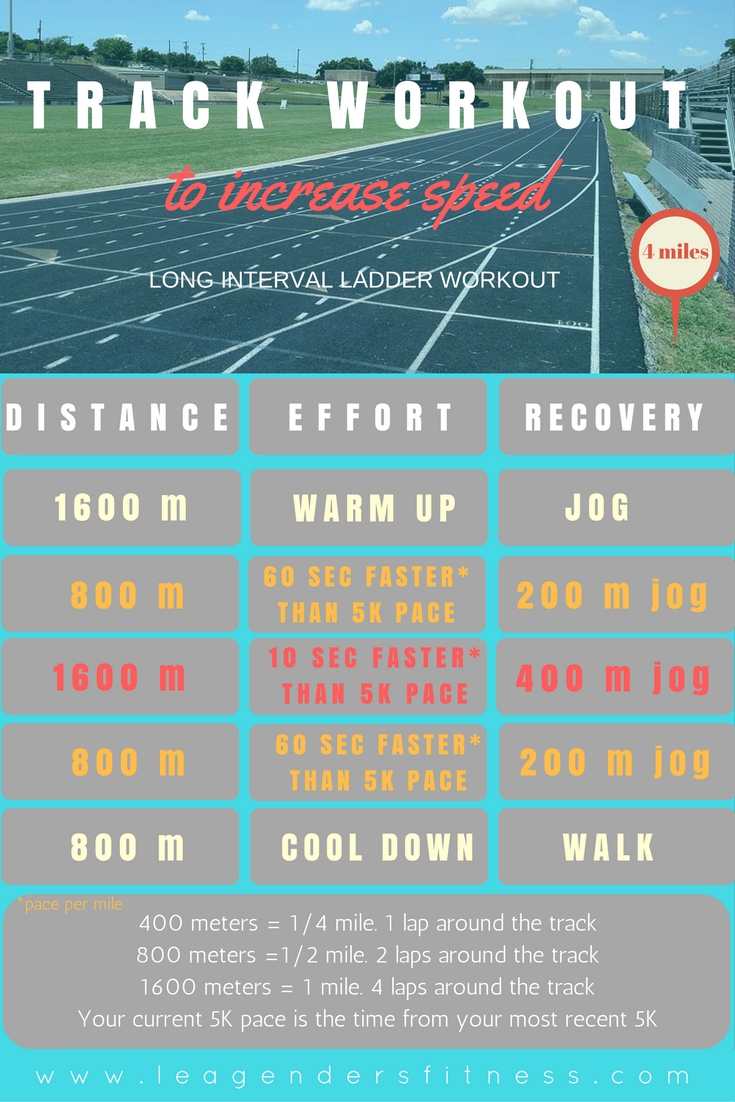
Track workouts are often described in meters which can be confusing to those of us who are used to measuring distance in miles. The track makes it very easy to measure distance in meters. You just need to count your laps:

200 meters is 1/2 lap of the track (one straight and one curve). It equals 1/8 mile.

400 meters is one lap around the track. It is equals 1/4 mile.

800 meters is two laps around the track. It equals 1/2 miles.

1600 meters is four laps around the track. It equals 1 mile.

Warm up by jogging for 1600 meters (1 mile / 4 laps around the track).

Once warmed up run 800 meters (1/2 mile / 2 laps around the track) 45-60 seconds faster than 5K pace. If your last 5K was at 10.00 minute mile pace (finished in 31 minutes), you would run this interval at a 9 to 9:15 minute mile (approx 4.5 minutes for 2 laps).

It’s easy. Take your current 5K pace per mile then subtract 45-60 seconds to determine your first interval pace.
— calculating your interval pace


Jog or walk 200 meters (1/8 mile / 1/2 lap around the track) to recover.

Run 1600 meters (1 mile / 4 laps around the track) 10-12 seconds faster than your current 5K pace. If your last 5K was a 10 minute mile (finished in 31 minutes), you would run this interval at 9:48-9:50 per mile

Take your current 5K pace then subtract 10-12 seconds to determine your long interval pace.
— calculating your long interval pace

Jog or walk 400 meters (1/4 mile / 1 lap around the track) to recover.

Run 800 meters (1/2 mile / 2 laps around the track) 45-60 seconds faster than 5K pace. If your last 5K was at 10.00 minute mile pace (finished in 31 minutes), you would run this interval at a 9 to 9:15 minute mile (approx 4.5 minutes for 2 laps).

Jog 400 meters then walk 400 meters to recover and cool down.

That's four miles! You should complete this workout feeling fatigued but also feeling like you could do one more interval if your mean 'ol coach asked you to do it. 

I recommend no more than 2 or 3 speed workouts per week for experienced runners and 1-2 for new runners. Always start with a solid running base of 20 miles per week of easy runs for at least 4-6 weeks before beginning any interval training. Always take a rest day or very easy run the day after a hard interval workout. Run your hard runs hards and your easy runs easy. Remember that adaptation to exercise (i.e. getting stronger/faster) happens during rest, not during the workout. Allow your body the time to recover, rebuild and get faster. Aim for 7-8 hours of sleep each night, fuel your body with mostly foods from nature, eat plenty of protein and carbs and you'll be set up for success.

Wondering about track etiquette? Check out my latest Running A-to-Z post about track etiquette. Don't make these mistakes when running on a track. 

Have questions? Confused? Need clarification? Leave your questions in the comments or be a part of my new series "Ask the Trainer" and have your questions answered in a future blog post.

Like this post? It helps me when you share. 


Coach Lea

I am a NASM personal trainer and RRCA adult distance running coach that specializes in strength training for runners. I offer in-person training in the Shredshed, online training and Fit to Run bootcamps. If you are interested in a more in-depth running or strength training plan, please contact me. Have questions? I'd love to help. 

While I am a certified personal trainer, I am not your personal trainer. Since I don't know your exercise abilities, injury background or medical history, please see your doctor before beginning any new exercise program.


THE ULTIMATE RESISTANCE BAND TRAVEL WORKOUT

Welcome to another edition of workout Wednesday! Last week hubby and I took a trip to my hometown, Pittsburgh PA to visit family (Go Steelers!). We all know it can be a struggle to fit in a workout when you are traveling, so I brought along my resistance band to show you how easy it can be to get in a quick travel-friendly workout while on the road. With no fancy equipment, just a resistance band and about 15 minutes of free time I was able to squeeze in some strength training while traveling. Add in a hotel treadmill session or a foot tour of a new city and you have a full body strength and cardio workout. 

Five simple resistance band moves for a full body strength workout. Perform 12 reps of each move and repeat 3 times. 

LUNGE & BICEP CURL 

Place your feet about hip width apart with the resistance band under your forward foot. Step into a back lunge while simultaneously curling the resistance band toward your chest making sure you keep your elbows close to your sides. Repeat on other leg. 


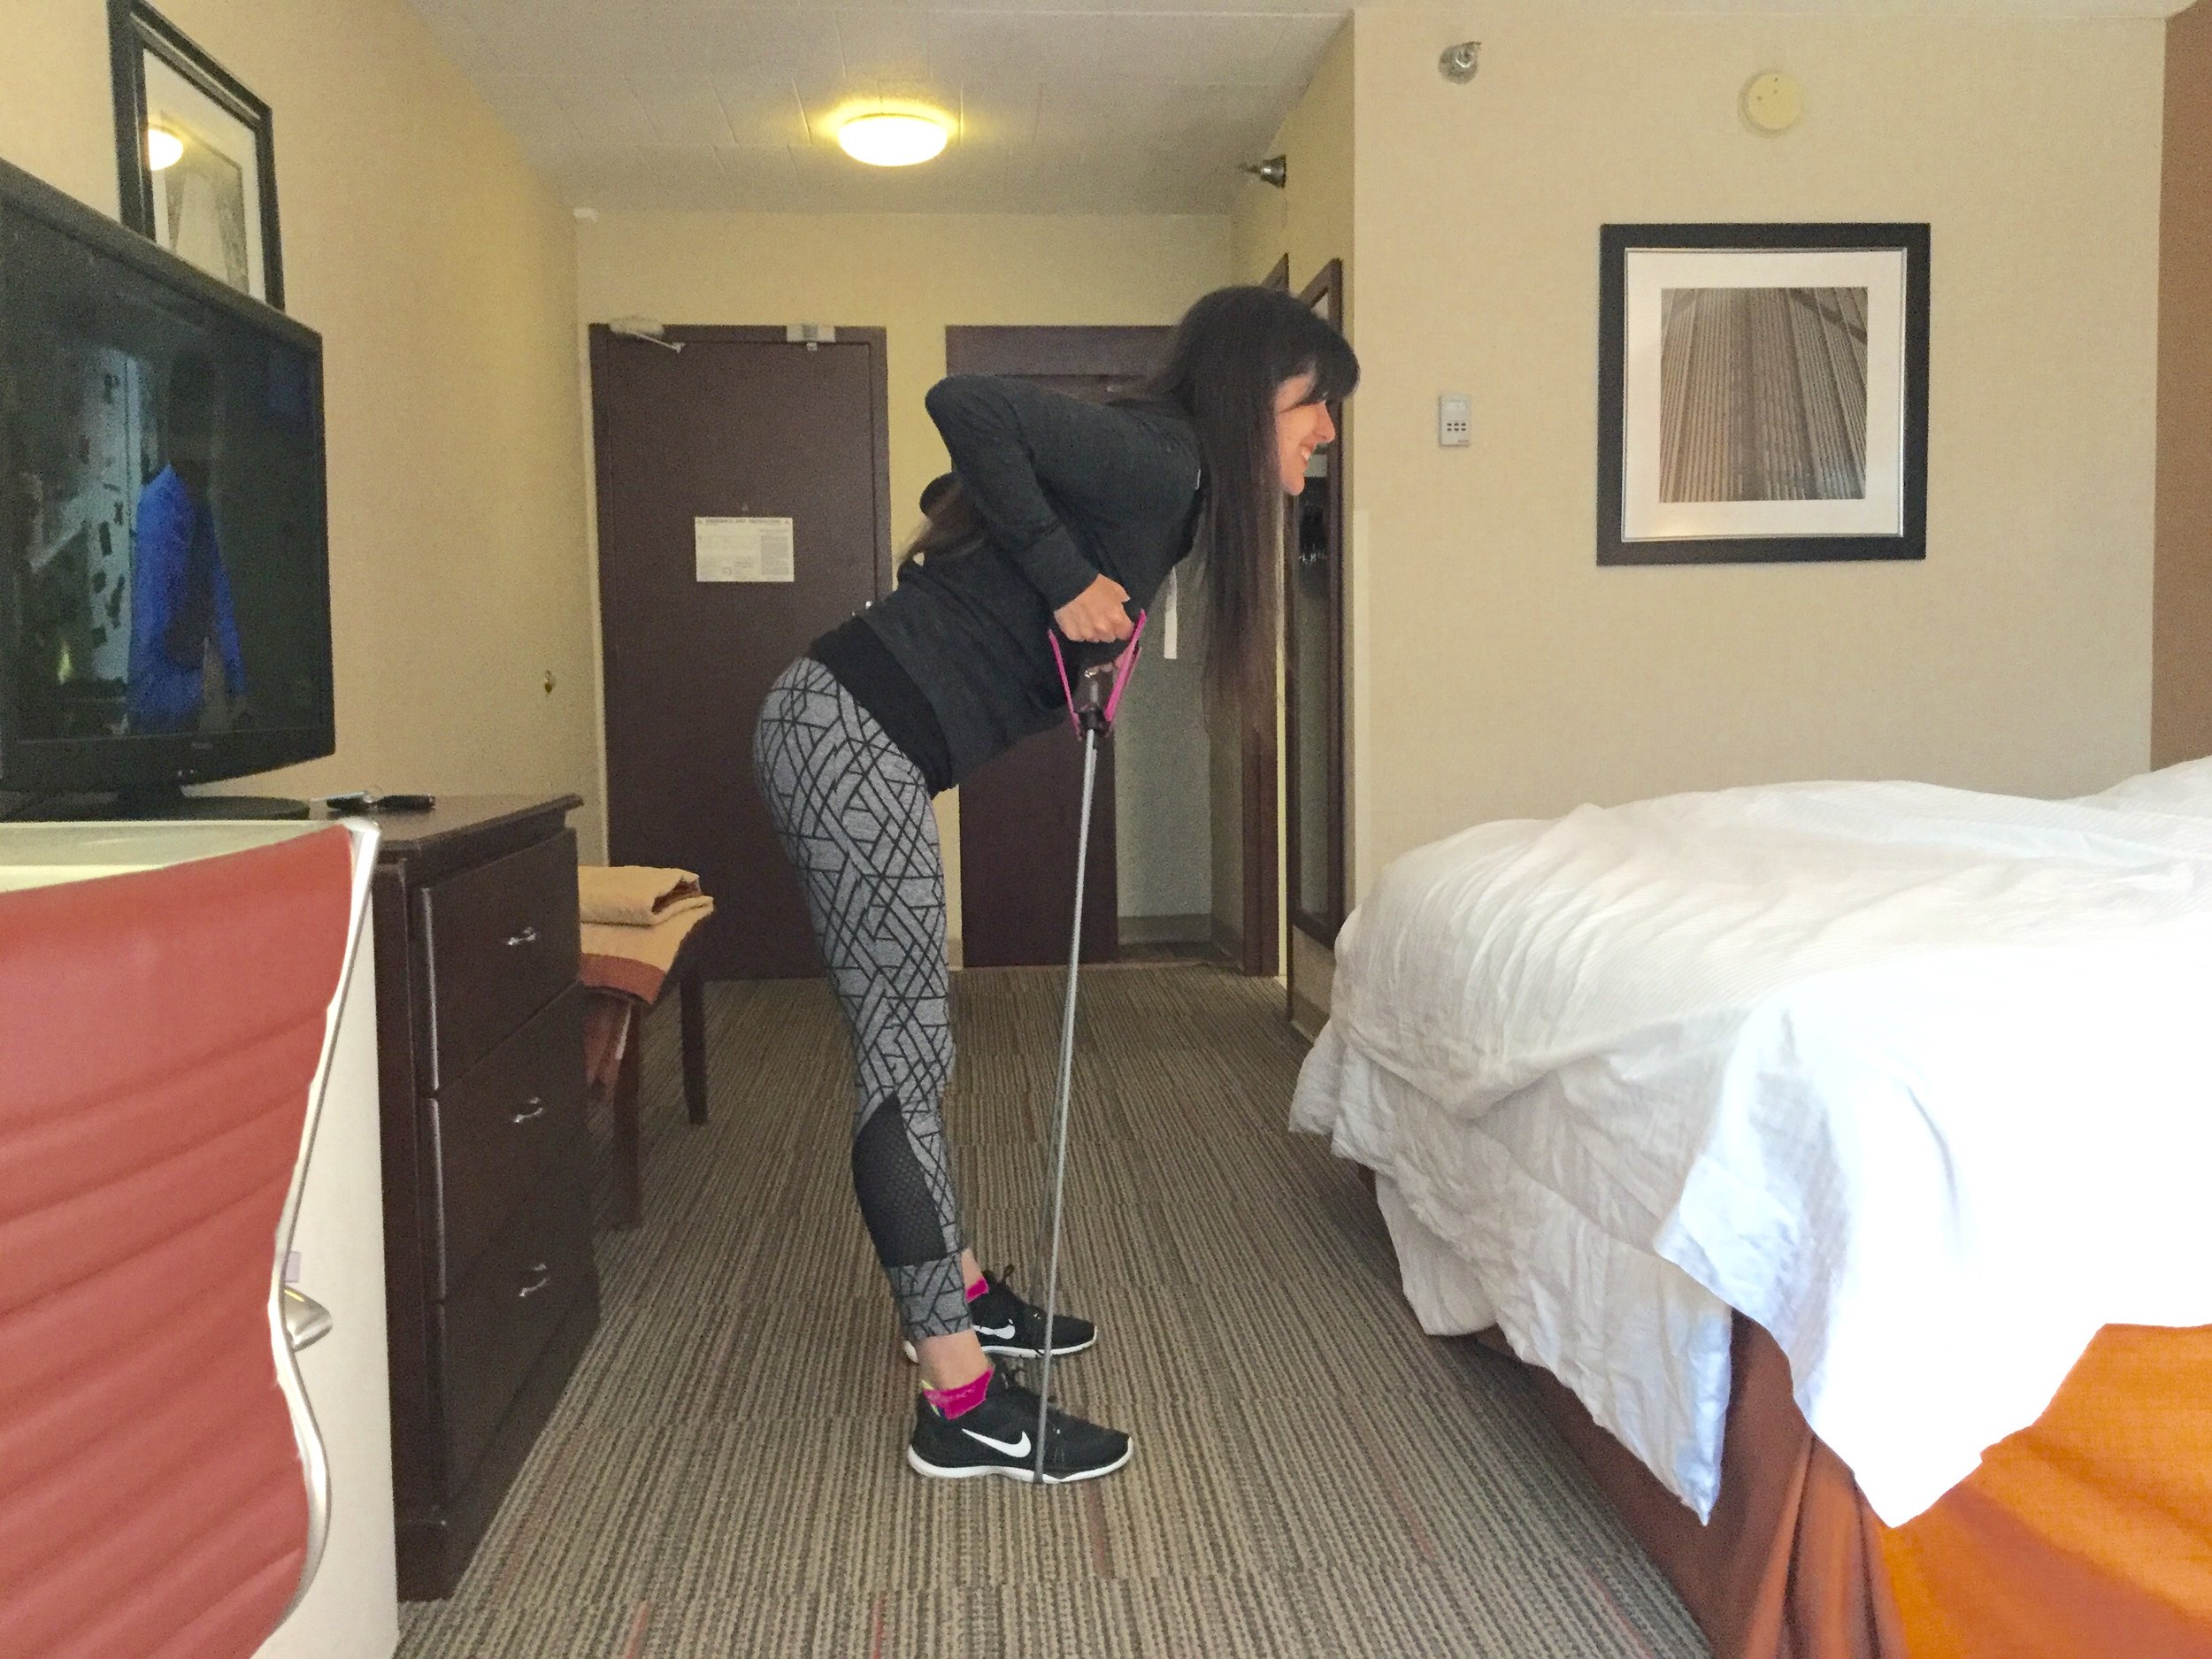
BENT OVER ROW

With your feet slightly wider than hip width step on a resistance band with an overhand grip on the handles. Keep your back straight and pull the handles upward in a rowing motion.


GLUTE KICK BACK

On all fours with your shoulders stacked directly over your wrists hold the resistance band on the ground with both hands while looping it around your back foot. Straighten your leg to kick out your back foot. Repeat on other leg,


HIP ABDUCTION

This is a great one for runners. Traveling or not, fit this exercise into your routine. With your feet slightly wider than hip width, pull the resistance bands in an upward motion while moving your leg out laterally. Repeat on other leg.


UPRIGHT ROW

With your feet slightly wider than hip width step on the resistance band. With an overhand grip pull the handles up until your elbows are even with your shoulders. 

Do you workout when you travel? Do you love the Steelers? Tell me in the comments. 

Like this post? it helps me when you share

Have questions? Leave them in the comments or be a part of my new series "Ask the Trainer" and have your questions answered in a future blog post.

Coach Lea

I am a NASM personal trainer and RRCA adult distance running coach that specializes in strength training for runners. I offer in-person training in the Shredshed, online training and Fit to Run bootcamps. If you are interested in a more in-depth running or strength training plan, please contact me. Have questions? I'd love to help. 

While I am a certified personal trainer, I am not your personal trainer. Since I don't know your exercise abilities, injury background or medical history, please see your doctor before beginning any new exercise program.